99198 - Fjernbetjening Casablanca - Gratis brugsanvisning og manual
Find enhedens vejledning gratis 99198 Casablanca i PDF-format.

Brugerspørgsmål om 99198 Casablanca
0 spørgsmål om dette apparat. Besvar dem du kender, eller stil dit eget.
Stil et nyt spørgsmål om dette apparat
Download vejledningen til din Fjernbetjening i PDF-format gratis! Find din vejledning 99198 - Casablanca og tag din elektroniske enhed tilbage i hånden. På denne side er alle dokumenter nødvendige for brugen af din enhed offentliggjort. 99198 af mærket Casablanca.
BRUGSANVISNING 99198 Casablanca
CASABIANCA® FAN COMPANY
CEILING FAN HANDHELD CONTROL
Model 99198
CASABLANCA FAN COMPANY CONTROL LIMITED WARRANTY
This product is warranted to the original purchaser by Casablanca Fan Company against defects in material and workmanship for one (1) year from date of purchase. During the warranty period, we will repair or, at our option, replace a defective product at no charge. For information on how to obtain service, contact Casablanca's Service Department by calling our toll-free number at 1-888-227-2178. Damage to the product caused by mishandling, improper installation or modification is not covered by this warranty. This warranty is given in lieu of all other warranties expressed or implied. Some states do not allow limitations of time on an implied warranty, therefore the above limitations may not apply in every case. This warranty states specific legal rights which may vary from state to state.
READ AND SAVE THESE INSTRUCTIONS
This product conforms to UL Standard 1917.
⚠️ WARNINGS
This device complies with part 15 of the FCC Rules. Operation is subject to the following two conditions: (1) this device may not cause harmful interference, and (2) this device must accept any interference received, including interference that may cause undesired operation.
This device complies with RSS-210 of Industry Canada. Operation is subject to the following two conditions: (1) this device may not cause interference, and (2) this device must accept any interference, including interference that may cause undesired operation of the device.
This equipment has been tested and found to comply with the limits for a Class B digital device, pursuant to Part 15 of the FCC Rules. These limits are designed to provide reasonable protection against harmful interference in a residential installation. This equipment generates, uses and can radiate radio frequency energy and, if not installed and used in accordance with the instructions, may cause harmful interference to radio communications. However there is no guarantee that interference will not occur in a particular installation. If this equipment does cause harmful interference to radio or television reception, which can be determined by turning the equipment off and on, the user is encouraged to try to correct the interference by one or more of the following measures: Reorient or relocate the receiving antenna, Increase the separation between the equipment and receiver, Connect the equipment into an outlet on a circuit different from that to which the receiver is connected. Consult the dealer or an experienced radio/TV technician for help. Note: Any changes or modifications to the transmitter or receiver not expressly approved by Hunter Fan Company may void one's authority to operate this remote control.
If you are installing multiple remote-controlled fans on the same circuit breaker,
you may need to perform a few extra steps to prevent interference or faulty operation of your remote controls.
Go to www.CasablancaFanCo.com/FAQs and click "How do I properly install multiple remote-controlled fans?" for more information.
INSTALLATION

The Casablanca Handheld Control requires an installed compatible receiver to function. Please follow the installation instructions included with the receiver prior to setting up your Handheld Control.
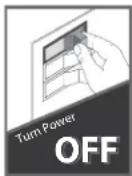
1 Turn off the power to the ceiling fan and receiver.
Power off the ceiling fan and pre-installed compatible receiver to prepare the receiver for pairing to the Handheld Control.
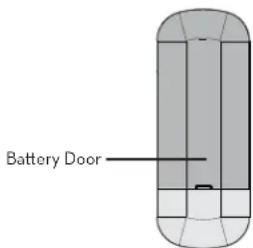
2 Open the battery compartment. To access the battery compartment, slide the battery door upwards.
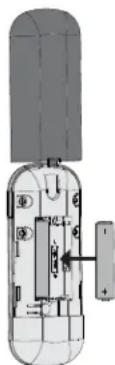
3 Install the battery.
Install two AAA batteries, found in the remote control hardware bag, into the transmitter. Reinstall the battery door.
Clean the battery contacts prior to installing the batteries. Please contact your local battery recycling center for proper battery disposal information.
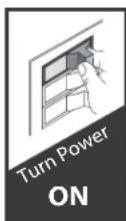
Turn power on.
Connect power to the ceiling fan and installed compatible receiver.

To avoid possible electrical shock, before installing or servicing your fan, disconnect the power by turning off the circuit breakers to the outlet box and associated wall switch location. If you cannot lock the circuit breakers in the off position, securely faster a prominent warning device, such as a tag, to the service panel.
5
Pair the remote with a compatible receiver
Within three minutes, press the pair button on the remote. If pairing was successful, a single beep will sound. Replace the battery door and Phillips head screw.
natural_image
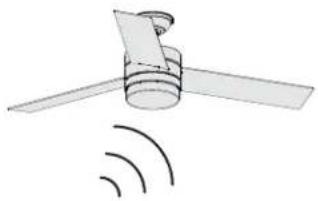
Diagram of a three-blade satellite with signal waves below (no text or symbols)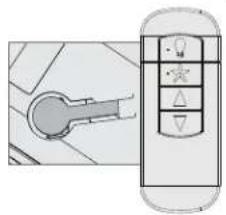
natural_image
Diagram of a car interior with a key and control panel (no text or symbols)6
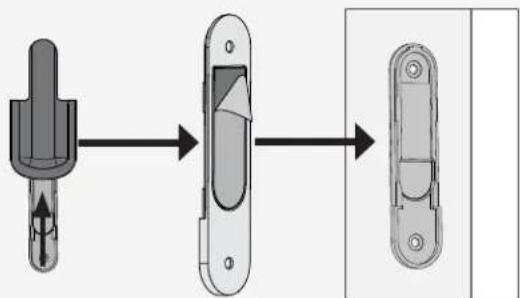
Install the Handheld Control cradle bracket.
You have two options to install the included Handheld Control cradle to the wall. Choose which path works best for you.
Option 1: Using Screws
natural_image
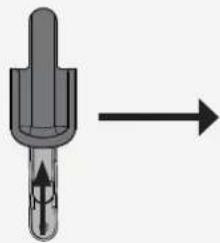
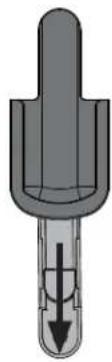
Diagram of a mechanical component with directional arrow indicating motion (no text or symbols)Remove the cradle from the cradle bracket.
natural_image
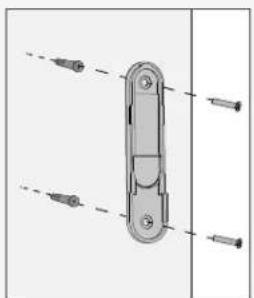
Mechanical component diagram showing a vertical rod with multiple screw holes and dashed alignment lines (no text or symbols)Choose your cradle installation location.
If you are installing into drywall, drill two 9/64 width holes using the cradle bracket as a guide. Gently hammer the included drywall anchors into the pre-drilled holes. Install the cradle bracket to the wall with the included screws.
Option 2: Using Adhesive Strip
flowchart
graph LR
    A["Top Component"] --> B["Cutaway"]
    B --> C["Shaped Window"]
    C --> D["Final Panel"]
Remove the cradle from the cradle bracket.
Apply the adhesive sticker to the back of cradle bracket per the instructions on the adhesive sticker.
Press the cradle bracket against the wall and hold firmly for 30 seconds.
7
Install the Handheld Control cradle.
Slide the cradle onto the mounted bracket.
natural_image
Cross-sectional diagram of a mechanical component with internal structure and directional arrow (no text or symbols)REMOTE FUNCTIONS
Key Press Function

+ Quick Press
Light On/Off

+ Long Press
Light Dimming

+ Quick Press
Fan On/Off

+ Quick Press
Raise Fan Speed

+ Quick Press
Lower Fan Speed
Long Press FanHigh
Long Press FanLow
Long Press
Dimming Mode On/Off

+ Long Press
Fan Reverse
Long Press

Fan Updraft
Long Press

Fan Downdraft