
39625 - Hjemmeautomatisering VIVANCO - Gratis brugsanvisning og manual
Find enhedens vejledning gratis 39625 VIVANCO i PDF-format.


Brugerspørgsmål om 39625 VIVANCO
0 spørgsmål om dette apparat. Besvar dem du kender, eller stil dit eget.
Stil et nyt spørgsmål om dette apparat
Download vejledningen til din Hjemmeautomatisering i PDF-format gratis! Find din vejledning 39625 - VIVANCO og tag din elektroniske enhed tilbage i hånden. På denne side er alle dokumenter nødvendige for brugen af din enhed offentliggjort. 39625 af mærket VIVANCO.
BRUGSANVISNING 39625 VIVANCO
VIVANCO
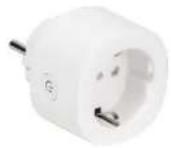
SMART PLUG / 39625
Version 1.0
Vivanco GmbH
Ewige Weide 15.
22929 Ahrensburg, Germany
www.vivanco.com

IMPORTANT. READ ATTENTIVELY BEFORE USE KEEP FOR REFERENCE
1. TECHNICAL DATA
• Voltage: 730V/50Hz
- Rated current: 104 max.
- Max. switching capacity: 2.30GW
- Retrosion class: IECG
- Protection class: If 20
- Working temperature: -10°C to +40°C
- Relative humidity: 8% to 87%RH
- Wireless transmitting and receiving frequency: 2.412GHz - 2.484GHz
- WLAN Standard: IEEE802.11 begin
- Transmitting power: 802.11b: 20dBm ±2dBm / 802.11b: 17dBm ±2dBm / 802.11b: 14dBm ±2dBm
- Modulation type: bPSK, bPSK QMM
- Repos vs to 12m
- Range: up to 10m
- Encryption type: WEP/TRIP/IES, WPS
- System requirements for APP control, Advanced 2.2 or higher, iOS 6.9 or higher
- System requirements for APP Schmitt: Ancero 2.2 or higher, 105 8.5 or higher
- Supported voice control systems. Just ask Amazon Alexa. Works with Google Assistant
• Weight: 840
- Dimensions: 90*120*33mm

Declaration of conformity
Hereby Vivamco GmbH declares that the radio equipment type [article 39625] is
in compliance with Directive 2014/53/EU. The full text of the EU declaration of conformity is available at the following Internet address: www.vivanco.de
1.1 Content
- Will power adapter
To User manual
Detailed manual available for download at www.vivanco.com / actual addresses: www.vivanco.com/Homepage/Contact/Contacts-worldwide
5. INSTALLATION AND OPERATION

Note: Please note that the following requirements must be met
before starting up and operating the SMART HOME socket adapter
- There is a working and switched on wireless home networks with available
- 2017年1月1日
- You have a Will bridge smartphone or target connected to your home website.
... in your name vectors - You have a free wall outlet socket connected to the mains.
5.1 Installation Smart Life APP from Tuya Inc.
To install the SMART LIFE APP, please scan the
OR Code or download the app directly from the Angie App Store or Google Play Store
Apple App Store of Google Play Store.
install the app on your smartphone / tablet and
then open it.
As a first-time user, you must register and create a
new account. If you already have an account, log in with your access data.

Select register Enter email address and confirmability, Expiry will be present to get order fully information specified after confirmation

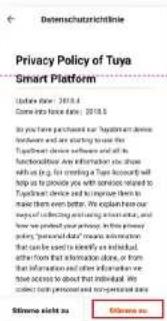


in which the adapter should be operated.
← Familie hinzufügen Fertigstellung
"Wanderson" "Vivano"
Ferrilienstlandort Standort versatellen
Metho: Diversus plut risk inklusiveur Zerleben angevortals...
Wangdian
Haugtschiefzimmer
Zwein Schlafzimmer
Easimnur
Küche
Arbetszimmer
5.2 Installation of the SMART HOME power adapter
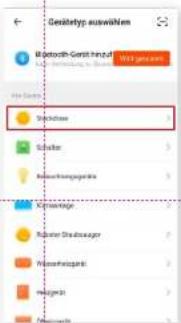
Click Add Device for +1 to add a device.
Select, Color.
Plug in the SMART HOME Outlet Adapter into a suitable wall outlet socket. The blue function LED on the ON / OFF switch lights up and starts listening quickly.
If this is not the case, please press and hold the ON/OFF button for 5 seconds and then release it. The function LED starts flashing quickly.
Confirm this with "Next step".
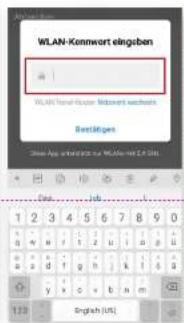
The SMART HOME adapter now selects the strongest WI-FI network in your environment (blue box).
- If this matches with your WLAN enter the WLAN password and confirm the entry.
- If this does not match with your WLAN, click on change network and select your WLAN network. Enter the WLAN password and confirm the entry.
The installation / pairing between the SMART HOME adapter and the wireless router is compiled and the message "Device has been added" appears. You can now rename the SMART HOME Adaptor and assign it to a room. Afterwards click on „Done“
The installation of the device is complete and you can now switch the adapter on or off by pressing the large DN / OFF switch or the SOCKET icon.
Alternatively it is always possible to switch the adapter manually. Therefore please press the overall switch on the adapter itself.




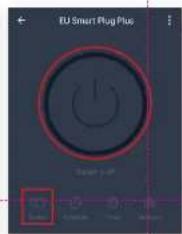

5.3 Timer function 5.4 Countdown Timer function 5.5 Electrical quantity management
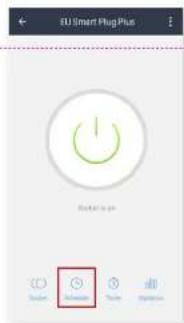
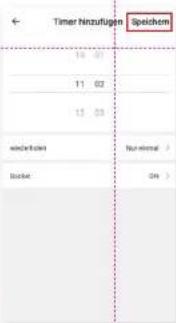
Select "Schedule" and then press, Add Timing. Now set the desired time at which the SMART HOME adapter should be activated (Socket = ON). Under the repeat "lab," please select the days of the week on which the adapter should be switched on. If you only want to switch once, please select "Only once".
Confirm your entry with "Save"
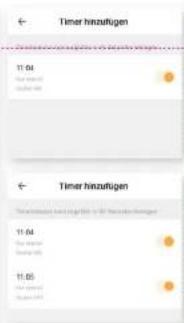
Repeat the programming for the time and days when the SMART HOME adapter should automatically turned all (Socket = OFF).
After programming, the switching times are then displayed in the TIMER overview and can then be activated / deactivated.
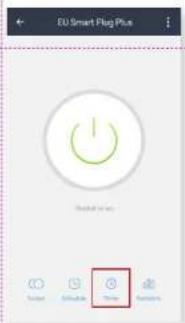
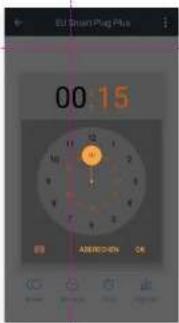
To set a countdown after which the SMART HOME adapter turns off the connected devices, press „Time“. Set the desired time in hours and minutes (in the example 15min) and confirm this with „OK“.
Below the on/off switch on the display appears the indication after which time the adapter will be switched off
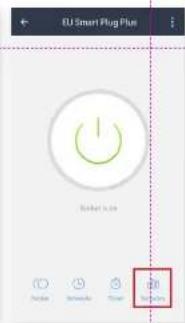
By pressing the „Statistics“ button, you will see the power consumption of the device connected to your SMART HOME adapter.


6. CREATE AND MANAGE A PROFILE
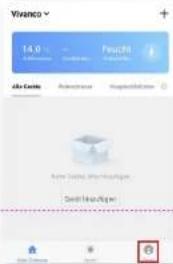
- Click Profile > Home administration > Home from .
- Under family settings you can personalize your house (family name, number of rooms, location). You can also add people to your family and unlock one or more devices associated with the Tuya AFP.
- Click Profile > Message Center to get notifications from Tuys. Tuys will only send you a message if you have contacted them about a problem.
- Click Profile > Scan, a QR Code Scanner will be activated to add new Smart Home products to the APP. Attention: The QR Code must be programmed accordingly.
- Click on Profile > FAQ to get immediate answers in the most frequently asked questions. This area is constantly being expanded.
- Under Profile > Feedback, you can contact Lapa directly with APP-related issues. Answers to your feedback can then be obtained via the message center.
- Under Profile > Settings you can make / view advanced settings.
6.1 Create and manage scenes and automations
In this section you can edit switching operations, similar to the timer ON/OFF settings. They can be fixed also on other parameters as only the time.
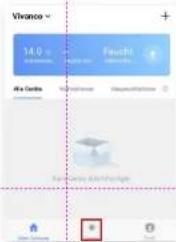
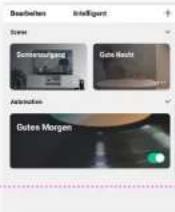
Click SMART.
You will now get shown the scenes "Sunrise" and "Good night", but no automation has been assigned yet. You can use and edit them or you can create a new scene.
6.2 Create automation

6.2 Create automation (continued)
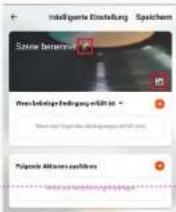
Click on the pen to edit the name of the
To change the scene, click on the icon.
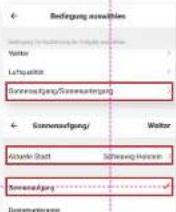
Select when an ACTION should be made. Click on the + indicator and select a condition.
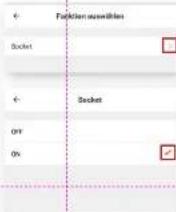
Select the action to be performed. Select the device. Choose between on / off switching



Save the settings. The automation has been added on the
mail page and can be switched on / off
with the slide switch.

6.3 Create scenes
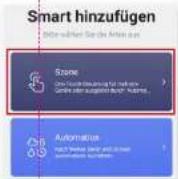
Click at the 2 + symbol. Select a scene to edit elements and select text in body coloration. Save processing.


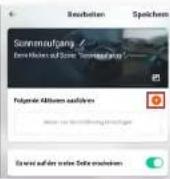
action. Click on trigger automation.
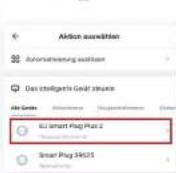

Select and click next.


7. ROOMS AND INFORMATION
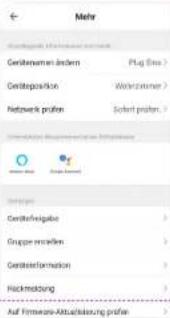
By clicking on the 3 menu dots on the top right, you will be taken to an information window for your adapter. Out of this you can
- change the device name
- assign a location / room to the device
• determine your network status - display supporting controls
- issue device approvals
• create groups - retrieve device information
• write a feedback about the SMART HOME adapter - check whether an firmware update is available

7.1 Change device name
Click the current device name of the adapter. A pop-up gel's open and you can change it adjust the device name.
7.2 Change device position
Click here on the current device position of the adapter. You will come to the room overview and from there you can select and confirm a new room.

7.4 Create a group
You will have the option of combining multiple adapters into a group. To do this, click Create Group, select the devices you want to group together, set a group name, and save your selection. Your group will appear on the home screen as well.
7.5 Device Information
Displays current information about your device.
7.6 Feedback
Here you can also submit problems with the APP directly to Tuys.
7.7 Check for firmware update
Verifies if your device is up to date.
7.8 Remove or reset the device
Remove device -> device is removed from device list, programming may be relaxed. Reset device -> device is removed from device list, programming is deleted.
8. EMBED DEVICE IN AMAZON ALEXA
To be able to control the smart home adapter with Amazon Alexa, the Smart Life and Alexa App must be installed on the same device and the desired socket adapter must be connected to the Smart Life App.
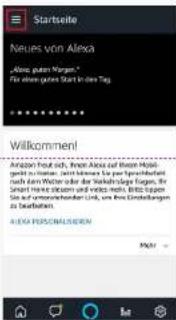
Start the Amazon Alexa APP and open the menu by touching the three-bar icon. Select the category Skills.

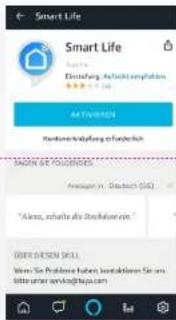
Enter Smart Life in Search to find the Smart Life Skill. Select it and enable it by touching the ACTIVATE button.

After activation, touch the settings button and enter the credentials of your Smart Life account. Then confirm with connect immediately.

Open the menu and select Smart Home. Select the devices button and search for devices. The device overview of the Alexa app should now show the Smart Home adapter.
The adaptor can now be switched by voice command with „Alexa, switch on [socket]“ or „Alexa, switch off [socket]“. Important. Instead of „sccict always use the self-chosen name that Alexa also displays in the device overview.
Enter your registration data from the Smart Lite APP here. Then click on Immediately connect. Confirm authorized:
Select the Smart Home adapter to assign it to a room. Select the home in which the 'room' should be located.


9. INCLUDE DEVICE IN GOOGLE HOME
To be able to control the socket adapter with Google Home, the Smart Life and Google Home app must be installed on the same device and the desired socket adapter must be connected to the Smart Life App. You still need
- a Google Home device or a smartphone / tablet with Google Assistant
- the latest version of the Google Home APP
- the latest version of the Google AFP
- a Google Account
Launch the Google Home APP and clicks on your home.
Konto
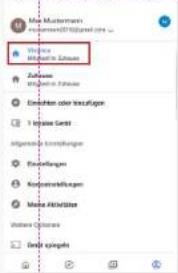
Select device setup. Select works with Google together.

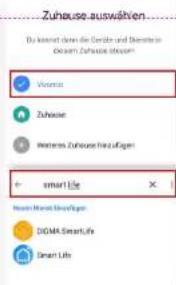


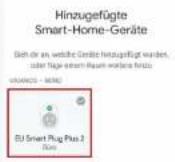
Name the room. The adapter was added successfully.
You can now use your smart home adapter with the commands. • Ok Google, „EU SMART PLUG PLUS 2" O • Hey Google, „EU SMART PLUG PLUS 2" O Important instead of EU Smart Plug Plus 2 you always have to use the self chosen name used in the Smart Lite APP.
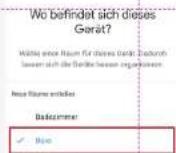
Important - instead-of - BJ Smart Plug Plus 2 you always have to use the self-chosen name used in the Smart Lite APP.


- TECHNICAL DATA
- 1.1 CONTENT
- INSTALLATION AND OPERATION
- 5.1 INSTALLATION SMART LIFE APP FROM TUYA INC
- 4 & - 1 2 3
- ( ) - + 4 5 6
- 7 8 9
- 0
- 5.2 INSTALLATION OF THE SMART HOME POWER ADAPTER
- 5.3 TIMER FUNCTION 5.4 COUNTDOWN TIMER FUNCTION 5.5 ELECTRICAL QUANTITY MANAGEMENT
- CREATE AND MANAGE A PROFILE
- 6.1 CREATE AND MANAGE SCENES AND AUTOMATIONS
- 6.2 CREATE AUTOMATION
- 6.2 CREATE AUTOMATION (CONTINUED)
- 6.3 CREATE SCENES
- ACTION. CLICK ON TRIGGER AUTOMATION
- SELECT AND CLICK NEXT
- ROOMS AND INFORMATION
- 7.1 CHANGE DEVICE NAME
- 7.2 CHANGE DEVICE POSITION
- 7.4 CREATE A GROUP
- 7.5 DEVICE INFORMATION
- 7.6 FEEDBACK
- 7.7 CHECK FOR FIRMWARE UPDATE
- 7.8 REMOVE OR RESET THE DEVICE
- EMBED DEVICE IN AMAZON ALEXA
- INCLUDE DEVICE IN GOOGLE HOME
Mærke : VIVANCO
Model : 39625
Kategori : Hjemmeautomatisering