
TH-55NX600G - Fjernsyn PANASONIC - Gratis brugsanvisning og manual
Find enhedens vejledning gratis TH-55NX600G PANASONIC i PDF-format.


Brugerspørgsmål om TH-55NX600G PANASONIC
0 spørgsmål om dette apparat. Besvar dem du kender, eller stil dit eget.
Stil et nyt spørgsmål om dette apparat
Download vejledningen til din Fjernsyn i PDF-format gratis! Find din vejledning TH-55NX600G - PANASONIC og tag din elektroniske enhed tilbage i hånden. På denne side er alle dokumenter nødvendige for brugen af din enhed offentliggjort. TH-55NX600G af mærket PANASONIC.
BRUGSANVISNING TH-55NX600G PANASONIC
Panasonic®
Petunjuk Pengoperasian LED TV
Bahasa Indonesia
TH-43NX600G
TH-50NX600G
TH-55NX600G
TH-65NX600G
natural_image
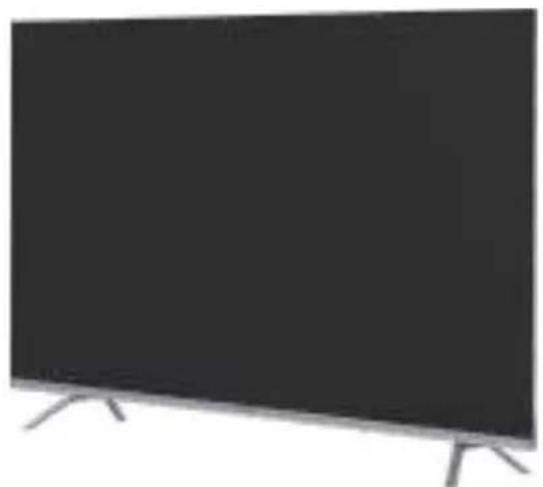
Front view of a modern flat-screen TV with visible black screen and stand (no text or symbols)(Gambar: TH-50NX600G)
Terima kasih telah membeli produk Panasonic.
Harap baca petunjuk ini dengan saksama sebelum mengoperasikan produk ini dan simpan untuk referensi di masa mendatang.
Gambar yang ditunjukkan pada buku panduan ini hanya untuk tujuan ilustrasi.
PMKG.54.01.2024
S0124-0
N080108-001122-001
Bahasa Indonesia
Bab 1: Pendahuluan
Peringatan 3
Lingkungan Penggunaan 4
Pembersihan 4
Menggantung TV di Dinding 4
Perhatian 4
Simbol 6
Tindakan Pencegahan untuk Menggunakan Remote Kontrol 6
Memasang/Melepas Baterai Remote 6
Aksesori Standar 7
Aksesori Opsional 7
Pemasangan Alas 8
Bab 2: Fitur Dasar
Terminal TV 9
Kontrol TV 10
Remote Kontrol....11
Cara Memasangkan Remote Kontrol Bluetooth dengan TV.... 12
Pengaturan Awal 12
Memilih Sumber Masukan 15
Pengaturan....15
Bab 3: Fitur Cerdas
Halaman Utama....19
Google Assistant....19
Chromecast Built-In 19
Penolakan tentang Menggunakan Google TV.... 21
Pemutar Multimedia 21
Bab 4: Informasi Teknis
Perawatan 23
Pemecahan Masalah 23
Spesifikasi 24
Lisensi OSS 25
Bab 1: Pendahuluan
Peringatan
Menangani steker dan kabel listrik
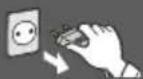
Masukkan steker listrik sepenuhnya ke dalam stopkontak. (Jika steker listrik kendur, maka bisa menghasilkan panas dan menyebabkan kebakaran.)
Pastikan steker listrik mudah diakses.
Jangan sentuh steker dengan tangan basah. (Hal ini dapat menyebabkan sengatan listrik.)
Jangan gunakan kabel listrik selain yang disediakan oleh TV tersebut. (Hal ini dapat menyebabkan kebakaran atau sengatan listrik.)
Jangan merusak kabel listrik. (Kabel yang rusak dapat menyebabkan kebakaran atau sengatan listrik.)
• Jangan pindahkan TV dengan kabel yang dicolokkan ke stopkontak.
• Jangan letakkan benda berat di atas kabel atau letakkan kabel di dekat benda yang bersuhu tinggi.
- Jangan memuntir kabel, menekuknya berlebihan, atau meregangkannya.
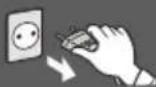
- Jangan menarik kabel. Pegang bodi steker listrik saat melepaskan kabel.
• Jangan gunakan steker listrik atau stopkontak yang rusak.
- Gunakan TV dalam iklim sedang.
Jika Anda menemukan ada yang tidak normal, segera lepas steker listrik.
110 - 240 V \~ 50 / 60 Hz
natural_image
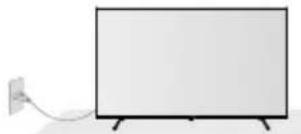
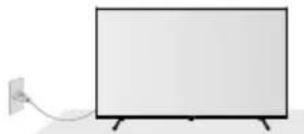
Simple line drawing of a flat-screen monitor with a cable attached to the side (no text or symbols)- Jenis steker listrik bervariasi di setiap negara.
Sumber daya
• TV ini didesain untuk beroperasi pada
• 110 - 240 V \~ 50/60 Hz
• Penggunaan di atas meja/Menggantung di tembok
Jangan gunakan penstabil tegangan eksternal dengan perangkat TV
- Penstabil dengan kualitas yang lebih rendah dapat menyebabkan kerusakan pada TV.
• Garansi tidak berlaku jika penstabil eksternal digunakan.
Jangan lepaskan penutup dan jangan pernah memodifikasi TV sendiri
- Jangan lepaskan penutup belakang karena komponen aktif dapat diakses ketika dilepas. Tidak ada komponen yang dapat diservis sendiri oleh pengguna. (Komponen yang bertegangan tinggi dapat menyebabkan sengatan listrik yang parah.)
- Periksalah, sesuaikan, atau perbaiki TV di dealer Panasonic setempat.
- Silakan mengacu pada informasi tentang penutup belakang eksternal untuk informasi kelistrikan dan keselamatan sebelum memasang atau mengoperasikan peralatan.
- Steker listrik digunakan sebagai perangkat pemutusan, perangkat pemutusan akan tetap siap dioperasikan.
Jangan sampai terkena hujan atau kelembapan yang berlebihan
- Untuk mencegah kerusakan yang dapat mengakibatkan sengatan listrik atau kebakaran, jangan biarkan TV ini terkena hujan atau kelembapan yang berlebihan. TV ini tidak boleh terkena tetesan atau percikan air dan benda-benda yang berisi cairan, seperti vas, tidak boleh diletakkan pada atau di atas TV.
Jangan masukkan benda asing ke dalam TV
- Jangan biarkan benda apa pun jatuh ke TV melalui ventilasi udara. (Kebakaran atau sengatan listrik bisa terjadi.)
Jangan letakkan TV di permukaan yang miring atau tidak stabil, dan pastikan TV tidak menggantung di tepi alas
• TV akan jatuh atau terbalik.
Gunakan alas khusus/perlengkapan pemasangan
- Menggunakan alas yang tidak disetujui atau perlengkapan lain dapat membuat TV tidak stabil, sehingga berisiko menyebabkan cedera. Pastikan untuk meminta dealer Panasonic setempat untuk melakukan pengaturan.
- Saat memasang produk di dinding atau langit-langit, pastikan untuk memasang produk sesuai dengan metode yang direkomendasikan oleh pabrik. Ini adalah fitur keamanan.
- Hanya gunakan alat pelengkap/aksesori yang ditentukan atau disediakan oleh pabrik (seperti adaptor catu eksklusif, baterai, dll.).
Jangan sampai terkena sinar matahari langsung dan sumber panas lainnya
- Hindarkan TV dari sinar matahari langsung dan sumber panas lainnya.

Untuk mencegah penyebaran api, jauhkan lilin atau api terbuka lainnya dari produk ini setiap saat.
Lingkungan Penggunaan
Peringatan: Bahaya Stabilitas
Pesawat televisi dapat jatuh yang menyebabkan cedera serius atau kematian pribadi. Banyak cedera, terutama pada anak-anak, dapat dihindari dengan mengambil tindakan pencegahan sederhana seperti:
- SELALU gunakan kabinet atau dudukan atau metode pemasangan yang disarankan oleh produsen pesawat televisi.
- SELALU gunakan perabot yang dapat dengan aman menopang pesawat televisi.
- SELALU pastikan bahwa pesawat televisi tidak menggantungkan di ujung perabot penopang.
- SELALU edukasi anak-anak tentang bahaya memanjat perabot untuk menjangkau pesawat televisi atau kendalinya.
- SELALU arahkan kabel yang terhubung ke televisi Anda sehingga tidak dapat tersandung, tertarik, atau tersambar.
- JANGAN PERNAH menempatkan televisi di lokasi yang tidak stabil.
- JANGAN PERNAH menempatkan televisi di perabot tinggi (misalnya, lemari atau rak buku) tanpa menambatkan perabot dan televisi ke dudukan yang sesuai.
- JANGAN PERNAH letakkan televisi di atas kain atau bahan lain yang mungkin terletak di antara psawat televisi dan perabot penopang.
- JANGAN PERNAH meletakkan benda-benda yang mungkin menggoda anak untuk memanjat, seperti mainan dan remote kontrol, di atas televisi atau perabot tempat televisi diletakkan.
Jika pesawat televisi yang ada sedang dipelihara dan dipindahkan, Anda harus menerapkan pertimbangan yang sama seperti di atas.
Pembersihan
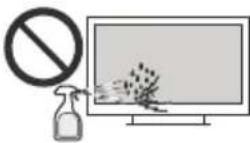
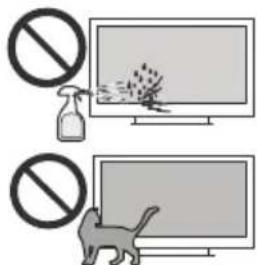
- Jangan semprotkan air atau deterjen secara langsung ke layar TV untuk tujuan membersihkan. Zat cair yang bocor akan menyebabkan kerusakan pada TV.
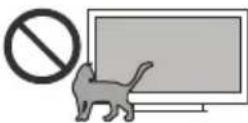
- Hati-hati terhadap kucing, tikus, atau hewan lainnya yang mungkin kencing di TV (depan dan belakang). Hal tersebut dapat menjadikan kegagalan TV.
- Jangan gunakan benda tajam atau keras (kuku jari, pisau, dll.) pada layar TV. Hal tersebut dapat menyebabkan kerusakan pada permukaan layar.
Menggantung TV di Dinding
- Periksa apakah dinding dapat menopang bobot peralatan TV dan rakitan pemasangan di dinding.
- Ikuti petunjuk pemasangan yang diberikan dengan pemasangan di dinding.
• Perangkat TV harus dipasang di dinding vertikal. - Pastikan hanya menggunakan sekrup yang cocok untuk bahan di dinding.
- Pastikan kabel TV dipasang sehingga tidak ada bahaya tersandung.
Semua petunjuk keselamatan lainnya tentang perangkat TV kami juga berlaku di sini.
Peringatan: Mengoperasikan TV ini membutuhkan dua orang.
Untuk memastikan pemasangan yang aman, perhatikan keamanan berikut.
Perhatian
- Baca petunjuk -- Semua petunjuk pengoperasian harus dibaca dan dipahami sebelum produk dioperasikan.
- Simpan petunjuk ini --- Petunjuk keselamatan dan pengoperasian ini harus disimpan di tempat yang aman untuk referensi di masa mendatang.
- Baca semua peringatan --- Semua peringatan pada produk dan petunjuk harus diperhatikan dengan cermat.
-
Ikuti semua petunjuk --- Semua petunjuk pengoperasian harus diikuti.
-
Alat pelengkap --- Hanya gunakan alat pelengkap/ aksesori yang ditentukan oleh pabrik. Jangan gunakan alat pelengkap yang tidak direkomendasikan oleh pabrik. Penggunaan alat pelengkap yang tidak tepat dapat menyebabkan kecelakaan.
-
Sumber daya -- Produk ini dimaksudkan untuk dipasok oleh dengan catu daya terdaftar yang tertera pada label penandaan. Jika Anda tidak yakin dengan jenis catu daya di rumah Anda, hubungi dealer produk Anda atau perusahaan listrik setempat. Untuk perlindungan tambahan terhadap produk ini selama badai petir, atau ketika dibiarkan tanpa pengawasan dan tidak digunakan dalam waktu lama, cabut stekernya dari stopkontak di dinding dan lepaskan sistem kabel.
Jangan mengalahkan tujuan keamanan dari steker yang terpolarisasi atau pembumian. Steker terpolarisasi memiliki dua bilah dengan satu bilah yang lebih lebar dari satunya. Steker pembumian memiliki dua bilah dan cabang pembumian ketiga. Bilah lebar atau cabang ketiga disediakan untuk keselamatan Anda. Jika steker yang disediakan tidak sesuai dengan stopkontak Anda, hubungi teknisi listrik untuk mengganti stopkontak yang sudah using.
- Perlindungan kabel listrik -- Lindungi kabel listrik agar tidak terinjak atau terjepit terutama pada steker, stopkontak praktis, dan titik keluarnya dari peralatan.
- Beban berlebih --- Jangan terlalu membebani stopkontak di dinding, kabel ekstensi, atau stopkontak di peralatan lain karena hal ini dapat menimbulkan risiko kebakaran atau sengatan listrik.
- Servis -- Lakukan servis pada personel servis yang berkualifikasi. Servis diperlukan saat peralatan rusak dengan cara apa pun, seperti kabel atau steker catu daya rusak, cairan tumpah atau benda jatuh ke peralatan, peralatan terkena hujan atau lembap, tidak beroperasi secara normal, atau telah jatuh.
- Kerusakan yang memerlukan servis --- Jika salah satu dari kondisi berikut terjadi, cabut kabel daya dari stopkontak AC, dan minta petugas servis yang berkompeten untuk melakukan perbaikan.
a. Ketika kabel atau steker listrik rusak.
b. Ketika cairan tumpah pada produk atau ketika benda jatuh ke dalam produk.
c. Ketika produk terkena hujan atau air. d. Ketika produk tidak beroperasi dengan benar seperti yang dijelaskan dalam petunjuk pengoperasian. Jangan menyentuh kontrol selain yang dijelaskan dalam petunjuk pengoperasian. Penyesuaian kontrol yang tidak tepat yang tidak dijelaskan dalam petunjuk dapat menyebabkan kerusakan, yang seringkali membutuhkan pekerjaan penyesuaian yang besar oleh teknisi yang berkualifikasi.
e. Jika produk terjatuh atau kabinet rusak dengan cara apa pun.
f. Saat produk menampilkan kondisi tidak normal atau menunjukkan perubahan kinerja yang berbeda. Setiap kelainan yang terlihat dalam produk menunjukkan bahwa produk perlu diservis.
-
Komponen pengganti --- Jika produk memerlukan komponen pengganti, pastikan petugas servis menggunakan komponen pengganti yang ditentukan oleh pabrik, atau yang memiliki karakteristik dan kinerja yang sama dengan komponen asli. Penggunaan komponen yang tidak sah dapat mengakibatkan kebakaran, sengatan listrik, dan/atau bahaya lainnya.
-
Pemeriksaan keamanan --- Setelah menyelesaikan pekerjaan servis atau perbaikan, mintalah teknisi servis untuk melakukan pemeriksaan keamanan untuk memastikan bahwa produk berada dapat beroperasi dengan benar.
-
Pijakan -- Gunakan hanya dengan kereta dorong, pijakan, tripod, braket, atau meja yang ditentukan oleh pabrik, atau dijual bersama peralatan. Jangan letakkan produk di atas troli, pijakan, tripod, atau meja yang tidak stabil. Menempatkan produk di atas benda yang tidak stabil dapat menyebabkan produk jatuh, serta mengakibatkan cedera serius dan kerusakan pada produk. Saat memasang produk di dinding, pastikan untuk mengikuti petunjuk dari pabriknya. Gunakan hanya perangkat keras pemasangan yang direkomendasikan oleh pabrik.

- Bergerak dengan hati-hati --- Saat troli digunakan, gunakan dengan hati-hati saat menggerakkan kombinasi troli/peralatan untuk menghindari cedera akibat terbalik. Berhenti mendadak, tekanan yang berlebihan dan permukaan lantai yang tidak rata dapat menyebabkan produk jatuh dari troli.
Jangan pernah mencoba memindahkan TV kecuali jika kabel listrik AC sudah dilepas.
-
Petir -- Cabut peralatan ini saat terjadi badai petir atau bila tidak digunakan dalam waktu lama. Untuk perlindungan tambahan terhadap perlengkapan televeisi ini selama badai petir, atau ketika dibiarkan tanpa pengawasan dan tidak digunakan dalam waktu lama, cabut stekernya dari stopkontak di dinding dan putuskan sambungan antena. Tindakan ini akan mencegah kerusakan pada peralatan karena petir dan lonjakan arus listrik.
-
Perlindungan panel -- Layar panel yang digunakan dalam produk ini terbuat dari kaca. Karenanya, mudah pecah ketika produk terjatuh atau terkena senggolan oleh benda lain. Berhati-hatilah agar tidak terluka oleh pecahan kaca jika layar panel rusak.
-
Cacat piksel --- Layar panel adalah produk teknologi sangat tinggi yang memberi Anda gambar yang sangat mendetail. Kadang-kadang, beberapa piksel yang tidak aktif dapat muncul di layar sebagai titik tetap biru, hijau, atau merah. Harap dicatat bahwa cacat ini tidak memengaruhi kinerja produk Anda.
18. Jangan menghalangi ventilasi udara belakang
- Ventilasi yang memadai sangat penting untuk mencegah kegagalan komponen elektronik.
- Ventilasi tidak boleh terhalang dengan menutup bukaan ventilasi dengan berbagai barang seperti koran, taplak meja, dan tirai.
- Kami merekomendasikan agar ada jarak minimum 10 cm di sekitar TV bahkan ketika diletakkan di dalam kabinet atau di antara rak.
- Saat menggunakan alas, jaga jarak antara komponen bawah TV dan permukaan tempat pemasangan TV.
- Jika alas tidak digunakan, pastikan ventilasi pada komponen bawah TV tidak terhalang.
- Jangan memasang peralatan ini di ruang terbatas atau gedung seperti rak buku atau unit serupa, dan tetap memiliki kondisi ventilasi yang baik di lokasi terbuka. Jarak minimum
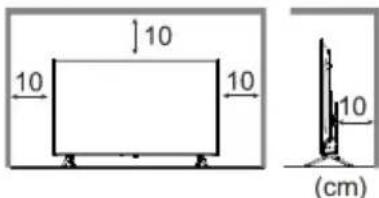
Catatan: Gambar ini hanya sebagai referensi.
-
Jangan menelan baterai, Bahaya Pembakaran Bahan Kimia --- Jauhkan baterai baru dan bekas dari jangkauan anak-anak. Jika ruang baterai tidak tertutup dengan aman, hentikan penggunaan produk dan jauhkan dari jangkauan anak-anak. Jika menurut Anda baterai mungkin telah tertelan atau masuk ke dalam bagian tubuh mana pun, segera minta bantuan medis.
-
Mendengarkan --- Mendengarkan musik dengan tingkat volume yang tinggi dan untuk waktu yang cukup lama dapat merusak pendengaran. Untuk mengurangi risiko kerusakan pendengaran, seseorang harus menurunkan volume ke tingkat yang aman dan nyaman, serta mengurangi jumlah waktu mendengarkan dengan tingkat yang tinggi.
21. Kerusakan
- Selain pada kasus-kasus di mana pertanggungjawaban telah ditetapkan oleh peraturan setempat, Panasonic tidak bertanggung jawab atas kerusakan yang disebabkan oleh penyalahgunaan atau pemakaian produk, dan masalah atau kerusakan lain yang disebabkan oleh pemakaian produk ini.
- Panasonic tidak bertanggung jawab atas kehilangan data dll. yang diakibatkan oleh bencana.
- Perangkat eksternal yang dibeli secara terpisah oleh pelanggan tidak tercakup dalam garansi. Pemeliharaan data yang tersimpan dalam perangkat tersebut merupakan tanggung jawab pelanggan. Panasonic tidak bertanggung jawab atas penyalahgunaan data tersebut.
Simbol
- Untuk terminal yang ditandai dengan simbol “♀” mungkin cukup besar untuk menimbulkan risiko sengatan listrik. Kabel eksternal yang terhubung ke terminal harus dipasang oleh orang yang diinstruksikan atau menggunakan kabel atau kawat yang siap pakai.
- Terminal pembumian pelindung. Perangkat harus disambungkan ke stopkontak dengan sambungan pembumian pelindung. (Hanya untuk perangkat Kelas I)
- Jika produk memiliki simbol □ pada label peringkatnya dan kabel listrik memiliki dua pin, itu berarti peralatan tersebut adalah alat listrik kelas II atau berisolasi ganda. Simbol tersebut telah dirancang sedemikian rupa sehingga tidak memerlukan sambungan pengaman ke arde.
- Informasi berikut ini direkomendasikan untuk disertakan jika berlaku:
\~ Mengacu pada arus bolak-balik (AC).
Mengacu pada arus searah (DC).
Mengacu pada peralatan Kelas II.
Mengacu pada mode siaga.
Mengacu pada daya AKTIF.
Mengacu pada tegangan berbahaya.
Mengacu pada perangkat Kelas I.
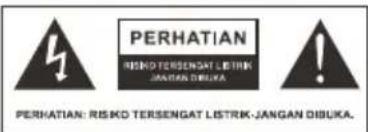
- Kilat dengan simbol kepala panah dalam segitiga sama sisi ini dimaksudkan untuk mengingatkan pengguna akan adanya 'tegangan berbahaya' yang tidak terisolasi dalam penutup produk yang mungkin cukup besar untuk menimbulkan risiko sengatan listrik.
- Untuk mengurangi risiko sengatan listrik. Jangan lepaskan penutup (atau belakang). Tidak ada komponen yang dapat diservis sendiri oleh pengguna. Rujuk ke petugas servis yang berkualifikasi.
- Titik seru dalam segitiga sama sisi dimaksudkan untuk mengingatkan pengguna akan adanya petunjuk pengoperasian dan perawatan yang penting dalam bacaan yang menyertai alat.
Tindakan Pencegahan untuk Menggunakan Remote Kontrol
- Gunakan remote kontrol dengan mengarahkannya ke sensor remote. Benda antara remote kontrol dan sensor remote akan mengganggu operasi normal.
- Jangan membuat remote kontrol bergetar hebat. Selain itu, jangan percikkan cairan pada remote kontrol, dan juga jangan letakkan remote kontrol di tempat dengan kelembapan yang tinggi.
- Jangan letakkan remote kontrol di bawah sinar matahari langsung yang akan menyebabkan perubahan bentuk pada unit akibat pemanasan.
- Ketika sensor remote kontrol berada di bawah sinar matahari langsung atau pencahayaan yang kuat, remote kontrol tidak langsung berfungsi. Dengan demikian ubahlah pencahayaan atau posisi TV, atau operasikan remote kontrol lebih dekat ke sensor remote.
Memasang/Melepas Baterai Remote
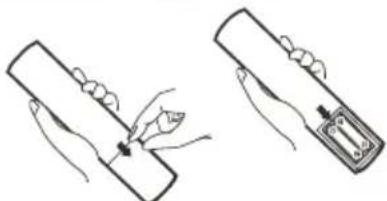
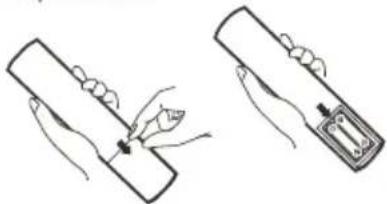
Letakkan dua buah baterai ukuran AAA dalam ruang baterai remote kontrol, pastikan baterai menghadap sesuai dengan tanda kutub di dalam ruang baterai.
natural_image
Two hand-drawn diagrams showing a tool interacting with a device, one with a magnified view and the other with a button (no text or symbols)Catatan: Gambar ini hanya sebagai referensi.
Perhatian
- Pemasangan yang salah dapat menyebabkan kebocoran dan kerusakan baterai, yang mengakibatkan kerusakan pada remote kontrol.
- Jangan mencampur baterai lama dengan yang baru.
- Ganti dengan tipe yang sama atau setara. Jangan mencampur jenis baterai yang berbeda (seperti baterai alkalin dan mangan).
• Jangan gunakan baterai isi ulang (Ni-Cd). - Jangan membenturkan atau memecah baterai.
- Jangan memaparkan baterai ke panas yang berlebihan seperti sinar matahari, api, atau sejenisnya.
- Pastikan Anda membuang baterai dengan benar.
- Pastikan baterai diganti dengan benar dengan jenis yang sama atau setara, jika baterai dibalik atau keliru diganti dapat menyebabkan bahaya ledakan dan kebakaran.
- Jangan membongkar atau memodifikasi remote kontrol.
Aksesori Standar
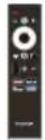
Remote Kontrol
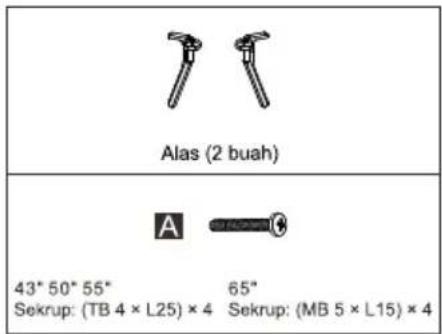
Alas (2)


Sekrup (4)

Baterai (2) (ukuran AAA)

Petunjuk Pengoperasian
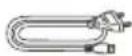
Kabel Listrik AC
Catatan:
1) Gambar ini hanya sebagai referensi.
2) Aksesori mungkin tidak diletakkan bersama-sama. Berhati-hatilah untuk tidak membuangnya begitu saja.
3) Produk ini mengandung komponen yang mungkin berbahaya (seperti kantong plastik), yang dapat terhirup atau tertelan oleh anak kecil secara tidak sengaja. Jauhkan komponen ini dari jangkauan anak-anak.
Aksesori Opsional
Silakan hubungi dealer Panasonic setempat untuk membeli aksesori opsional yang direkomendasikan. Untuk detail tambahan, baca manual aksesori opsional.
Braket gantung
Silakan hubungi dealer Panasonic setempat untuk membeli braket gantung yang direkomendasikan.
Catatan: Referensi grafik.
- Spesifikasi Sekrup

• VESA
| Ukuran | 43" | 50" | 55" | 65" |
| a (mm) | 200 | 200 | 200 | 400 |
| b (mm) | 200 | 200 | 200 | 200 |

Perhatian
- Kegagalan untuk menggunakan braket Panasonic atau memilih untuk memasang unit sendiri akan dilakukan dengan risiko konsumen. Selalu pastikan untuk meminta teknisi yang berkompeten untuk melakukan pengaturan. Pemasangan yang salah dapat menyebabkan peralatan jatuh, yang mengakibatkan kecelakaan dan kerusakan produk. Kerusakan apa pun yang disebabkan karena tidak memiliki pemasang profesional yang memasang unit Anda akan membatalkan garansi Anda.
- Ketika aksesori atau kurung hiasan dinding opsional digunakan, selalu pastikan bahwa petunjuk yang diberikan diikuti semuanya.
- Jangan memasang unit langsung di bawah lampu atap (seperti lampu sorot atau lampu halogen) yang biasanya mengeluarkan panas tinggi. Hal tersebut dapat merusak atau merusak komponen kabinet plastik.
- Berhati-hatilah saat memasang braket TV dinding ke dinding. Peralatan yang dipasang di dinding tidak boleh ditempatkan dengan logam dinding. Selalu pastikan bahwa tidak ada kabel atau kabel listrik di dinding sebelum menggantungkan braket.
- Untuk mencegah kejatuhan atau cedera, lepaskan TV dari posisi ketika tidak lagi digunakan.
- Untuk menyambungkan perangkat eksternal ke perangkat TV dengan terminal menghadap dinding, gunakan penjarak plastik setinggi 30mm serta masing-masing sekrupnya untuk memasang dudukan dinding.
Pemasangan Alas

Perhatian
Jangan membongkar atau memodifikasi alas.
- Kalau tidak, TV bisa jatuh dan rusak, serta cedera pribadi akan terjadi.

Perhatian
Jangan gunakan alas selain yang disediakan dengan TV ini.
- Kalau tidak, TV bisa jatuh dan rusak, serta cedera pribadi akan terjadi.
Jangan gunakan alas jika mengerut atau rusak secara fisik.
- Jika Anda menggunakan alas yang rusak secara fisik, cedera pribadi akan terjadi. Hubungi dealer Panasonic setempat dengan segera.
Selama pemasangan, pastikan semua sekrup dikencangkan dengan aman.
- Jika perawatan tidak cukup dilakukan untuk memastikan sekrup dikencangkan dengan benar selama perakitan, alas tidak akan cukup kuat untuk mendukung TV, dan mungkin jatuh dan menjadi rusak, dan cedera pribadi dapat terjadi.
Pastikan TV tidak jatuh.
- Jika TV jatuh atau anak-anak naik ke alas dengan TV terpasang, TV mungkin jatuh dan cedera pribadi akan terjadi.
Diperlukan dua orang atau lebih untuk memasang dan melepas TV.
- Jika dua atau lebih orang tidak hadir, TV mungkin jatuh, dan cedera pribadi akan terjadi.
Saat melepas alas TV, lepaskan alas dengan metode dari prosedur yang ditentukan.
- Kalau tidak, TV atau alas dapat jatuh dan menjadi rusak, dan cedera pribadi akan terjadi.
Tampilan produk dalam ilustrasi mungkin berbeda dari produk Anda yang sebenarnya, dan hanya untuk tujuan referensi.
Memindahkan alas TV
Pastikan untuk melepaskan alas dengan cara berikut saat menggunakan braket menggantung di dinding atau mengemas ulang TV.
1 Lepaskan sekrup rakitan dari TV.
2 Lepaskan alas TV.
Catatan: Gambar ini hanya sebagai referensi.
- Silakan ambil tas aksesori dari paket dan periksa apakah semua komponen di bawah ada tanpa hilang, jika tidak, silakan hubungi dealer setempat Anda.
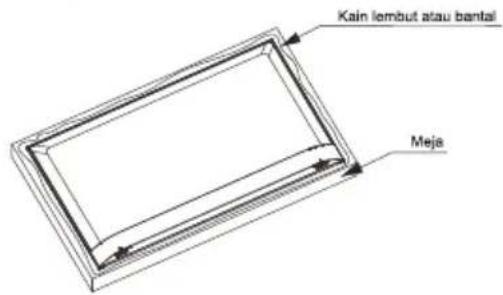
- Keluarkan TV dan letakkan dengan hati-hati (layar menghadap ke bawah) di atas meja yang stabil dan datar dengan kain lembut atau bantal di atasnya.
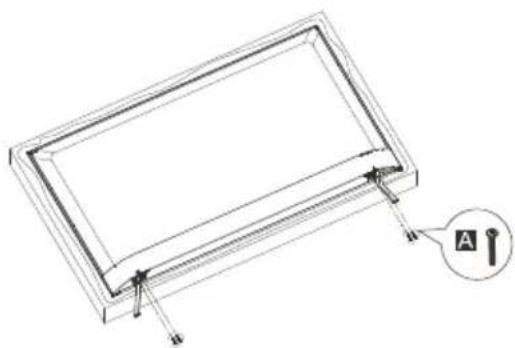
- Hubungkan TV dan alas dengan mengencangkan sekrup yang cocok ke dalam lubang.
natural_image
Technical line drawing of a rectangular frame with mounting points and a labeled component 'A' (no text or symbols beyond label)Bab 2: Fitur Dasar
Terminal TV
Catatan:
1) Gambar hanya untuk referensi saja.
2) Posisi terminal dapat bervariasi tergantung model.
Tampilan Belakang
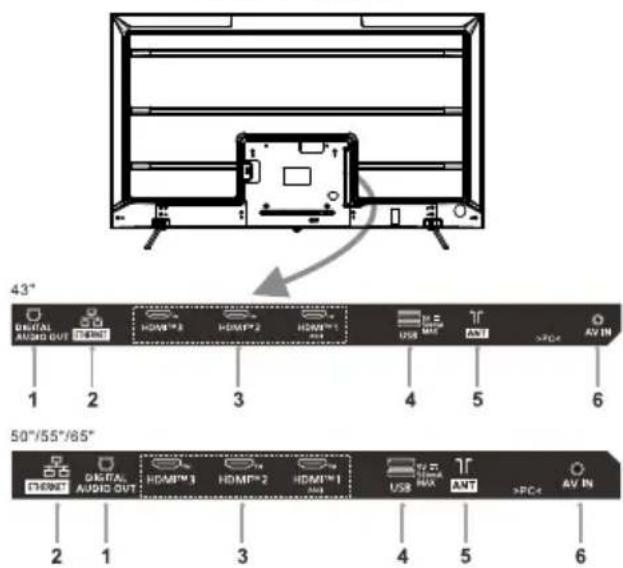
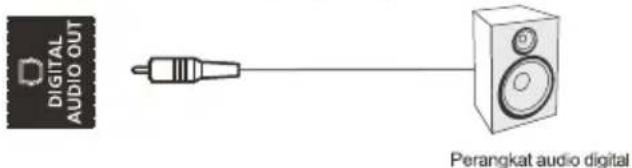
1. DIGITAL AUDIO OUT
Sambungkan kabel optik ke keluaran sinyal audio digital TV ke penerima audio yang kompatibel.
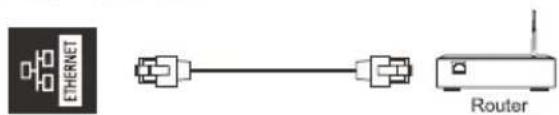
2. ETHERNET
Port jaringan kabel.
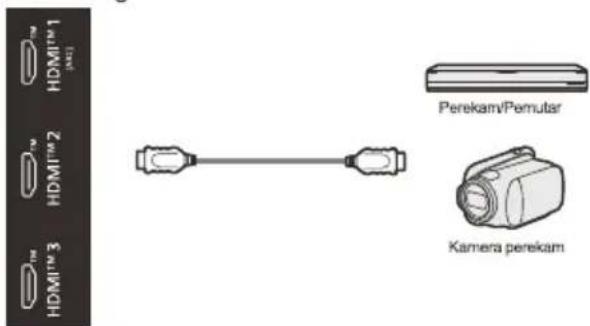
3. HDMI IN
Menerima sinyal input HDMI dari perangkat HDMI yang tersambung.
Catatan:
1) Jika perangkat eksternal hanya memiliki output DVI, gunakan kabel adaptor DVI ke HDMI untuk tersambung ke terminal HDMI.
2) HDMI1 mendukung fungsi ARC (Audio Return Channel), dan Anda dapat menyambungkan perangkat yang mendukung ARC dengan TV melalui terminal HDMI1.
4. USB
Sambungkan perangkat USB ke TV.
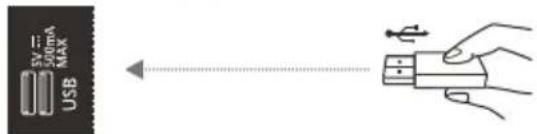
Catatan: Jangan pernah melepas perangkat USB atau mematikan TV saat menggunakan perangkat USB.
5. ANTENNA IN
Menyambungkan kabel yang sama untuk menerima sinyal dari antena atau kabel.
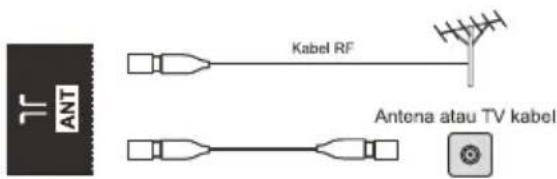
Catatan:
1) Jangan letakkan kabel RF di bawah TV.
2) Untuk mendapatkan kualitas gambar dan suara yang optimal, diperlukan kabel yang tepat (75 Ω kabel yang sama) dan terminal yang benar.
3) Jika sistem antena komunitas digunakan, Anda mungkin memerlukan kabel penghubung dan steker yang benar antara stopkontak udara di dinding dan TV.
4) Pusat Servis Televisi atau dealer setempat Anda mungkin dapat membantu Anda dalam mendapatkan sistem antena yang tepat untuk area khusus Anda dan aksesori yang diperlukan.
5) Segala hal yang berkaitan dengan pemasangan antena, peningkatan sistem atau aksesori yang ada, dan biaya yang dikeluarkan, adalah tanggung jawab Anda, sebagai pelanggan.
6. AV IN
Menerima sinyal audio dan video dari sumber sinyal seperti DVD.
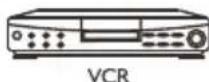

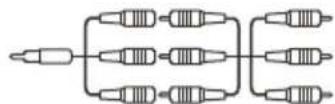
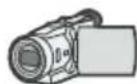
Kamera perekam
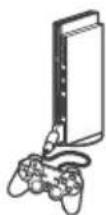
Konsol permainan
Kontrol TV
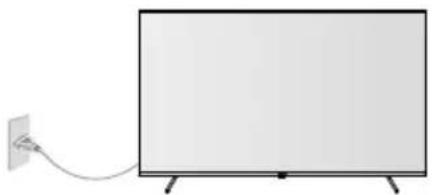
■ Sambungan Daya
natural_image
Simple line drawing of a blank rectangular screen connected to a cable (no text or symbols)Catatan: Gambar ini hanya sebagai referensi.
Sambungkan kabel daya ke TV dan stopkontak (110-240 V \~ 50/60 Hz).
■ Menyalakan atau mematikan TV
- Sambungkan kabel daya ke stopkontak dan TV.
- Dalam mode siaga, tekan tombol DAYA untuk menyalakan TV.
- Dalam keadaan menyala, tekan tombol DAYA untuk mengalihkan TV ke mode siaga.
- Cabut kabel daya untuk mematikan TV sepenuhnya.
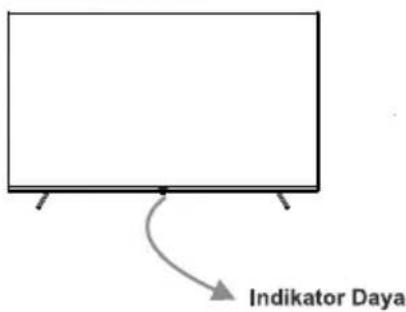
■ Indikator Daya
Tampilan Depan
Catatan: Gambar ini hanya sebagai referensi.
- Menyala merah: Mode siaga.
- Menyala hijau: Status kerja.
- Tidak menyala: Mati.
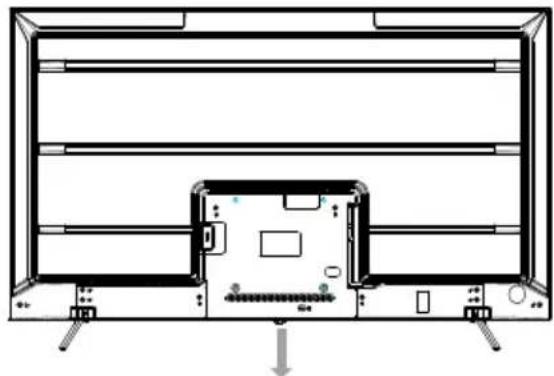
■ Tombol Kontrol TV
Tampak belakang
natural_image
Technical line drawing of a mechanical or electronic component with no visible text, numbers, or symbols.
Tombol Kontrol TV
Catatan: Gambar ini hanya sebagai referensi.
Tombol Kontrol TV (Terletak di bawah ikon ini)
* Dalam mode siaga:
Ketuk tombol kontrol TV untuk menyalakan TV.
* Dalam status operasional:
Ketuk tombol kontrol TV untuk menampilkan menu keyboard virtual berikut. Setelah itu, ketuk tombol kontrol TV untuk menggerakkan kursor dan memilih item yang diinginkan. Tekan lama (selama lebih dari 3 detik) tombol kontrol TV untuk masuk atau menjalankan item yang dipilih.

Remote Kontrol
Catatan:
1). Gambar hanya untuk referensi.
2). Gambar, tombol, atau fungsi remote kontrol dapat bervariasi tergantung pada wilayah, model, aplikasi, atau sumbernya.
3). Beberapa tombol terkait DTV mungkin tidak dapat dipakai karena tidak tersedianya sinyal DTV di beberapa area.
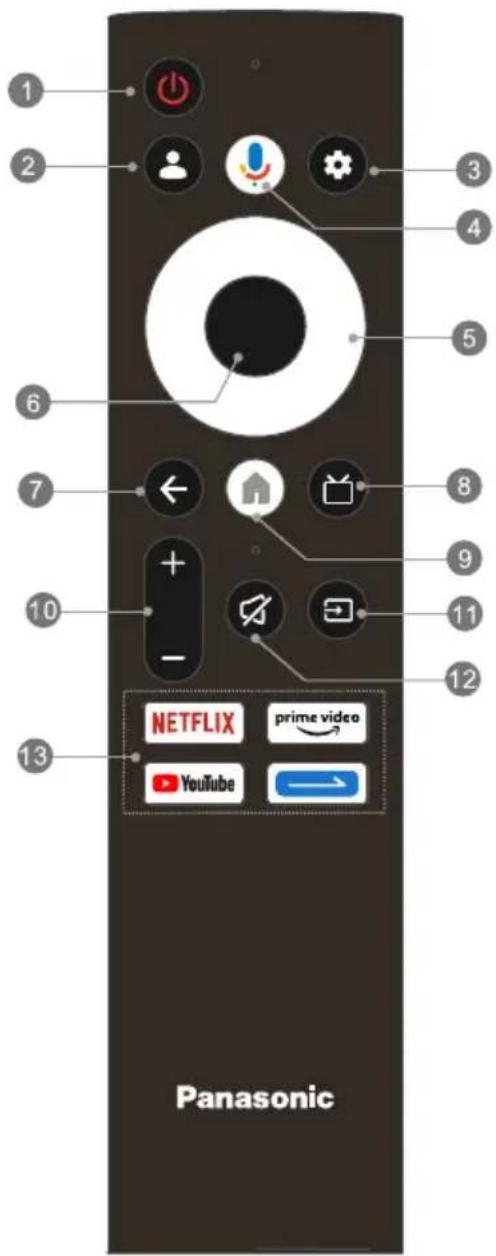
- DAYA ( ⏻ ):
Menyalakan TV atau mengalihkan ke modus siaga.
- Akun Pengguna ( ):
Kelola akun pengguna.
- PENGATURAN ( ⚙ ):
Tekan untuk membuka dasbor.
- MIC ( ):
Memulai bicara kepada Google Assistant dari TV.
- ATAS/BAWAH/KIRI/KANAN ( ^ / √ / < / > )
Menavigasi menu untuk memilih menu apa yang Anda inginkan.
- OK
Konfirmasi atau masukkan konten yang dipilih.
- KEMBALI (←):
Kembali ke menu pada tingkat atas.
- TV siaran langsung ( ☐ ):
Akses antarmuka EPG dalam mode DTV.
- BERANDA ( ) :
Mengakses halaman beranda.
- Volume Naik/Turun (+/-):
Meningkatkan atau mengurangi volume suara.
- SUMBER ( ⊙ ):
Tekan untuk masuk ke Sumber, Pintasan, dan Terbaru.
- BISU ( ≈ ):
Membisukan atau mengembalikan suara TV.
- Tombol Aplikasi:
Mengakses aplikasi tertentu secara langsung dan cepat.
Cara Memasangkan Remote Kontrol Bluetooth dengan TV
Catatan:
1) Gambar hanya untuk referensi.
2) Beberapa layar dapat bervariasi, tergantung pada versi perangkat lunak.
3) Ini adalah remote kontrol Bluetooth. Sebelum menggunakannya, silakan pasangkan terlebih dahulu dengan TV.
■ Pasangkan Remote Kontrol Bluetooth dengan TV
Tekan tombol Remote kontrol untuk masuk ke pemasangan dengan TV. Setelah terhubung, tampilan "Succeed" (Berhasil) akan muncul seperti gambar berikut ini.
natural_image
Dark image with a small rectangular object and faint dots, no visible text or symbols.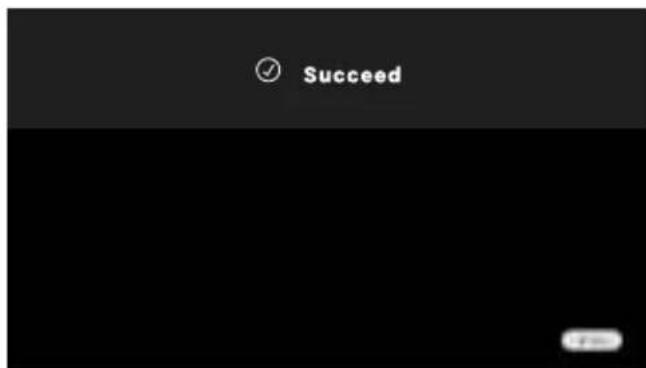
Pengaturan Awal
Saat Anda menyalakan TV untuk pertama kali, akan terdapat pemandu untuk menuntun Anda untuk menyelesaikan pengaturan awal berikut: Langkah 1: Tekan tombol ⚙️ untuk menghubungkan remote kontrol Bluetooth. Jika Anda tidak memiliki remote kontrol Bluetooth, lewati saja.
natural_image
Dark scene with a small device and a blue light source, no visible text or symbols
natural_image
Dark indoor scene with a small illuminated device and a window, no visible text or symbolsLangkah 2: Pilih menu bahasa yang Anda butuhkan.
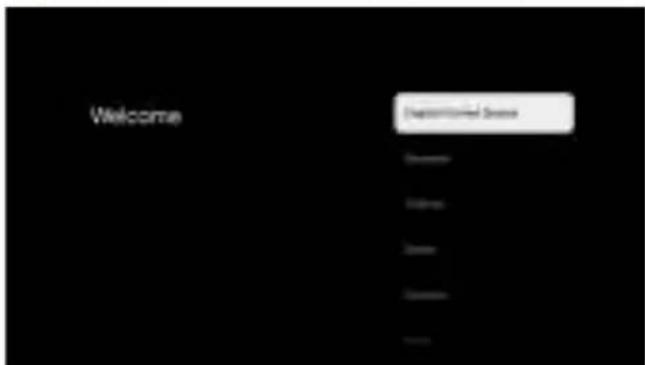
Langkah 3: Pilih untuk Mengatur Google TV atau Mengatur TV standar.
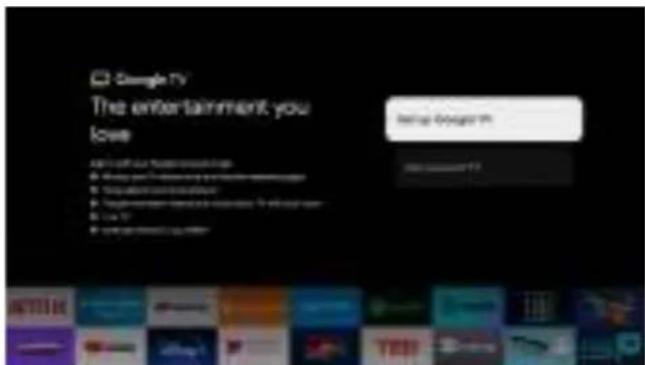
Langkah 4: Pilih menggunakan ponsel Android atau remote kontrol untuk memasukkan akun Google Anda.
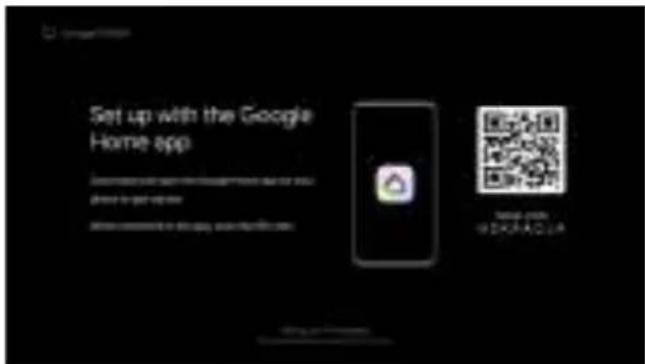
< Petunjuk untuk Mengatur TV dengan Ponsel Android Anda >
- Aktifkan fungsi Bluetooth ponsel Android Anda, kemudian cari dan buka aplikasi "Home" (Beranda) di ponsel Anda.
Catatan: Sebelum mengoperasikan langkah-langkah berikut, pertama-tama, gunakan Ponsel Android Anda untuk masuk ke Akun Google Anda dan buat beranda baru "House" (Rumah) atau nama lain yang Anda sukai.
- Klik + → Pengaturan perangkat → Perangkat baru.
- Pilih "House" (Rumah) yang telah dibuat, klik "Next" (Berikutnya), cari perangkat Google TV, lalu klik "Yes" (Ya) ke langkah berikutnya.
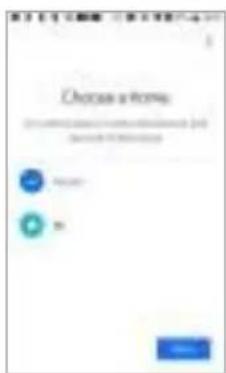
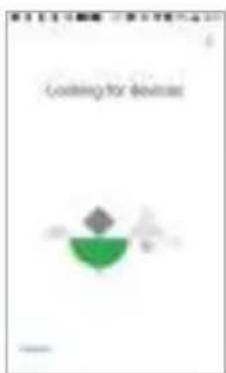
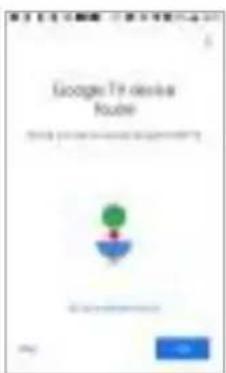
- Pindai kode QR atau masukkan kode Pengaturan yang ditampilkan di perangkat Google TV untuk menyambungkan perangkat Google TV.
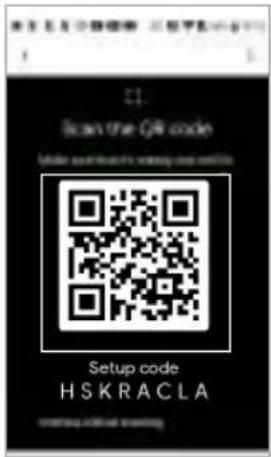
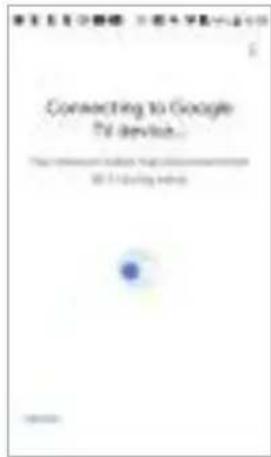
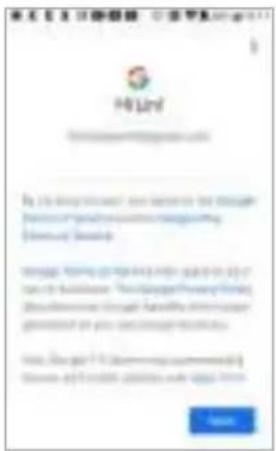
- Baca dan setujui persyaratan layanan dan kebijakan privasi Google. Ikuti panduan untuk memilih atau membuat lokasi untuk Google TV.
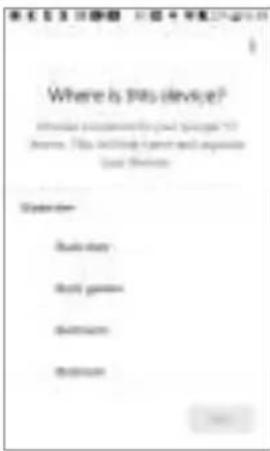
• Sambungkan ke Wi-Fi.
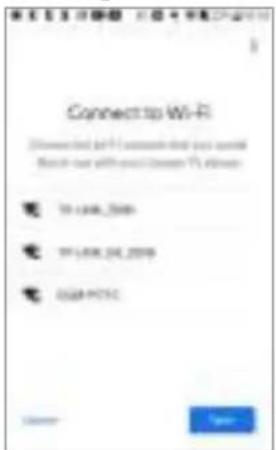
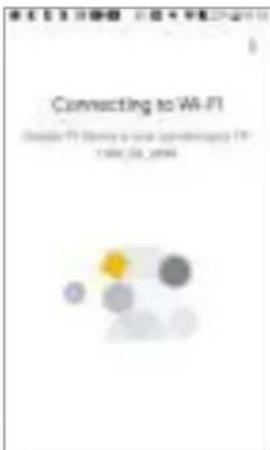
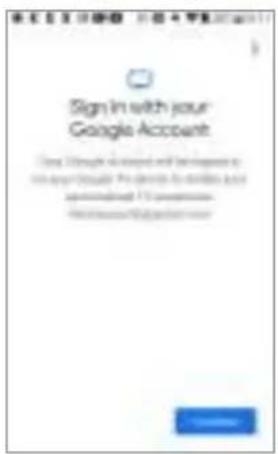
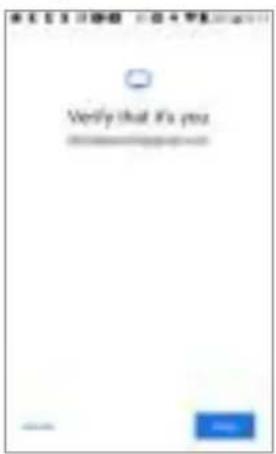
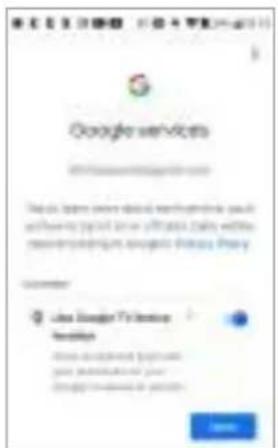
- Ikuti panduan langkah demi langkah untuk masuk ke Google dengan Akun Google Anda.
Catatan:
1) Gambar hanya untuk referensi.
2) Beberapa tampilan layar mungkin berbeda,
tergantung pada pengoperasian Anda melalui ponsel Android.
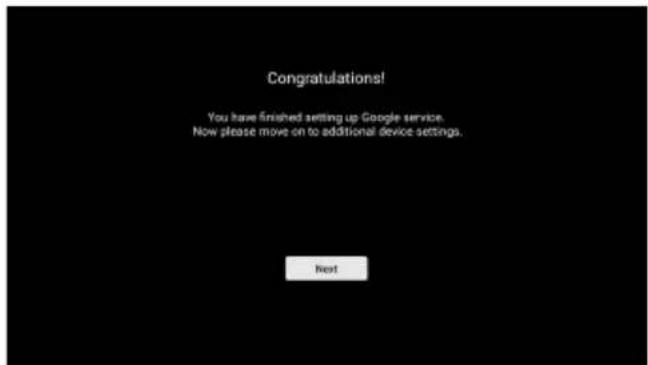
Langkah 5: Ikuti petunjuk untuk menyelesaikan pengaturan layanan Google.
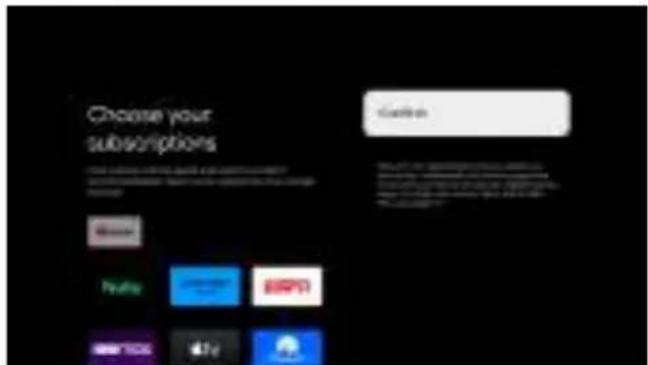
Langkah 6: Baca perjanjian lisensi pengguna akhir.
![End User License Agreement This agreement mainly declares items regarding software usage specifications, responsibilities of third parties, legal statements, privacy policy, limitation of our liability and so on. Please check ### View Detail to carefully read and fully understand all items of the agreement. ✓ [have read and agreed to the whole agreement] Next](/content/2026/05/1013183/images/dba256160172bf3ec73873895caaab6e498dbbb76eb81d7814e1056432b51a02.jpg)
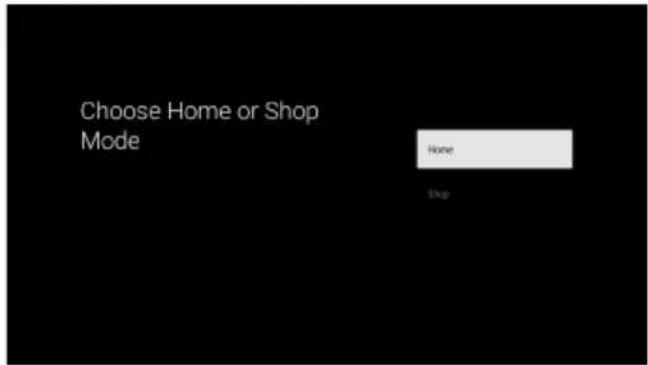
Langkah 7: Pilih lingkungan penggunaan TV antara "Home" (Rumah) dan "Shop" (Toko).
Catatan: Mode "Rumah" direkomendasikan untuk tampilan rumah, sedangkan mode "Toko" digunakan untuk mendemonstrasikan TV di toko dan sejenisnya. Mode "Toko" akan menghabiskan lebih banyak energi.
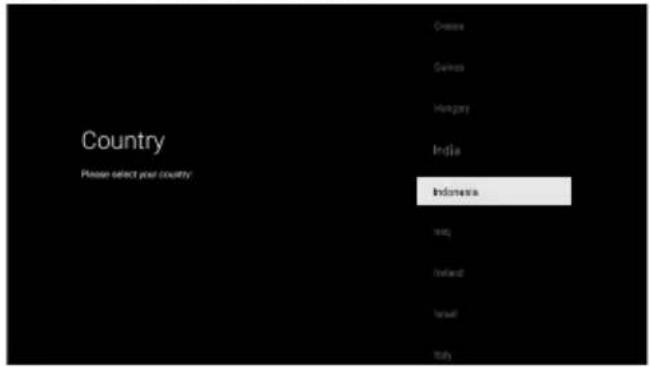
Langkah 8: Pilih negara Anda.
Langkah 9: Pilih sumber TV.
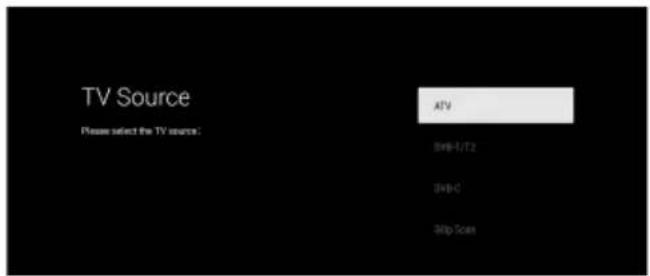
Langkah 10: Pilih apakah akan memulai "Channel Scan" (Pemindaian Saluran).
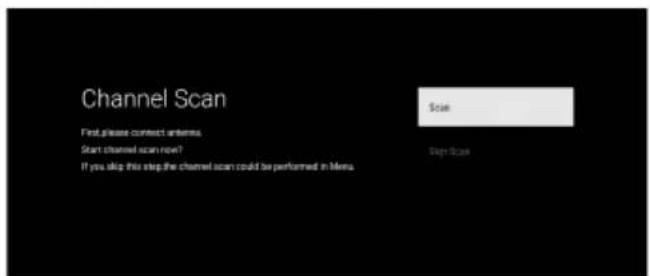
Langkah 11: Instal aplikasi Anda dan nikmati Google TV Anda.
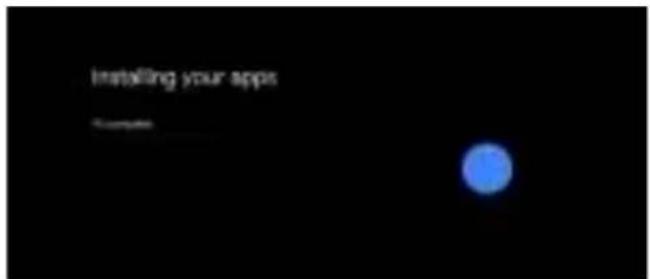
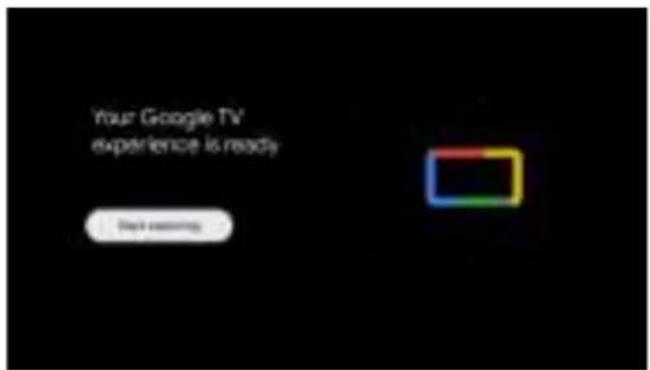
Catatan:
1) Pilihan yang berbeda dengan layar yang berbeda. Gambar-gambar berikut ini hanya sebagai referensi, harap merujuk ke layar Google TV Anda yang sesungguhnya.
2) Pengaturan awal dapat berubah tanpa pemberitahuan, yang bergantung pada persyaratan Google. Anda harus menyelesaikan semua pengaturan awal sesuai dengan yang ditunjukkan di layar.
3) Jika Anda ingin memulai ulang pengaturan awal setelah pengaturan pertama, harap tekan tombol "PENGATURAN", lalu masuk ke Pengaturan → Sistem → Tentang → Atur Ulang.
Memilih Sumber Masukan
- Tekan tombol SOURCE untuk mengakses daftar sumber masukan.
- Tekan tombol KIRI/KANAN untuk memilih sumber masukan yang diinginkan.
- Tekan tombol OK untuk mengakses sumber masukan yang dipilih.
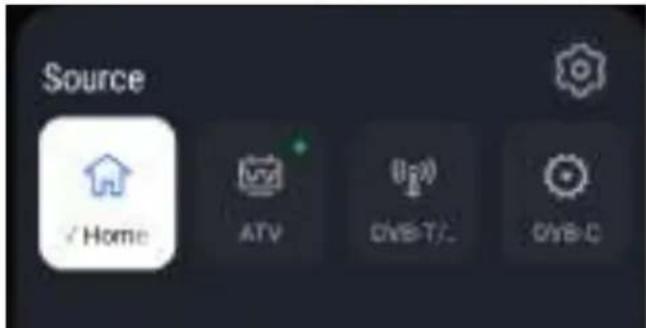
Catatan:
1) Gambar hanya untuk referensi.
2) Sumber Google TV Home akan tersedia hanya jika Anda telah memperbarui sistem TV, sambungkan TV ke jaringan, dan masuk ke akun Google Anda.
Pengaturan
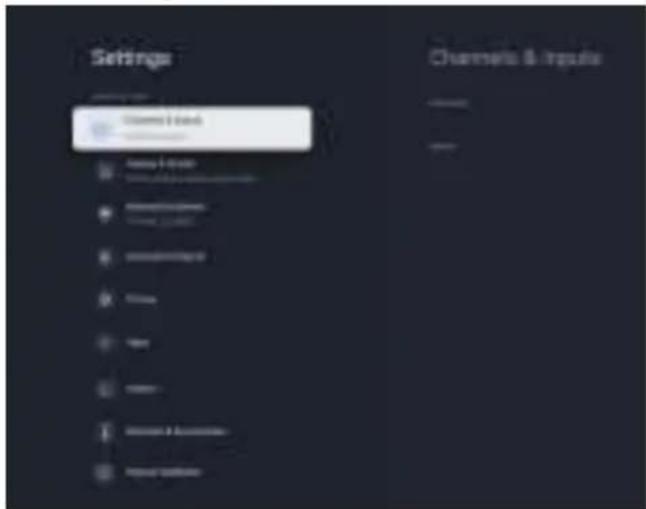
Langkah 1: Tekan tombol PENGATURAN untuk masuk ke pengaturan.
Langkah 2: Tekan tombol OK untuk ke pengaturan umum.
Langkah 3: Tekan tombol ATAS/BAWAH/KIRI/KANAN dan OK untuk memilih dan menyesuaikan item.
Langkah 4: Tekan tombol KEMBALI untuk kembali ke menu bagian atas.
Catatan:
1) Gambar hanya untuk referensi.
2) Beberapa pengaturan layar mungkin berbeda, tergantung pada pengoperasian Anda melalui ponsel Android.
Saluran dan Input: Pilih untuk masuk ke Saluran atau Input.
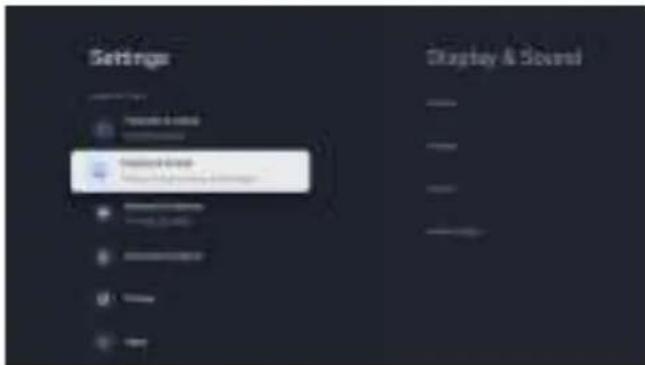
Layar & Suara: Mengatur Gambar, Layar, Suara, Output audio
Gambar:
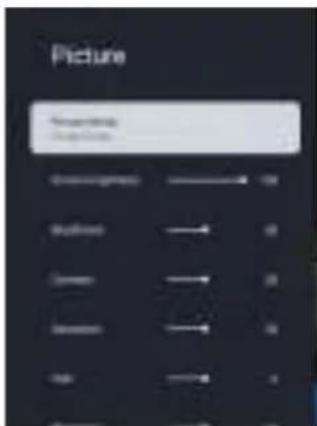
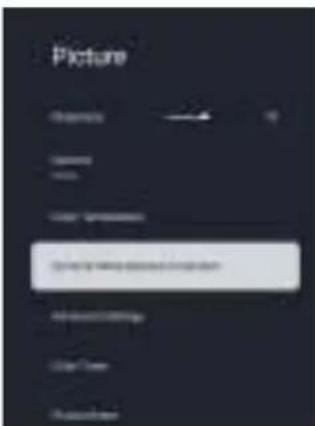
| ModeGambar | Pilih mode gambar. Pilihannya adalah Cerah, Standar, Olahraga, Pengguna, Film, dan sebagainya, yang dapat bervariasi berdasarkan sumber input yang berbeda. |
| Kecerahan layar | Sesuaikan tingkat kecerahan layar. |
| Kecerahan | Menyesuaikan kecerahan gambar. |
| Kontras | Menyesuaikan perbedaan antara area yang terang dan gelap gambar. |
| Saturasi | Menyesuaikan warna-wami dari relatif warna terhadap kecerahannya sendiri. |
| RONA | Menyesuaikan rona warna gambar. |
| Ketajaman | Menyesuaikan tepian gambar. |
| Gamma | Menyesuaikan intensitas cahaya dari gambar asil.Pilihannya antara lain Gelap, Tengah, dan Cerah. |
| Suhu Warna | Menyesuaikan nada warna secara keseluruhan pada gambar. |
| Koreksi Keseimbangan Putih 20 Titik | Sesuaikan keseimbangan putih |
| Pengaturan Lanjutan | Mengurangi Noise digital, menetapkan kontrol kontras lokal, dll. |
| Pengatur Warna | Sesuaikan Rona Warna, Saturasi, dan Kecerahan. |
| Atur Ulang Gambar | Mengatur ulang pengaturan gambar. |
Layar:
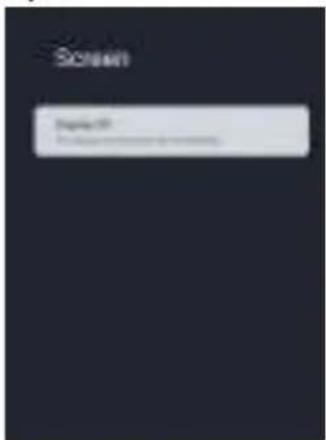
| Tampilan Mati | Matikan tampilan. |
Suara:
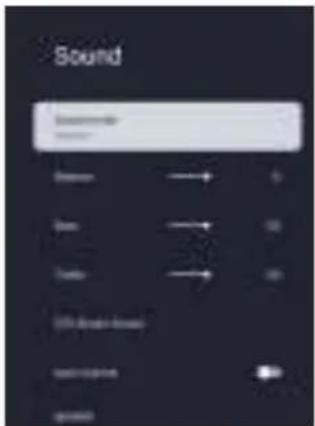
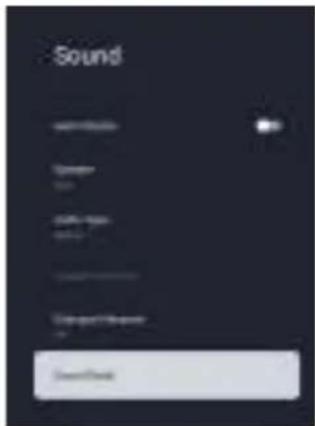
| Mode Suara | Memilih mode suara. Pilihannya antara lain Standar, Musik, Olahraga, dan Film. |
| Keseimbangan | Mengontrol keseimbangan suara antara speaker kiri dan kanan. |
| Bas | Sesuaikan frekuensi rendah suara. |
| Treble | Sesuaikan frekuensi tinggi suara. |
| DTS Studio Sound | Nyalakan atau matikan sistem suara DTS Studio Sound. |
| Volume Otomatis | Aktifkan untuk menyesuaikan volume suara secara otomatis berdasarkan sinyal masukan. |
| Speaker | Menyalakan atau mematikan speaker TV. |
| Jenis Audio | Memilih jenis keluaran audio. Pilihannya antara lain Normal dan Penglihatan Terganggu. |
| Gangguan Penglihatan | Sesuaikan Speaker dan Volume untuk membantu pemirsa yang mengalami gangguan penglihatan dapat memahami dan menikmati program. Fitur ini hanya tersedia setelah “Gangguan Penglihatan” dipilih di “Jenis Audio”. |
| Penyempurna Dialog | Pilih Penyempurna Dialog, pilihannya adalah Mati, Rendah, Sedang dan Tinggi. |
| Atur Ulang Suara | Mengatur ulang pengaturan suara. |
Output audio:
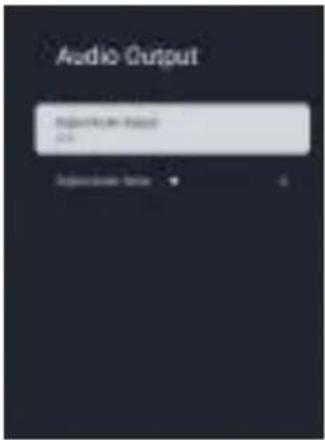
| Output Audio Digital | Mengatur output Audio Digital, pilihannya adalah Mati, Otomatis, Dolby Digital, PCM, dll. |
| Penundaan Audio Digital | Mengatur nilai Penundaan Audio Digital. |
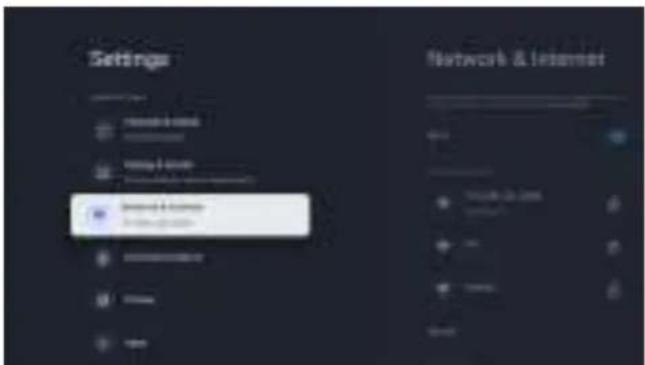
Jaringan & Internet: Sambungkan TV ke jaringan nirkabel atau berkabel.
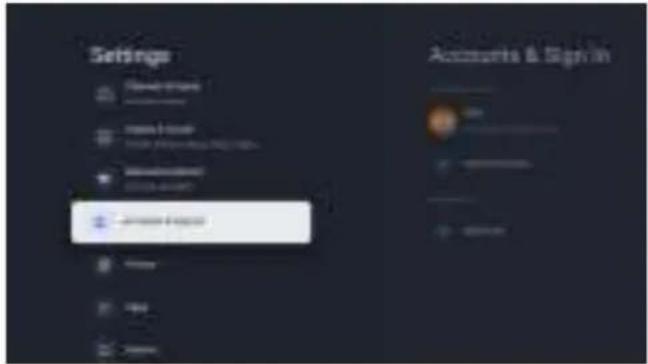
Akun & Masuk: Kelola Akun Google Anda.
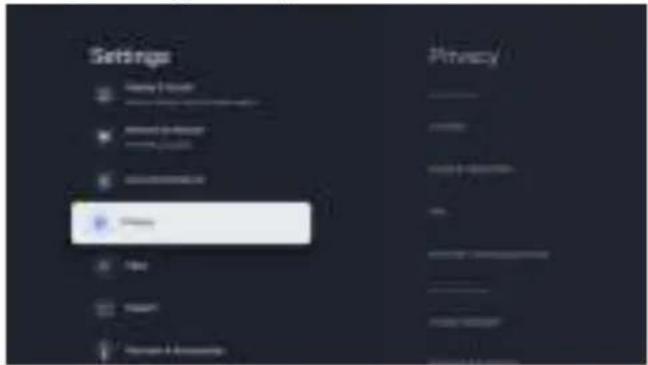
Privasi: Tetapkan Pengaturan Perangkat, Pengaturan akun, dan Pengaturan aplikasi.
Aplikasi: Menampilkan daftar aplikasi terakhir yang dibuka dan semua aplikasi yang terinstal. Mengatur izin aplikasi tertentu.
Sistem: Mengatur sistem.
Sistem:
| Aksesibilitas | Mengatur Keterangan, Teks, Pintasan Aksesibilitas, TalkBack, dll. |
| Tentang | Pembaruan sistem, Informasi perangkat (Termasuk versi perangkat lunak), Pengaturan ulang pabrik, dll. |
| Tanggal & Waktu | Mengatur tanggal, waktu, dan zona waktu. |
| Bahasa | Pilih bahasa yang Anda inginkan. |
| Keyboard | Kelola Keyboard. |
| Penyimpanan | Menampilkan informasi penyimpanan perangkat. |
| Mode sekitar | Pilih saluran foto, pengaturan lebih lanjut mengenai Cuaca, Waktu, Data foto pribadi, dll. |
| Daya & Energi | Pilihan Daya berdasarkan aktivitas, Penghemat energi, Pengatur waktu tidur, dll. |
| Transmisi | Kontrol notifikasi transmisi. |
| Suara sistem | Saat mengoperasikan Remote Kontrol, suara singkat akan muncul dari perangkat. |
| Kesehatan | Pilihannya adalah mode Malam, Perlindungan Mata dan Kontrol Volume Otomatis. |
| Mode belanja | Pilih mode Toko atau Beranda. |
| Nyalakan ulang | Nyalakan ulang perangkat. |
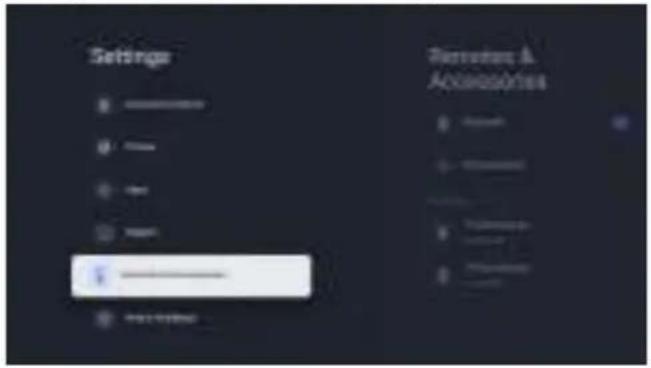
Remote & Aksesori: Mengaktifkan atau menonaktifkan perangkat Bluetooth atau Memasangkan aksesori lain.
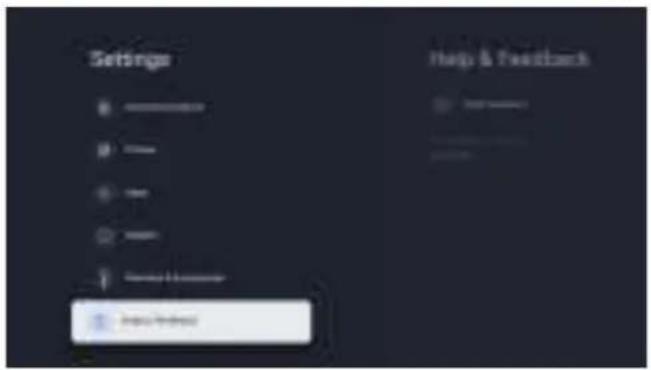
Bantuan & Masukan: Kirimkan umpan balik ke Google.
Bab 3: Fitur Cerdas
Halaman Utama
Harap tekan tombol Beranda ( ) untuk masuk ke halaman utama guna menikmati fungsi berikut.
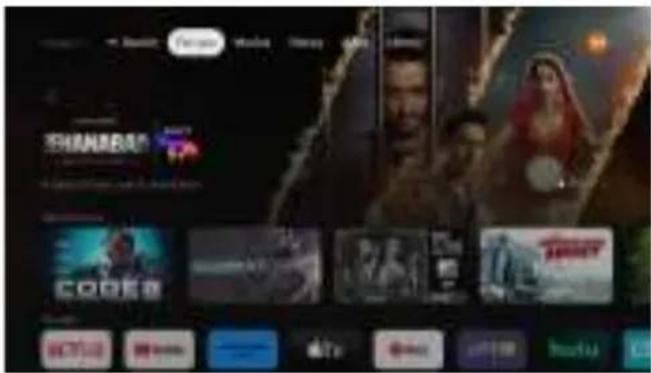
Catatan: Gambar hanya untuk referensi.
- Pencarian: Gunakan Google Assistant atau ketikkan kata-kata untuk mencari apa yang Anda inginkan.
- Untuk Anda: Merekomendasikan daftar konten Pilihan teratas, Aplikasi Anda, Lanjutkan menonton, Film populer, dll.
- Film: Menampilkan Film populer, Film baru, Film dari daftar tontonan Anda, Sedang tren di Google, dll.
- Acara: Menampilkan Acara populer, Acara baru, Acara dari daftar tontonan Anda, Sedang tren di Google, dll.
- Aplikasi: Menampilkan Aplikasi Anda, Kategori aplikasi, Aplikasi dari perangkat saya yang lain, dll.
- Perpustakaan: Menampilkan film dan acara yang dibeli, Daftar tontonan, dll.
Catatan:
1) Fungsi atau konten "Home Page" (Halaman Utama) dapat berbeda di setiap negara atau model.
2) Sebelum menggunakan fungsi jaringan di aplikasi jaringan seperti halaman utama dan semacamnya, harap hubungkan TV ke jaringan terlebih dahulu.
3) Hak cipta Ikon dimiliki oleh penyedia aplikasi.
Google Assistant
■ Google Assistant tersedia di Google TV Anda sebagai pembantu pribadi virtual Anda. Tekan tombol MIC pada remote kontrol Anda untuk memulai dan menikmatinya. Google Assistant sangat luar biasa sehingga Anda akan langsung menyukainya! Dengan Google Assistant, Anda bisa mendapatkan apa yang Anda inginkan dengan mudah dan cepat hanya menggunakan kekuatan suara Anda. Tidak ada pengetikan teks yang rumit atau membosankan, dan apa yang perlu Anda Iakukan hanyalah berbicara kepada TV Anda.
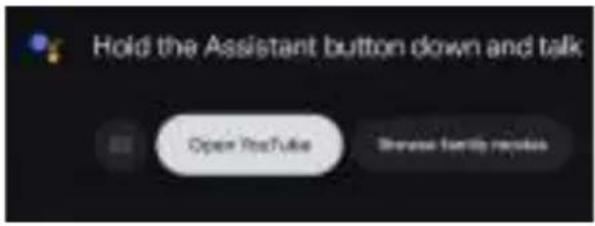
■ Sebelum menggunakan Google Assistant, harap pastikan bahwa Anda telah menghubungkan TV ke jaringan, dan bahwa Anda telah berhasil memasangkan remote kontrol Bluetooth Anda dengan TV, serta Anda telah masuk ke Akun Google Anda.
Catatan:
1) Gambar hanya untuk referensi.
2) Google Assistant hanya tersedia di beberapa wilayah atau beberapa bahasa. Sebelum menggunakannya, pastikan Anda telah berhasil memasangkan remote kontrol Bluetooth Anda dengan TV.
Chromecast Built-In
■ Definisi Chromecast Built-In
"Chromecast Built-In" adalah teknologi casting yang dikembangkan oleh Google yang memungkinkan perangkat seluler atau komputer pribadi Anda untuk memulai dan mengontrol pemutaran konten audio/video di TV.
■ Cara Cast Konten
"Chromecast Built-In" menawarkan dua metode untuk melakukan cast konten:
* Yang pertama menggunakan perangkat seluler dan aplikasi web yang mendukung teknologi Chromecast Built-In.
* Yang kedua memungkinkan pencerminan konten dari browser web "Google Chrome" (dengan ekstensi cast) yang dijalankan di komputer pribadi. Dalam kedua metode tersebut, pemutaran diawali melalui ikon cast "☐" pada perangkat pengirim.
■ Cast Layar/Audio (seperti Google Home)
Cast layar dan audio perangkat seluler Anda ke TV.
Langkah 1: Sambungkan ponsel dan TV ke jaringan nirkabel yang sama.
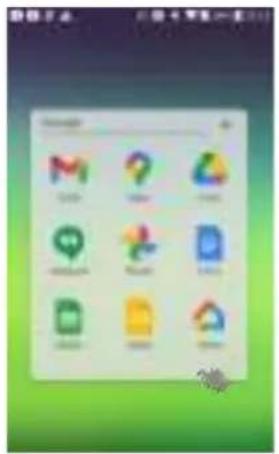
Langkah 2: Pilih dan akses aplikasi "Home" (Beranda) dari ponsel Anda, lalu klik "Bedroom TV" (TV Kamar Tidur) yang sudah ada, yang diatur di Pengaturan Awal.
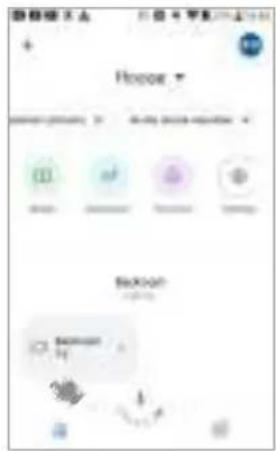
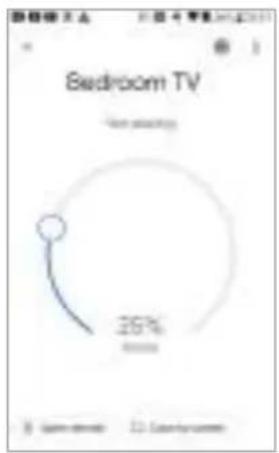
Langkah 3: Klik "Cast my screen" (Transmisikan layar saya), konten pada layar ponsel Anda telah ditransmisikan ke layar TV. Anda dapat mentransmisikan gambar, audio, film, dll. ke layar Google TV. Klik "Stop mirroring" (Hentikan pencerminan) untuk menghentikan transmisi.
pie
Bedroom TV | Temperature | Percentage (%) | | :--- | :--- | | 26 | 26 |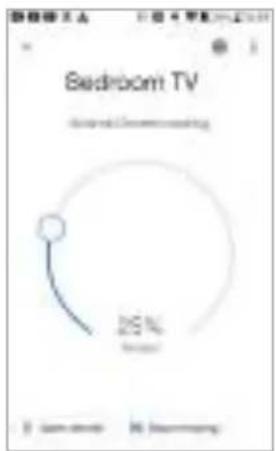
pie
| Category | Percentage (%) | | :--- | :--- | | Bedroom TV | 22 |■ Cast stream Langsung dan Video (seperti YouTube) Cast stream langsung dan video perangkat seluler Anda ke TV.
Langkah 1: Sambungkan ponsel dan TV ke jaringan nirkabel yang sama.
Langkah 2: Pilih dan akses aplikasi "YouTube" dari ponsel Anda.
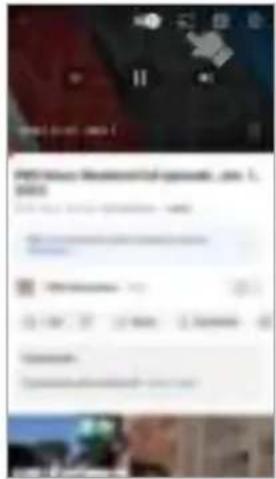
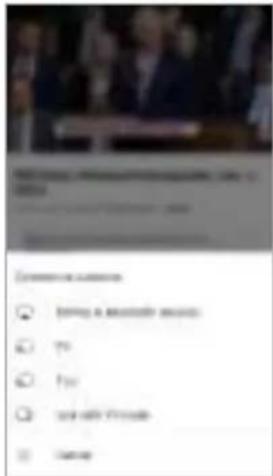
Langkah 3: Pilih konten yang Anda sukai, klik ikon transmisi "☐" dan sambungkan ke perangkat yang Anda inginkan, lalu untuk mentransmisikan konten ke TV agar dapat diputar di TV, alih-alih di ponsel Anda. Klik kembali ikon transmisi "☐" untuk menampilkan menu (termasuk Pencarian suara, Remote, Tutup dan Putuskan), Anda dapat memilih pengoperasian yang diinginkan.
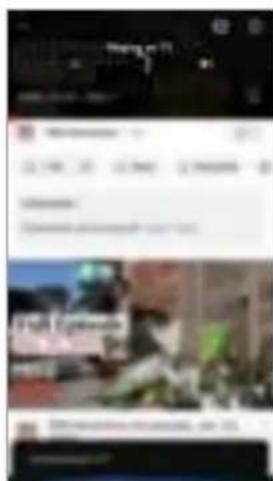
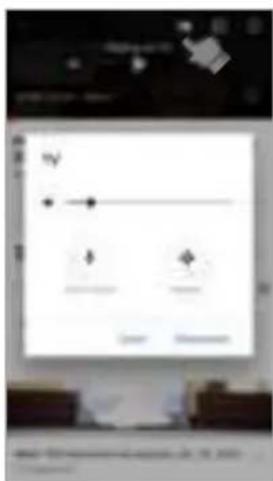
(Fungsi ini mungkin tidak tersedia tergantung pada remote kontrol yang digunakan) Tombol di bawah ini dapat Anda gunakan pada remote kontrol saat memutar video:
| OK | Mainkan/Jeda |
| < / > | Mundur Cepat/Maju Cepat |
Catatan:
1) Gambar hanya sebagai referensi dan harap lihat layar ponsel Android Anda yang sebenarnya untuk gambar yang jelas dan konten yang benar.
2) Untuk fitur cast YouTube di atas, ponsel pintar & TV harus terhubung pada jaringan yang sama.
Penolakan tentang Menggunakan Google TV
Konten aplikasi dan layanan jaringan dikontrol oleh penyedia aplikasi jaringan melalui fasilitas jaringan dan transmisi, yang dapat berubah, ditangguhkan, dihapus, diakhiri atau diganggu, atau akses tidak valid setiap saat tanpa pemberitahuan lebih lanjut di mana produsen tidak dapat mengontrol atau diberi tahu mengenai perubahan tersebut. Produsen membuat pernyataan lebih lanjut bahwa produsen melepaskan tanggung jawab atau kewajiban yang timbul dari kegagalan pelanggan untuk menggunakan konten dan layanan aplikasi jaringan yang disebabkan oleh, termasuk namun tidak terbatas pada, kegagalan koneksi jaringan atau jalur komunikasi, pembaruan atau perubahan teknologi, penangguhan, gangguan, penghentian, penonaktifan, atau penghapusan konten atau layanan apa pun oleh penyedia aplikasi jaringan, dll.
Catatan:
- Beberapa perangkat penyimpanan USB mungkin tidak kompatibel untuk beroperasi dengan lancar dengan TV ini.
- Cadangkan seluruh data di perangkat penyimpanan USB jika data hilang karena kecelakaan yang tidak terduga.
- Kami tidak bertanggung jawab atas kehilangan karena penyalahgunaan atau kegagalan fungsi. Pencadangan data merupakan tanggung jawab konsumen.
- Untuk file berukuran besar, kecepatan pemuatan dapat sedikit lama.
- Kecepatan pengenalan perangkat penyimpanan USB mungkin tergantung pada masing-masing perangkat.
- Ketika menghubungkan atau melepas perangkat penyimpanan USB, pastikan bahwa TV tidak dalam mode USB, jika tidak, perangkat penyimpanan USB atau file yang tersimpan di dalamnya dapat rusak.
- Harap hanya menggunakan perangkat penyimpanan yang diformat dalam sistem file FAT16, FAT32, atau NTFS yang tersedia dengan sistem operasi Windows. Jika perangkat penyimpanan diformat sebagai program utilitas berbeda yang tidak didukung oleh Windows, perangkat mungkin tidak dikenali.
- Saat menggunakan Drive Hard Disk USB yang membutuhkan sumber daya listrik, pastikan daya terukur tidak melebihi arus yang tertera di terminal USB. Jika daya hard Disk USB melebihi arus yang tertera, sistem TV akan diubah ke mode siaga, lalu, Anda harus mencabut Hard Disk USB dan memulai ulang sistem TV.
- Pesan "File Tidak Didukung" akan muncul jika format file tidak didukung atau rusak.
- Gambar besar FHD membutuhkan waktu lebih lama untuk diproses yang tidak disebabkan oleh TV. Harap bersabar menunggu.
• TV ini mungkin tidak mendukung beberapa file multimedia yang diubah dan ditingkatkan karena perubahan format pengkodean atau kemajuan teknis lainnya. - Gunakan perangkat seluler berkualitas tinggi untuk merekam program HD, jika tidak, video akan macet selama pemutaran. Cadangkan seluruh data di perangkat penyimpanan USB jika data hilang karena kecelakaan yang tidak terduga.
- Kami tidak bertanggung jawab atas kehilangan karena penyalahgunaan atau kegagalan fungsi. Pencadangan data merupakan tanggung jawab konsumen.
-
Jangan nonaktifkan TV selama proses peningkatan perangkat lunak, jika tidak, maka TV dapat tidak bekerja, dan pelanggan harus bertanggung jawab.
-
Produsen tidak menjamin pengoperasian browser web pihak ketiga. Aplikasi pihak ketiga yang telah diunduh dan dipasang dari Google Play store didukung oleh perusahaan atau pengembang yang memproduksi aplikasi tersebut.
- Browser mungkin tidak mendukung beberapa halaman web atau video dikarenakan jaringan, wilayah, format, atau penyedia layanan internet, yang tidak ada hubungannya dengan TV.
- Setiap merek dagang yang ditunjukkan pada TV ini merupakan milik masing-masing pemegang hak merek dagang, dan seluruh hak dimiliki oleh mereka.
- Browser dapat berhenti merespon, jika ukuran situs web terlalu besar.
- Untuk pengalaman yang lebih baik & lebih mulus, silakan hapus riwayat browser web secara teratur.
Pemutar Multimedia
■ Persiapan
- Masukkan perangkat USB Anda di TV untuk melihat foto dan film yang kompatibel di layar TV atau memutar musik yang kompatibel melalui TV.
- Jika hard disk USB yang tersambung tidak memiliki sumber daya eksternal, hard disk mungkin tidak terdeteksi. Pastikan untuk menyambungkan sumber daya eksternal.
- Untuk menghindari hilangnya data pada perangkat USB Anda atau merusak perangkat USB Anda, disarankan agar Anda mencadangkan semua data pada perangkat USB Anda.
- Tampilan menu kontrol di pemutar media mungkin berbeda menurut wilayah atau model yang berbeda. Dan harap anggap TV Anda yang sebenarnya sebagai standar.
- Jika Anda ingin mengeluarkan perangkat USB Anda, silakan keluar dari mode USB terlebih dahulu.
- Sebagai petunjuk pada penggunaan perangkat USB Anda, lihat manual pemilik perangkat USB Anda.
- Jangan pernah melepas perangkat USB atau mematikan TV saat menggunakan perangkat USB. Melepas perangkat USB dapat menyebabkan hilangnya data atau kerusakan pada perangkat USB atau TV.
- Jenis perangkat USB tertentu mungkin tidak kompatibel dengan TV.
■ Operasi Media
Langkah 1: Sambungkan perangkat USB ke TV.
Langkah 2: Tekan tombol SUMBER untuk masuk ke Pintasan → Perangkat USB.
Langkah 3: Tekan tombol ATAS/BAWAH/KIRI/KANAN dan OK untuk memilih dan memutar file media yang diinginkan.
Langkah 4: Tekan tombol OK untuk memulai pemutaran.
Langkah 5: Tekan tombol KEMBALI untuk keluar dari pemutaran.
■ Menonton Film
Sambil menonton film, tekan tombol berikut untuk mengontrol pemutaran film.
| Tombol | Fungsi |
| OK | Tanpa bilah kendali, munculkan bilah kendali. |
| Dengan bilah kontrol, jeda atau putar. | |
| ^ | Akses pengaturan menu film. |
| √ | Tampilkan daftar putar film. |
| < / > | Mundur cepat atau maju cepat. |
■ Putar Musik
Saat memutar musik, tekan tombol berikut untuk mengontrol pemutaran musik.
| Tombol | Fungsi |
| OK | Jeda atau putar. |
| ^ | Tampilkan Daftar Putar dan Urutan Putar. |
| √ | Tampilkan daftar putar musik. |
| < / > | Mundur cepat atau maju cepat. |
■ Menelusuri Foto
Sambil menelusuri foto, tekan tombol berikut untuk mengontrol pemutaran foto.
| Tombol | Fungsi |
| OK | Akses pengaturan menu foto. |
| ^/√ | Tampilkan daftar putar foto. |
| < / > | Loncat ke foto sebelumnya atau berikutnya. |
■ Format File yang Didukung di Pemutar Multimedia
| Jenis | Format |
| Video | Kode Video: H.263, H.264, HEVO/H.265, VP8, VP9, AV1, MPEG1/2, MPEG4 |
| Nama Ekstensi File: avl, cat, mpeg, mpe, mpg, vob, mp4, mov, miv, ts, tp, trp, m2ts, mls, mfv, f4v, flx, asf, 3gp, webm | |
| Audio | Kode Audio: AC3(DD), EAC3(DD+), HEAAC |
| Nama Ekstensi File: mp3, AAC, m4a, fac, amr, mp2, mpga, agg, AC3, wav | |
| Foto | JPEG, PNG, BMP |
Catatan:
-
Dalam kondisi berikut, sistem tidak dapat mendekodekan file dan file tidak dapat diputar secara normal:
-
Parameter file, seperti piksel gambar, laju kode file audio dan video, laju pengambilan sampel file audio, melebihi batas sistem;
- Format file tidak cocok atau file rusak.
Catatan: Laju kode yang didukung sistem ini tidak melebihi 20Mbps.
- Steker panas: Jangan diputus ketika sistem sedang membaca atau mengirim data, hindari merusak sistem atau perangkat.
- Perhatikan catu daya perangkat saat Anda menggunakan hard disk seluler atau kamera digital. Jika catu daya tidak mencukupi atau tidak stabil, Anda mungkin mengalami masalah selama operasi atau tidak dapat beroperasi sama sekali. Dalam hal ini, silakan mulai ulang perangkat, atau cabut perangkat dan pasang kembali, dan pastikan catu dayanya normal.
- Sistem mendukung perangkat USB1.1, USB2.0, dan USB3.0 standar, seperti USB standar, pemutar MP3, hard disk mobile, dll.
- Untuk mendapatkan kualitas audio dan video yang lebih baik, disarankan untuk menggunakan perangkat eksternal yang sesuai dengan standar USB2.0.
- Saat memutar video dengan rasio kompresi tinggi, fenomena ini, seperti kemacetan gambar dan respons lama menu, adalah normal.
- Untuk beberapa perangkat USB dengan catu daya, seperti hard disk berukuran besar, MP4, dll., Disarankan menggunakannya dengan daya untuk menghindari kekurangan daya listrik. -Parameter file, seperti piksel gambar, tingkat kode file audio dan video, tingkat sampling file audio, melampaui batasan dari sistem.
- File mungkin tidak dapat diputar secara normal dikarenakan parameternya, seperti piksel gambar, laju kode file audio dan video, laju pengambilan sampel file audio, melebihi batas sistem.
- Beberapa file mungkin tidak dapat diputar meskipun memenuhi ketentuan ini.
- Perangkat tersebut mungkin tidak dapat digunakan dengan TV ini jika nama file atau folder diubah.
Bagian 4: Informasi Teknis
Perawatan
Pertama, lepaskan steker listrik dari stopkontak.
Perawatan rutin:
Lap permukaan panel layar, kabinet, atau alas dengan lembut menggunakan kain lembut untuk membersihkan kotoran atau sidik jari.
Untuk kotoran membandel:
Pertama-tama, bersihkan debu di permukaan. Basahi kain lembut dengan air bersih atau deterjen netral (1 komponen deterjen dengan 100 komponen air).
Peras kain, dan lap permukaannya.
Akhirnya, bersihkan semua kelembaban.
Steker listrik
Usap steker listrik dengan kain kering secara berkala. Embun dan debu dapat menyebabkan kebakaran atau sengatan listrik.

Peringatan
Jangan menggunakan kain keras atau menggosok permukaan terlalu keras, karena menyebabkan goresan pada permukaan.
- Berhati-hatilah agar permukaan TV tidak terkena air atau cairan detergen di dalam TV karena dapat menyebabkan produk rusak.
- Berhati-hatilah agar permukaan tidak terkena zat pengusir serangga, pelarut, pengencer atau zat yang mudah menguap lainnya. Hal tersebut dapat menurunkan kualitas permukaan atau menyebabkan pengelupasan cat.
- Permukaan panel layar dirawat secara khusus dan mungkin mudah rusak. Berhati-hatilah untuk tidak mengetuk atau menggores permukaan dengan kuku Anda atau dengan benda keras lainnya.
- Jangan biarkan kabinet dan alas membuat kontak dengan karet atau bahan PVC untuk waktu yang lama. Hal tersebut dapat menurunkan kualitas permukaan layar TV.
Pemecahan Masalah
Sebagian besar masalah yang Anda jumpai pada TV Anda dapat diperbaiki dengan melihat daftar pemecahan masalah berikut.
Tidak ada gambar, tidak ada suara
• Periksa apakah sekring atau pemutus sirkuit berfungsi.
- Colokkan perangkat listrik lain ke stopkontak untuk memastikannya berfungsi atau menyala.
- Steker listrik dan stopkontak tidak dapat tersambung dengan baik.
• Periksa sumber sinyal.
Tidak ada warna
- Sesuaikan saturasinya.
Remote kontrol tidak berfungsi
• Ganti baterai.
• Baterai tidak terpasang dengan benar.
• Daya utama tidak tersambung.
Tidak ada gambar, suara normal
- Sesuaikan kecerahan dan kontras.
Gambar normal, tidak ada suara
- Tekaan tombol Vol+ untuk menambah volume.
- Jika volume disetel ke bisu, tekan tombol bisu untuk mengembalikan suara.
Gangguan frekuensi radio
Gangguan tersebut menghasilkan suara bergerak atau goresan diagonal, pada beberapa kasus, kehilangan kontras dalam gambar. Cari tahu dan hapus sumber gangguan radio.
Remote kontrol bluetooth tidak dapat dipasangkan
- Coba kembali untuk memasangkan remote kontrol beberapa kali.
• Ganti baterai.
Tidak dapat masuk ke akun Google
• Coba masuk kembali.
- Gunakan perangkat lain untuk memeriksa apakah ada yang salah dengan jaringannya.
- Gunakan perangkat Android lainnya untuk memeriksa apakah ada yang salah dengan server Google.
Tidak dapat menggunakan Google Assistant
- Periksa apakah remote kontrol Bluetooth telah berhasil dipasangkan.
- Gunakan perangkat lain untuk memeriksa apakah ada yang salah dengan jaringannya.
- Gunakan perangkat Android lainnya untuk memeriksa apakah ada yang salah dengan server Google.
Spesifikasi
| Nomer Merek | TH-43NX600G | TH-50NX600G | TH-55NX600G | TH-65NX600G | |
| Sumber Daya | 110 - 240 V~50/60 Hz | 110 - 240 V~50/60 Hz | 110 - 240 V~50/60 Hz | 110 - 240 V~50/60 Hz | |
| Konsumsi Daya | Peringkat Daya | 100 W | 120 W | 150 W | 200 W |
| Kondisi Siaga | < 0.5 W | < 0.5 W | < 0.5 W | < 0.5 W | |
| Panel Layar | Ukuran Layar Terlihat | 108 cm | 126 cm | 139 cm | 164 cm |
| Resolusi | 3840 X 2160 | 3840 X 2160 | 3840 X 2160 | 3840 X 2160 | |
| Dimensi (L X B X H) | dengan Alas hanya TV | 95.7 X 23.3 X 62.3 cm95.7 X 8.7 X 56.4 cm | 111.0 X 23.3 X 70.7 cm111.0 X 9.0 X 64.9 cm | 122.5 X 23.3 X 77.6 cm122.5 X 9.1X 71.8 cm | 144.5 X 27.2 X 90.5 cm144.5 X 9.7 X 83.7 cm |
| Berat Bersih | 6.3 kg (dengan Alas)6.2 kg (hanya TV) | 8.2 kg (dengan Alas)7.9 kg (hanya TV) | 11.3 kg (dengan Alas)11.2 kg (hanya TV) | 18.1 kg (dengan Alas)17.8 kg (hanya TV) | |
| Berat Kotor | 9.3 kg | 11.3 kg | 16.1 kg | 24.5 kg | |
| Suara | Speaker | 6 Ω | 6 Ω | 6 Ω | 6 Ω |
| Output Audio | 10 W + 10 W | 10 W + 10 W | 10 W + 10 W | 10 W + 10 W | |
| Sistem TV | DTV: DVB-T/T2/C | ||||
| ATV: PAL BG/I/DK | |||||
| Terminal sambungan | AV IN | Konektor Mini AV × 1 (Membutuhkan kabel konversi AV) | |||
| ANTENNA IN | Konektor Udara x 1 | ||||
| HDMI | Konektor HDMI x 3 | ||||
| USB | Konektor USB 2.0 × 1, DC 5 V, Maks. 500 mA | ||||
| DIGITAL AUDIO OUT | Optik x 1 | ||||
| LAN IN | Konektor Jaringan x 1 | ||||
| Konektivitas | Jenis WiFi | ieee 802.11 a/b/g/n/ac 2.4G+5G 2T2R | |||
| Versi Bluetooth | 2.4G/5G | ||||
Catatan
-
Desain dan Spesifikasi dapat berubah tanpa pemberitahuan.
-
Berat dan Dimensi yang ditampilkan merupakan perkiraan.
-
Grafik di dalam buku panduan ini hanya untuk referensi saja.
-
TV Anda mungkin sedikit berbeda dari yang diperlihatkan di dalam buku panduan ini.
-
Di lingkungan yang kering karena listrik statis, produk bisa dimulai ulang dan kembali ke antarmuka Tampilan Di Layar yang utama, antarmuka pemutar USB, atau modus sumber yang sebelumnya. Ini dalah hal yang normal, lanjutkan saja pengoperasian TV.
Lisensi OSS
Produk ini menyertakan perangkat lunak berikut ini:
(1) Perangkat lunak yang dikembangkan secara independen oleh atau untuk Panasonic Entertainment & Communication Co., Ltd.
(2) Perangkat lunak yang dimiliki oleh pihak ketiga dan diberi lisensi oleh Panasonic Entertainment & Communication Co., Ltd.
(3) Perangkat lunak ini dilisensikan berdasarkan Lisensi Publik Umum GNU, Versi 2.0 (GPL V2.0),
(4) Perangkat lunak yang dilisensikan berdasarkan Lisensi Publik Umum GNU LESSER, Versi 2.1 (LGPL V2.1), dan/atau
(5) Perangkat lunak sumber terbuka selain perangkat lunak yang berlisensi GPL V2.0 dan/atau LGPL V2.1.
Perangkat lunak yang dikategorikan sebagai (3) - (5) didistribusikan dengan tujuan dapat dimanfaatkan, namun TANPA GARANSI APAPUN, bahkan tanpa jaminan tersirat atas KELAYAKAN UNTUK DIPERDAGANGKAN atau KESE SUAIAN UNTUK TUJUAN TERTENTU.
Setidaknya tiga (3) tahun sejak penyerahan produk ini, Panasonic akan memberikan kepada pihak ketiga yang menghubungi kami melalui informasi kontak yang tertera di bawah ini, dengan biaya yang tidak melebihi biaya distribusi kode sumber yang kami lakukan secara fisik, salinan lengkap kode sumber yang dapat dibaca oleh mesin yang tercakup dalam GPL V2.0, LGPL V2.1, atau lisensi lain yang berkewajiban untuk melakukan hal tersebut, serta pemberitahuan hak cipta yang terkait. Informasi Kontak: osd-cd-request@gg.jp.panasonic.com

Google TV
Google TV adalah nama dari pengalaman perangkat lunak perangkat ini dan merupakan merek dagang dari Google LLC. Google, YouTube, dan Chromecast bawaan serta merek dagang terkait lainnya adalah merek dagang dari Google LLC.

Dolby
AUDIO
Diproduksi berdasarkan lisensi dari Dolby Laboratories.
Dolby, Dolby Audio, dan simbol dua D adalah merek dagang dari Dolby Laboratories Licensing Corporation.

HEDDIN MULPEEN INTERFATE
Merek Dagang yang Digunakan HDMI, HDMI High-Definition Multimedia Interface, nama dagang HDMI, dan Logo HDMI adalah merek dagang atau merek dagang terdaftar dari HDMI Licensing Administrator, Inc. di Amerika Serikat dan negara lain.

Untuk informasi paten DTS, lihat http://patents.dts.com. Diproduksi sesuai lisensi dari DTS, Inc. atau DTS Licensing Limited. DTS, TruSurround, dan logo DTS adalah merek dagang terdaftar atau merek dagang dari DTS, Inc. di Amerika Serikat dan negara lain. © 2021 DTS, Inc. HAK CIPTA DILINDUNGI UNDANG-UNDANG.

Bluetooth®
Merek kata dan logo Bluetooth ^® adalah merek dagang terdaftar yang dimiliki oleh Bluetooth SIG, Inc. dan penggunaan merek tersebut oleh Panasonic Entertainment & Communication Co., Ltd. telah mendapatkan lisensi. Merek dagang dan nama dagang lainnya adalah milik masing-masing pemiliknya.

Advance
Dicakup oleh satu atau beberapa klaim paten HEVC yang terdaftar di patentlist.accessadvance.com.
Diproduksi Oleh :
PT. Skyworth Industry Indonesia
East Jakarta Industrial Park Plot 5G Cikarang Selatan,
Bekasi 17530, Indonesia
Pusat Pelayanan Pelanggan :
Contact Center
Telp. 0804-1-111-111
E-mail: ccc@id.panasonic.com
Website: www.panasonic.com/id
Catatan Pelanggan
Nomor model dan nomor seri produk ini dapat ditemukan pada panel belakang. Anda harus mencatat nomor seri ini di tempat yang disediakan di bawah ini dan menyimpan buku ini, beserta kuitansi pembelian, sebagai catatan permanen pembelian guna membantu mengidentifikasi jika terjadi pencurian atau kehilangan, dan untuk tujuan Layanan Garansi.
Nomor Model
Nomor Seri
Bahasa Indonesia
Panasonic Entertainment & Communication Co., Ltd.
Web Site: https://www.panasonic.com/id
Panasonic®
Operating Instructions
LED TV
TH-43NX600G
TH-50NX600G
TH-55NX600G
TH-65NX600G
natural_image
Front view of a modern flat-screen TV with black screen and stand (no visible text or symbols)(Image: TH-50NX600G)
Thank you for purchasing this Panasonic product.
Please read these instructions carefully before operating this product and retain them for future reference.
The images shown in this manual are for illustrative purposes only.
PMKG.54.01.2024
S0124-0
N080108-001122-001
English
Chapter 1: Introduction
Warning 3
Use Environment 4
Cleaning 4
Hanging the TV Set on the Wall 4
Caution 4
Symbol 6
Precautions for Using Remote Control 6
Installing/Removing Remote's Batteries 6
Standard Accessories 7
Optional Accessories 7
Pedestal Installation....8
Chapter 2: Basic Features
TV Terminals 9
TV Controls 10
Remote Control....11
How to Pair Bluetooth Remote Control with the TV 12
Initial Setup 12
Selecting the Input Source 15
Settings 15
Chapter 3: Smart Features
Home Page....19
Google Assistant....19
Chromecast Built-In....19
Disclaimer about Using Google TV 21
Multimedia Player 21
Chapter 4: Technical Information
Maintenance 23
Troubleshooting 23
Specifications 24
OSS license 25
Chapter 1: Introduction
Warning
Handling the mains plug and lead
Insert the mains plug fully into the socket outlet. (If the mains plug is loose, it could generate heat and cause fire.)
Ensure that the mains plug is easily accessible.
Do not touch the mains plug with a wet hand. (This may cause electrical shock.)
Do not use any mains lead other than that provided with this TV. (This may cause fire or electrical shock.)
Do not damage the mains lead. (A damaged lead may cause fire or electrical shock.)
- Do not move the TV with the lead plugged in the socket outlet.
- Do not place a heavy object on the lead or place the lead near a high-temperature object.
- Do not twist the lead, bend it excessively or stretch it.
- Do not pull on the lead. Hold onto the mains plug body when disconnecting the lead.
- Do not use a damaged mains plug or socket outlet.
- Use the TV in moderate climates.
If you find any abnormality, remove the mains plug immediately!
110 - 240V \~ 50 / 60 Hz
natural_image
Simple line drawing of a flat-screen monitor with a cable attached to the side (no text or symbols)- Mains plug types vary between countries.
Power source
• This TV is designed to operate on
• 110 - 240V \~ 50/60 Hz
• Table-top use / Wall hanging
Do not use external voltage stabilizer with the TV set
• Inferior quality stabilizer may cause damage to the TV.
- Warranty is not valid if external stabilizer is used.
Do not remove covers and never modify the TV by yourself
- Do not remove the rear cover as live parts are accessible when it is removed. There are no user serviceable parts inside. (High-voltage components may cause serious electrical shock.)
- Have the TV checked, adjusted, or repaired at your local Panasonic dealer.
- Please refer the information on exterior back enclosure for electrical and safety information before installing or operating the apparatus.
- The mains plug is used as disconnect device, the disconnect device shall remain readily operable.
Do not expose to rain or excessive moisture
• To prevent damage which might result in electrical shock or fire, do not expose this TV to rain or excessive moisture. This TV must not be exposed dripping or splashing water and objects filled with liquid, such as vases, must not be placed on top of or above the TV.
Do not insert external objects into the TV
- Do not allow any objects to drop into the TV through the air vents. (Fire or electrical shock may result)
Do not place the TV on sloped or unstable surfaces, and ensure that the TV does not hang over the edge of the base
• The TV may fall off or tip over.
Use only the dedicated pedestals/mounting equipments
- Use an unapproved pedestal or other fixtures may make the TV unstable, risking injury. Be sure to ask your local Panasonic dealer to perform setup.
- When mounting the TV on a wall or ceiling, be sure to install the product according to the method recommended by the manufacturer. This is a safety feature.
- Only use attachments/accessories specified or provided by the manufacturer (such as the exclusive supply adapter, battery, etc.).
Do not expose to direct sunlight and other sources of heat
- Avoid exposing the TV to direct sunlight and other sources of heat.

To prevent the spread of fire, keep candles or other open flames away from this product at all times.
Use Environment
Warning: Stability Hazard
A television set may fall, causing serious personal injury or death. Many injuries, particularly to children, can be avoided by taking simple precautions such as:
- ALWAYS use cabinets or stands or mounting methods recommended by the manufacturer of the television set.
- ALWAYS use furniture that can safely support the television set.
- ALWAYS ensure the television set is not overhanging the edge of the supporting furniture.
- ALWAYS educate children about the dangers of climbing on furniture to reach the television set or its controls.
- ALWAYS route cords and cables connected to your television so they cannot be tripped over, pulled or grabbed.
- NEVER place a television set in an unstable location.
- NEVER place the television set on tall furniture (for example, cupboards or bookcases) without anchoring both the furniture and the television set to a suitable support.
- NEVER place the television set on cloth or other materials that may be located between the television set and supporting furniture.
- NEVER place items that might tempt children to climb, such as toys and remote controls, on the top of the television or furniture on which the television is placed.
If the existing television set is being retained and relocated, the same considerations as above should be applied.
Cleaning
- Do not spray water or detergent directly on TV screen for cleaning purpose. Leaking liquid substance will cause damage to TV.
- Be careful of cats, rats or other animals that may urinate on the TV (front and rear). It may lead to TV failure.
- Do not use sharp or hard objects (finger nails, knife and etc.) on TV screen. This may cause damage to the screen surface.
Hanging the TV Set on the Wall
- Check that the wall can support the weight of the TV set and wall mount assembly.
- Follow the mounting instructions provided with the wall mount.
• The TV set must be installed on a vertical wall.
• Make sure to use only screws suitable for the material of the wall.
• Make sure that the TV set cables are placed so that there is not danger of tripping over them.
All other safety instructions about our TV sets are also applicable here.
Warning: This operation requires two people.
To ensure a safe installation, observe the following safety.
Caution
-
Read these instructions—All operating instructions must be read and understood before the product is operated.
-
Keep these instructions---These safety and operating instructions must be kept in a safe place for future reference.
- Read all warnings---All warnings on the product and in the instructions must be observed closely.
- Follow all instructions---All operating instructions must be followed.
- Attachments---Only use attachments/ accessories specified by the manufacturer. Do not use attachments not recommended by the manufacturer. Use of improper attachments can result in accidents.
- Power source---This product is intended to be supplied by a listed power supply indicated on the marking label. If you are not sure of the type of power supply to your home, consult your product dealer or local power company. For added protection for this product during a lightning storm, or when it is left unattended and unused for long periods of time, unplug it from the wall outlet and disconnect the cable system.
Do not defeat the safety purpose of the polarized or grounding plug. A polarized plug has two blades with one wider than the other. A grounding plug has two blades and a third grounding prong. The wide blade or the third prong is provided for your safety. If the provided plug does not fit into your outlet, consult an electrician for replacement of the obsolete outlet. - Power cord protection--Protect the power cord from being walked on or pinched particularly at plugs, convenience receptacles, and the point where they exit from the apparatus.
- Overloading---Do not overload wall outlets, extension cords, or convenience receptacles on other equipment as this can result in a risk of fire or electric shock.
- Servicing---Refer all servicing to qualified service personnel. Servicing is required when the apparatus has been damaged in any way, such as power-supply cord or plug is damaged, liquid has been spilled or objects have fallen into the apparatus, the apparatus has been exposed to rain or moisture, does not operate normally, or has been dropped.
- Damage requiring service---If any of the following conditions occurs, unplug the power cord from the AC outlet, and request a qualified service person to perform repairs.
a. When the power cord or plug is damaged. b. When a liquid is spilled on the product or when objects have fallen into the product.
c. When the product has been exposed to rain or water.
d. When the product does not operate properly as described in the operating instructions.
Do not touch the controls other than those described in the operating instructions. Improper adjustment of controls not described in the instructions can cause damage, which often requires extensive adjustment work by a qualified technician.
e. If the product has been dropped or the cabinet has been damaged in any way.
f. When the product displays an abnormal condition or exhibits a distinct change in performance. Any noticeable abnormality in the product indicates that the product needs servicing.
-
Replacement parts---In case the product needs replacement parts, make sure that the service person uses replacement parts specified by the manufacturer, or those with the same characteristics and performance as the original parts. Use of unauthorized parts can result in fire, electric shock and/or other danger.
-
Safety checks---Upon completion of service or repair work, request the service technician to perform safety checks to ensure that the product is in proper operating condition.
-
Stand---Use only with the cart, stand, tripod, bracket, or table specified by the manufacturer, or sold with the apparatus. Do not place the product on an unstable trolley, stand, tripod or table. Placing the product on an unstable base can cause the product to fall, resulting in serious personal injuries as well as damage to the product. When mounting the product on a wall, be sure to follow the manufacturer's instructions. Use only the mounting hardware recommended by the manufacturer.

- Careful move---When a cart is used, use caution when moving the cart/apparatus combination to avoid injury from tip-over. Sudden stops, excessive force and uneven floor surfaces can cause the product to fall from the trolley.
Never attempt to move the TV unless the AC power cord has been disconnected.
-
Lightning---Unplug this apparatus during lightning storms or when unused for long periods of time. For added protection for this television equipment during a lightning storm, or when it is left unattended and unused for long periods of time, unplug it from the wall outlet and disconnect the antenna. This will prevent damage to the equipment due to lightning and power-line surges.
-
Panel protection---The display panel used in this product is made of glass. Therefore, it can break when the product is dropped or impacted upon by other objects. Be careful not to be injured by broken glass pieces in case the display panel breaks.
-
Pixel defect---The display panel is a very high technology product, giving you finely detailed pictures. Occasionally, a few non-active pixels may appear on the screen as a fixed point of blue, green or red. Please note that this does not affect the performance of your product.
18. Do not block the rear air vents
- Adequate ventilation is essential to prevent failure of electronic components.
- Ventilation should not be impeded by covering the ventilation openings with items such as newspapers, table cloths and curtains.
• We recommended that a gap of at least 10 cm is left all around this TV even when placed inside a cabinet or between shelves.
- When using the pedestal, keep the space between the bottom of the TV and the surface where the TV is set.
- If pedestal is not used, ensure the vents is the bottom of the TV are not blocked.
- Do not install this equipment in a confined or building-in space such as a book case or similar unit, and remain a well ventilation conditions at open site. Minimum distance
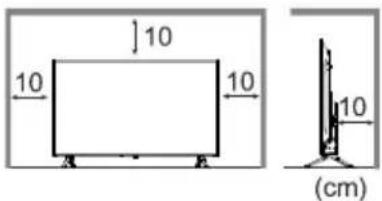
Note: The picture is only for reference.
-
Do not ingest the battery, Chemical Burn Hazard—Keep new and used batteries away from children. If the battery compartment does not close securely, stop using the product and keep it away from children. If you think batteries might have been swallowed or placed inside any part of the body, seek immediate medical attention.
-
Listening-- Listening to music at high volume levels and for extended durations can damage one's hearing. In order to reduce the risk of damage to hearing, one should lower the volume to a safe, comfortable level, and reduce the amount of time listening at high levels.
21. Damages
- Excepting cases where responsibility is recognised by local regulations, Panasonic accepts no responsibility for malfunctions caused by misuse or use of the product, and other problems or damages caused by use of this product.
- Panasonic accepts no responsibility for the loss, etc., of data caused by disasters.
- External devices separately prepared by the customer are not covered by the warranty. Care for the data stored in such devices is the responsibility of the customer. Panasonic accepts no responsibility for abuse of this data.
Symbol
- For the terminals marked with symbol of “ ^4 ” may be of sufficient magnitude to constitute a risk of electric shock. The external wiring connected to the terminals requires installation by an instructed person or the used of ready-made leads or cords.
- Protective earthing terminal. The apparatus should be connected to a mains socket outlet with a protective earthing connection. (Only for Class I appliance)
- If the product has the symbol ☐ in its rating label and the power cord has two pins, it means that the equipment is a Class II or double insulated electrical appliance. It has been designed in such a way that it does not require a safety connection to electrical earth.
- The following information are recommended to be included where applicable:
\~ Refers to alternating current(AC).
— —— Refers to direct current(DC).
☐ Refers to Class II equipment.
Refers to stand-by.
Refers to power ON.
Refers to dangerous voltage.
Refers to Class I equipment.
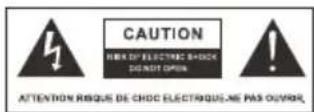
- This lightning flash with arrowhead symbol within an equilateral triangle is intended to alert the user to the presence of non-insulated "dangerous voltage" within the product's enclosure that may be of sufficient magnitude to constitute a risk of electric shock.
• To reduce the risk of electric shock. Do not remove cover (or back). No user serviceable parts inside. Refer to qualified service personnel.
- The exclamation point within an equilateral triangle is intended to alert the user to the presence of important operating and maintenance instructions in the literature accompanying the appliance.
Precautions for Using Remote Control
- Use the remote control by pointing it towards the remote sensor. The items between the remote control and the remote sensor will interfere the normal operation.
- Do not make remote control vibrate violently. Also, do not splash liquid on the remote control, also do not put the remote control in high humidity place.
- Do not place remote control under direct sunlight which will cause deformation of the unit by heat.
- When the remote sensor is under direct sunlight or strong lighting, the remote control will do not work. If so please change the lighting or TV's position, or operate the remote control closer to the remote sensor.
Installing/Removing Remote's Batteries
Place two AAA size batteries in the remote control's battery compartment, making sure to match the polarity markings inside the compartment.
natural_image
Two hand-drawn diagrams showing a pen being inserted into a cylindrical device, no text or symbols present.Note: The picture is only for reference.
Caution
- Incorrect installation may cause battery leakage and corrosion, resulting in damage to the remote control.
- Do not mix old and new batteries.
- Replace only with same or equivalent type. Do not mix different battery types (such as alkaline and manganese batteries).
- Do not use rechargeable (Ni-Cd) batteries.
- Do not burn or break up batteries.
- Do not expose batteries to excessive heat such as sunshine, fire or the like.
- Make sure you dispose of batteries correctly.
- Ensure batteries are replaced correctly with the same or equivalent type, there is danger of explosion and fire if battery is reversed or incorrectly replaced.
- Do not disassemble or modify the remote control.
Standard Accessories
| Remote Control | Pedestal (2) | Screws (4) | Batteries (2)(AAA size) | OperatingInstructions | AC Power Cord |
| A |
Note:
1) The pictures are only for reference.
2) Accessories may not be placed all together. Take care not to throw them away unintentionally.
3) This product contains possibly dangerous parts (such as plastic bags), that can be breathed in or swallowed by young children accidentally. Keep these parts out of reach of young children.
Optional Accessories
Please contact your local Panasonic dealer to purchase the recommended optional accessories. For additional details, please read the manual of optional accessories.
Wall-hanging bracket
Please contact your local Panasonic dealer to purchase the recommended wall-hanging bracket.
Note: The graphics are only for reference.
- Screw Specifications

• VESA
| Size | 43" | 50" | 55" | 65" |
| a (mm) | 200 | 200 | 200 | 400 |
| b (mm) | 200 | 200 | 200 | 200 |

Warning
- Failure to use a Panasonic bracket or choosing to mount the unit yourself will be done at the risk of the consumer. Always be sure to ask a qualified technician to carry out set up. Incorrect fitting may cause equipment to fall, resulting in injury and product damage. Any damage resulting from not having a professional installer mount your unit will void your warranty.
- When any optional accessories or wall hanging brackets are used, always ensure that the instructions provided are followed fully.
- Do not mount the unit directly below ceiling lights (such as spotlights or halogen lights) which typically give off high heat. Doing so may warp or damage plastic cabinet parts.
Take care when fixing wall brackets to the wall. Wall mounted equipment shall not be grounded by metal within the wall. Always ensure that there are no electrical cables or pipes in the wall before hanging bracket.
• To prevent fall and injury, remove the TV from its fixed wall position when it is no longer in use. - For the TV sets with terminals facing towards the wall, in order to connect external devices, a 30mm-high plastic spacer is used together with each screw to fix the wall mount.
Pedestal Installation

Warning
Do not disassemble or modify the pedestal.
- Otherwise the TV may fall over and become damaged, and personal injury may result.

Caution
Do not use any pedestal other than the one provided with this TV.
- Otherwise the TV may fall over and become damaged, and personal injury may result.
Do not use the pedestal if it becomes warped or physically damaged.
- If you use the pedestal while it is physically damaged, personal injury may result. Contact your local Panasonic dealer immediately.
During set-up, make sure that all screws are securely tightened.
- If insufficient care is taken to ensure screws are properly tightened during assembly, the pedestal will not be strong enough to support the TV, and it might fall over and become damaged, and personal injury may result.
Ensure that the TV does not fall over.
- If the TV is knocked or children climb onto the pedestal with the TV installed, the TV may fall over and personal injury may result.
Two or more people are required to install and remove the TV.
- If two or more people are not present, the TV may be dropped, and personal injury may result.
When removing the pedestal from the TV, do not remove the pedestal by the methods other than the specified procedure.
• Otherwise the TV and / or pedestal may fall over and become damaged, and personal injury may result.
Appearance of the product in illustrations may differ from your actual product, and is for reference purposes only.
Removing the pedestal from the TV
Be sure to remove the pedestal in the following way when using the wall-hanging bracket or repacking the TV.
1 Remove the assembly screws from the TV.
2 Remove the pedestal from the TV.
Note: The pictures are only for reference.
- Please take out the accessory bag from the package and check if all bellow parts exist without missing, if not, please contact your local dealer.
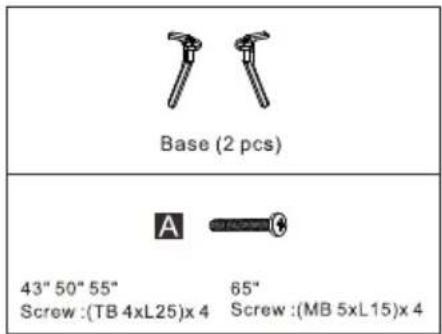
- Take out the TV and carefully put it (screen downward) on a stable and flat table with a soft cloth or cushion on it.
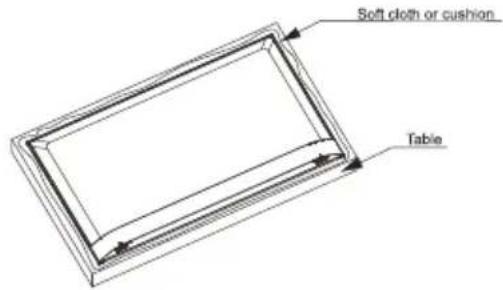
- Connect the TV and base by putting and fastening matched screws into the holes.
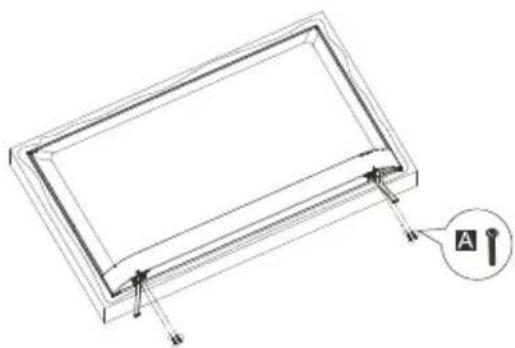
natural_image
Technical line drawing of a rectangular frame with mounting points and a labeled component 'A' (no text or symbols beyond label)Chapter 2: Basic Features
TV Terminals
Note:
1) The pictures are only for reference.
2) The positions of terminals may vary by different models.
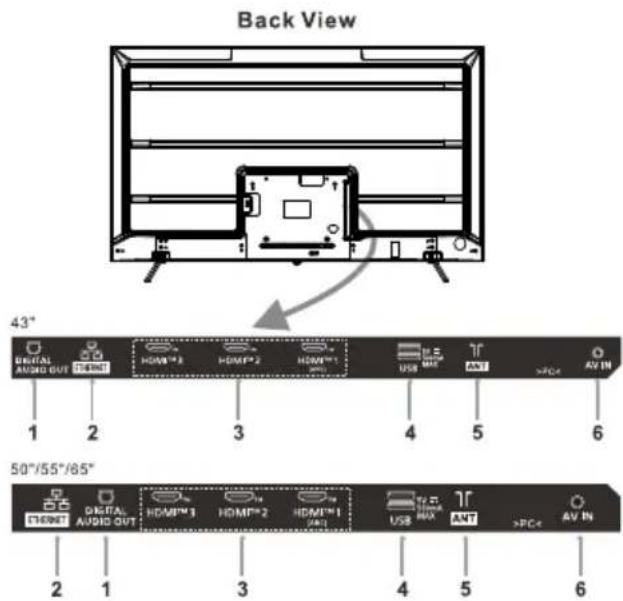
1. DIGITAL AUDIO OUT
connect an optical cable to output the TV's digital audio signal to a compatible audio receiver.
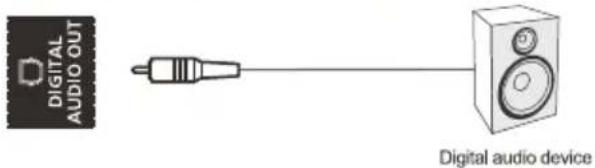
2. ETHERNET
Wired network port.
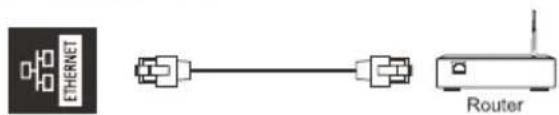
3. HDMI IN
Receive HDMI input signal from the connected HDMI device.
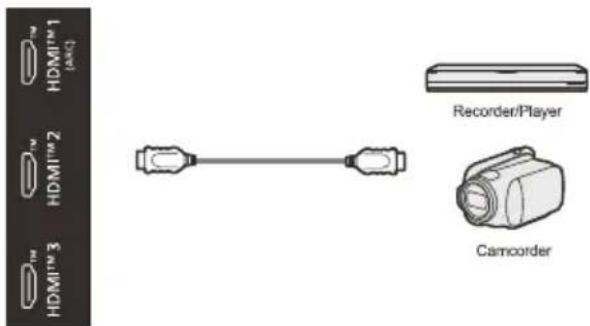
Note:
1) If the external device has a DVI output only, use a DVI to HDMI adapter cable to connect to the HDMI terminal.
2) HDMI1 supports ARC(Audio Return Channel) function, and you can connect ARC-enabled device with the TV by HDMI1 terminal.
4. USB
Connect USB devices to the TV.
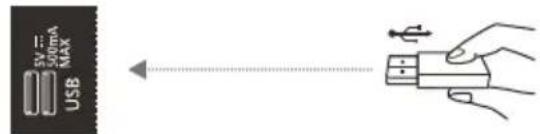
Note: Never remove the USB device or turn off the TV while using the USB device.
5. ANTENNA IN
Connect a coaxial cable to receive signal from the antenna or cable.
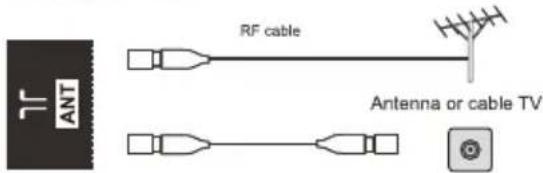
Note:
1) Do not place the RF cable under the TV.
2) To obtain the optimum quality of picture and sound, an aerial, the correct cable (75Ω coaxial) and the correct terminal are required.
3) If a community antenna system is used, you may require the correct connection cable and plug between the wall aerial socket and the TV.
4) Your local Television Service Center or dealer may be able to assist you in obtaining the correct aerial system for your particular area and the accessories required.
5) Any matters regarding aerial installation, upgrading of existing systems or accessories required, and the costs incurred, are the responsibility of you, the customer.
6. AV IN
Receive audio and video signal from signal source such as DVD.
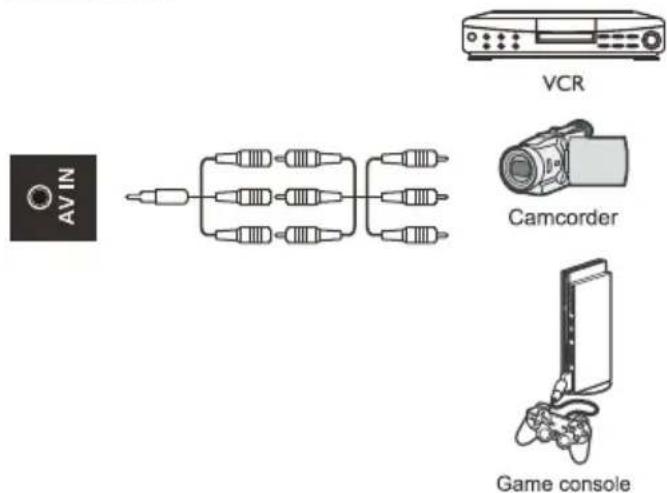
TV Controls
■ Power Connection
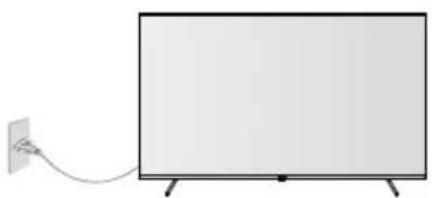
natural_image
Simple line drawing of a blank rectangular screen connected to a cable with a cable outlet (no text or symbols)Note: The picture is only for reference.
Connect the power cord to the TV and the power outlet (110-240V \~ 50/60Hz).
■ Turn on or turn off the TV
- Connect the power cord to the power outlet and the TV.
- In standby mode, press POWER ⏻ button to turn on the TV.
- In working status, press POWER ⏻ button to turn the TV to standby mode.
- Disconnect the power cord to power off the TV completely.
■ Power Indicator
Front View
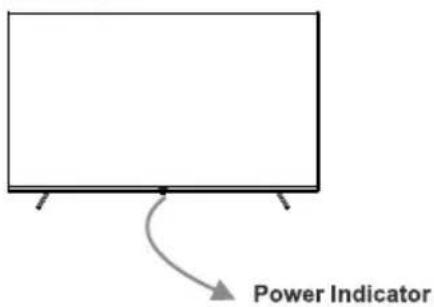
Note: The picture is only for reference.
- Lit in Red: Standby mode.
• Lit in Green: Working status. - Unlit: Power off.
■ TV Control Button
Back View
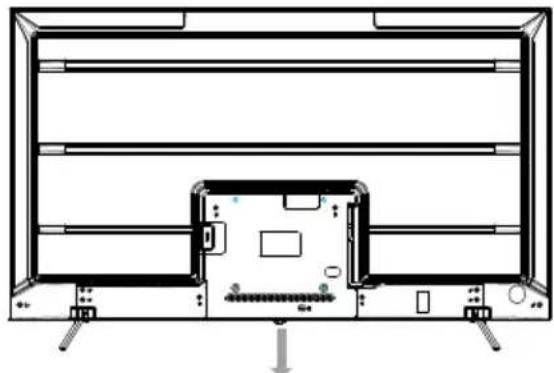
natural_image
Technical line drawing of a mechanical or electronic component with no visible text, numbers, or symbols
TV Control Button
Note: The picture is only for reference.
TV Control Button (Located under this icon)
* In standby mode: Tap TV control button to turn on the TV. * In working status: Tap TV control button to call out the following menu of soft keyboard. Inside it, tap TV control button to move the cursor and select the desired item. Long press (for more than 3 seconds) TV control button to enter or execute the selected item.

Remote Control
Note:
1). The picture is only for reference.
2). The image, buttons or functions of remote control may vary depending on the region, model, app or source.
3). Some DTV-related buttons may not be applicable due to non-availability of DTV signal in some areas.
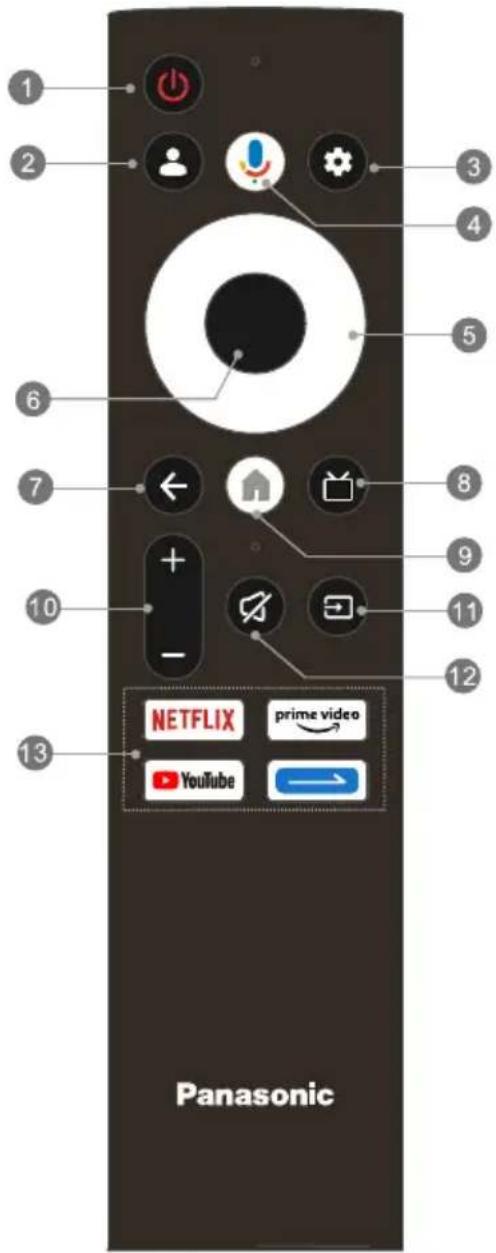
- POWER ( ⏻ ): Turn on the TV or to standby mode.
- User Account ( ): Manage user account.
- SETTING ( ⚙ ): Press to open the dashboard.
- MIC ( ): Start talking to Google Assistant of the TV.
- UP/DOWN/LEFT/RIGHT ( ^ / √ / < / > ) Navigate the menu to select what you want.
- OK: Confirm or enter the selected content.
- BACK ( ): Back to the upper-level menu.
- Live TV ( ☐ ): Access the EPG interface in DTV mode.
- HOME ( 🔍 ): Enter the home page.
- Volume Up/Down (+/-): Increase or decrease the sound volume.
- SOURCE ( ⊖ ): Press to enter Source, Shortcuts and Recent.
- MUTE ( ☑ ): Mute or restore the sound.
- APP Buttons: Access the specific applications directly and quickly.
How to Pair Bluetooth Remote Control with the TV
Note:
1) The pictures are only for references.
2) Some screens may vary depending on software version.
3) This is a Bluetooth remote control. Before using it, please pair it with the TV.
■ Pair Bluetooth Remote Control with the TV
Press Remote control 🤒 button to enter pairing with TV. Once has been connected ,will show "Succeed" as following picture.
natural_image
Dark image with a small rectangular object and five faint dots above it, no visible text or symbols.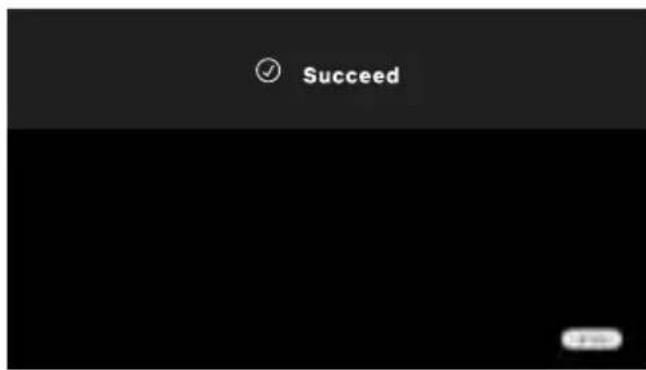
Initial Setup
When you turn on the TV for the first time, there will show a wizard to guide you to finish the following initial settings: Step 1: Press button 🤒 Connect the Bluetooth remote control. If you haven't a Bluetooth remote control, please just skip it.
natural_image
Dark scene with a small device and a glowing blue light source, no visible text or symbols
natural_image
Dark indoor scene with a small illuminated device and a window, no visible text or symbolsStep 2: Select the menu language as you need.
Step 3: Select to Set up Google TV or Set up basic TV.
Step 4: Select using Android phone or remote control to enter your Google account.
- Turn on the Bluetooth functions of your Android phone, then find and open "Home" application on your phone.
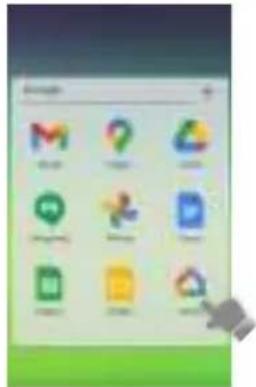
Remark: Before operate following steps, please firstly using your Android Phone to log into your Google Account and create the new home "House" or other which you like.
- Click + → Set up device → New device.
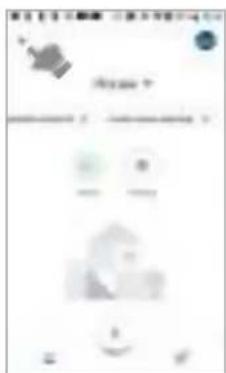
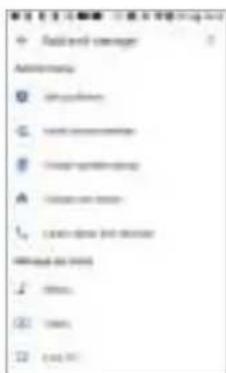
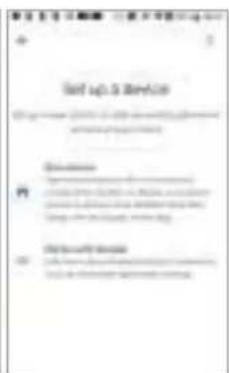
- Choose created "House", click "Next", looking for Google TV device, then click "Yes" to next step.
- Scan the QR code or input Setup code Shown on Google TV device to connecting the Google TV device
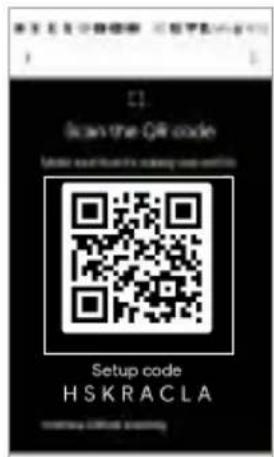
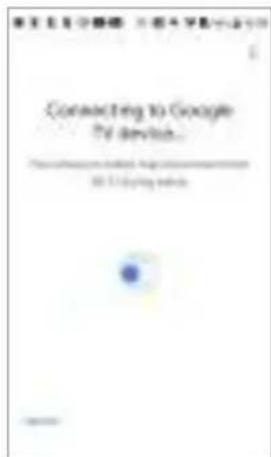
- Read and accept the Google terms of service and privacy policy. Follow the step to choose or create a location for Google TV.
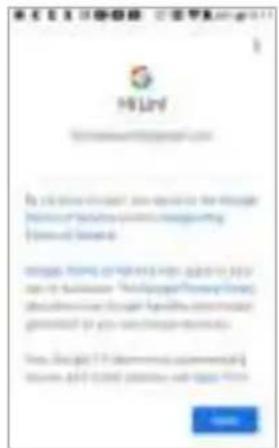
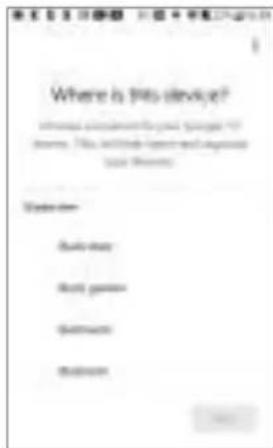
- Connect to Wi-Fi.
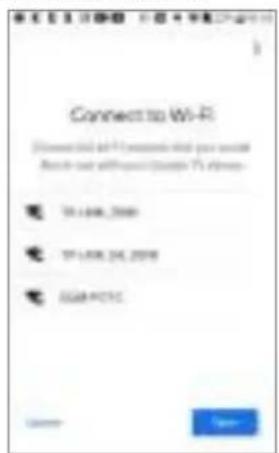
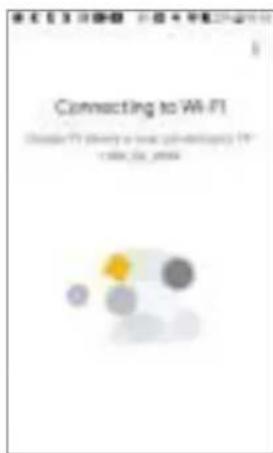
- Follow the guide to step by step until signed in to Google with your Google Account.
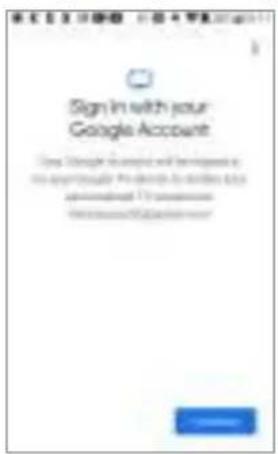
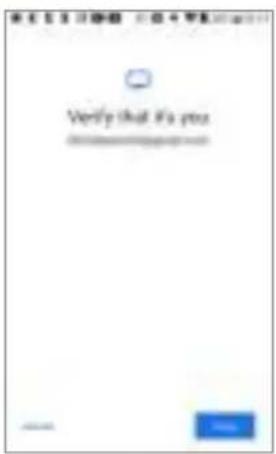
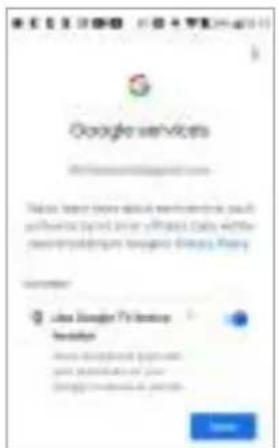
Note:
1) The pictures are only for references.
2) Some screens may vary depending on your operating with Android phone.
Step 5: Follow the wizard to finish setting up Google service.
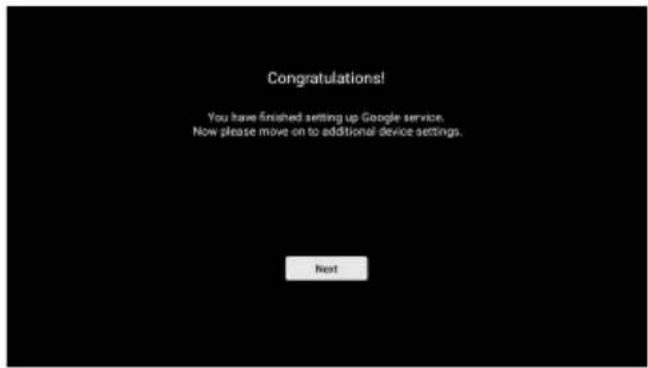
Step 6: Read the end user license agreement.
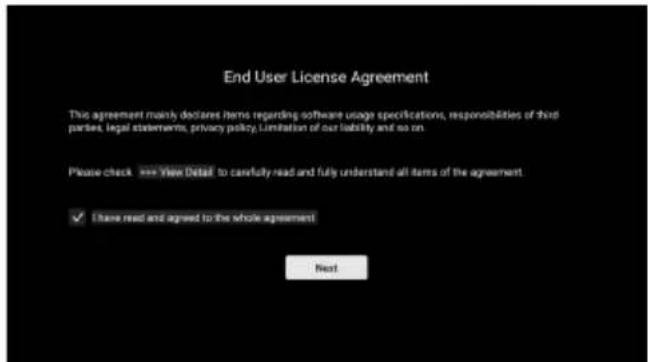
Step 7: Choose the TV usage environment between "Home" and "Shop".
Note: "Home" mode is recommended for home viewing, while "Shop" mode is used to demonstrate the TV in a shop and the like. It will consume more energy in "Shop" mode.
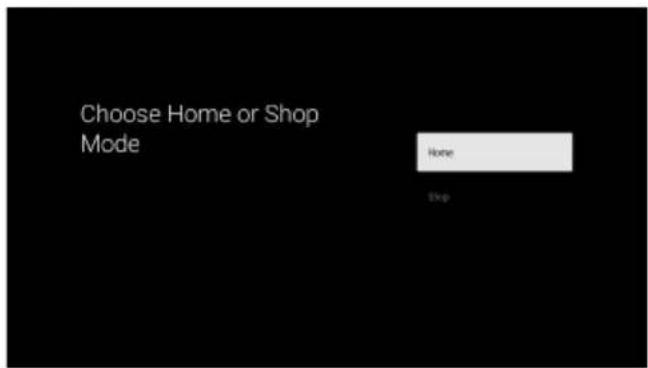
Step 8: Select your country.
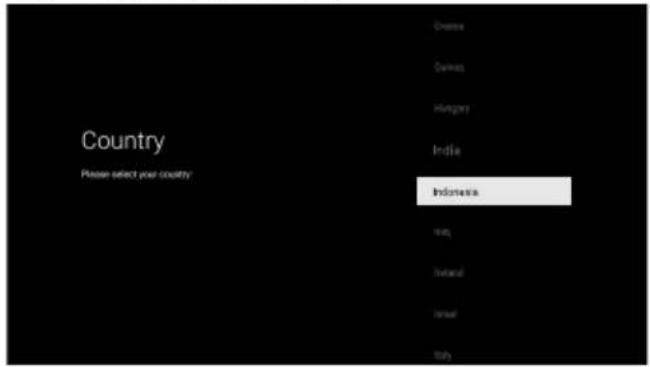
Step 9: Select the TV source.
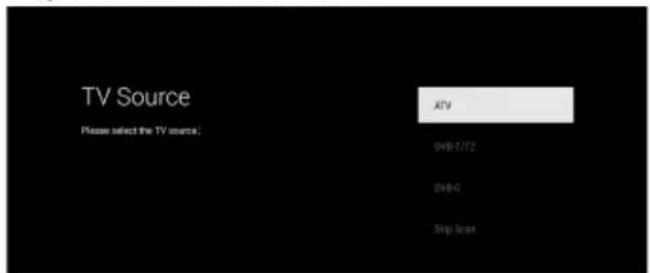
Step 10: Select whether or not to start "Channel Scan".
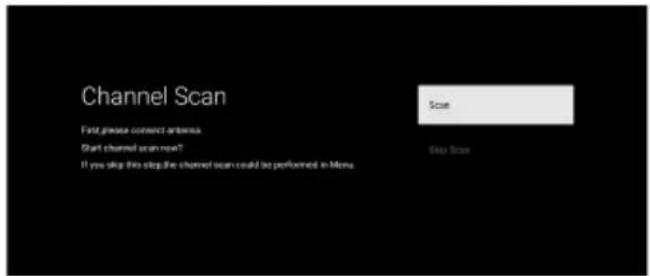
Step 11: Install your apps and be ready for your Google TV.
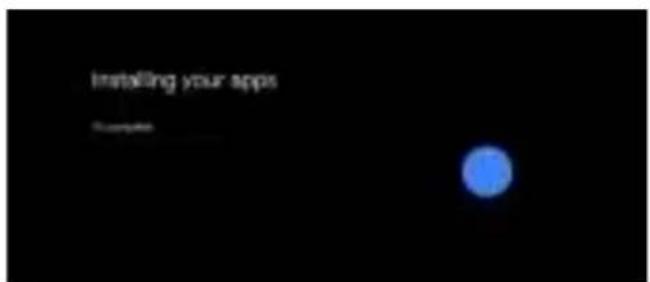
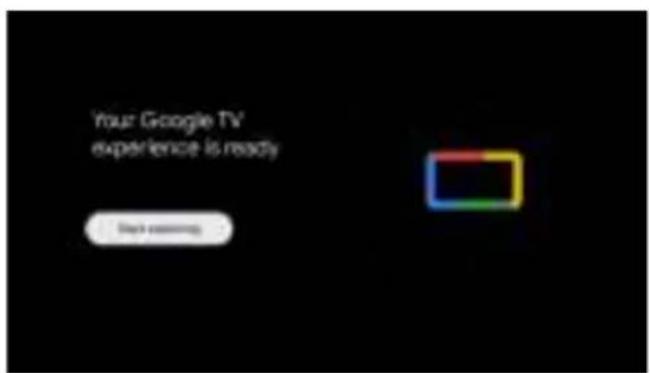
Note:
1) Different choices with different screens. The pictures are only for references, please refer to actual screens of your Google TV.
2) Initial settings may change without notice, which depends on Google requirements. You need to finish all initial settings according to what is indicated on the screen.
3) If you want to restart the initial setup after the first time, please Press "SETTING" button into Settings → System → About → Reset.
Selecting the Input Source
- Press SOURCE button to access the list of input sources.
- Press LEFT/RIGHT button to select the desired input source.
- Press OK button to access the selected input source.
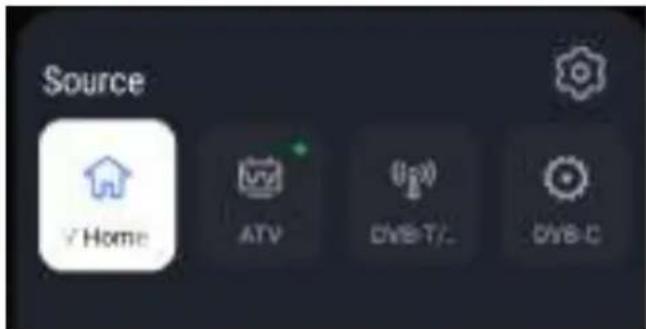
Note:
1) The picture is only for reference.
2) The source of Google TV Home will be available only after you update the TV system, connect the TV to the network, and login to your Google account.
Settings
Step 1: Press SETTING button to enter settings.
Step 2: Press OK buttons to general settings.
Step 3: Press UP/DOWN/LEFT/RIGHT and OK buttons to select and adjust an item.
Step 4: Press BACK button to back to the upper-level menu.
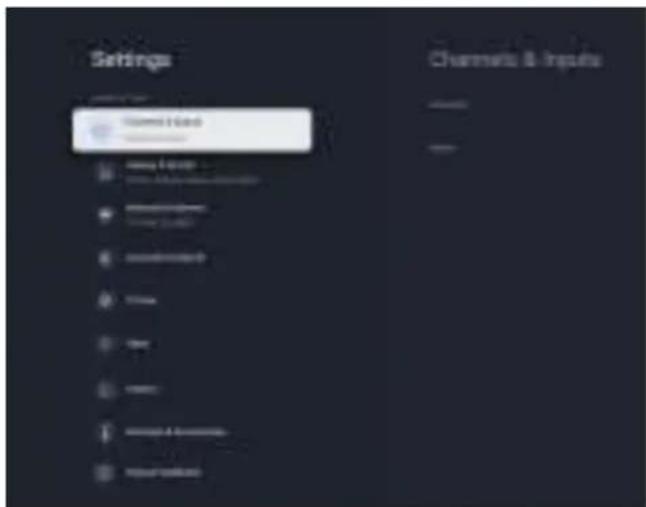
Note:
1) The pictures are only for references.
2) Some settings may vary depending on the region, model or input source.
Channels and Inputs: Select to enter Channels or Inputs.
Display & Sound: Set Picture, Screen, Sound, Audio output
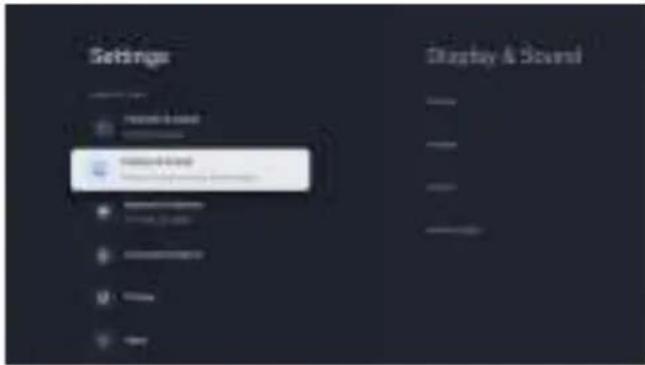
Picure:
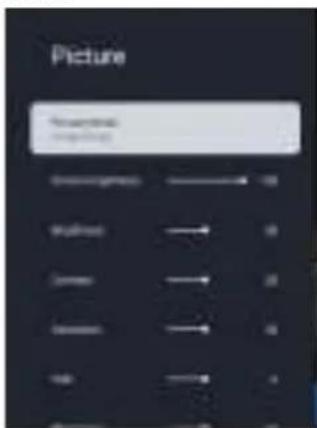
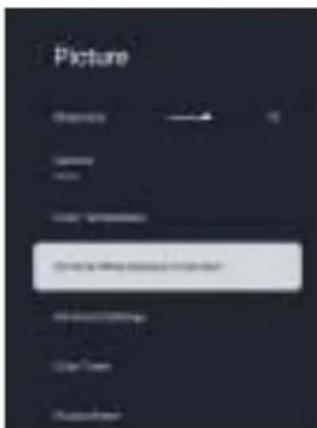
| Picture Mode | Select the picture mode. Choices are Vivid, Standard, Sport, User, Movie, etc., which may vary by different input sources. |
| Screen brightness | Adjust the lightness of the screen. |
| Brightness | Adjust the lightness of the picture. |
| Contrast | Adjust the difference between light and dark areas of the picture. |
| Saturation | Adjust the colorfulness of the color relative to its own brightness. |
| HUE | Adjust the color tint of the picture. |
| Sharpness | Adjust the edge of the picture. |
| Gamma | Adjust the light intensity of original image. Choices are Dark, Middle and Bright. |
| Color Temperature | Adjust the overall color tone of the picture. |
| 20 Point White Balance Correction | Adjust white balance. |
| Advanced Settings | Reduce the Digital noise, set the local contrast control, etc. |
| Color Tuner | Adjust Hue, Saturation and Brightness. |
| Picture Reset | Reset picture settings. |
Screen:
| Display Off | Turn off the display. |
Sound:
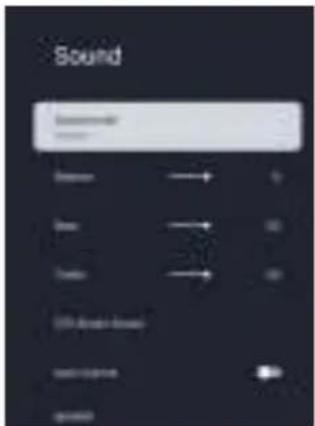
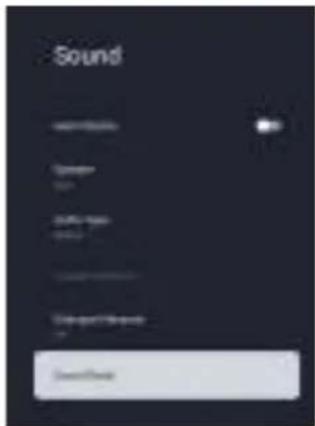
| Sound mode | Select the sound mode. Choices are Standard, Music, Sport and Movie. |
| Balance | Control the sound balance between left and right speakers. |
| Bass | Adjust the low frequency of the sound. |
| Treble | Adjust the high frequency of the sound. |
| DTS Studio Sound | Turn on or turn off the sound system of DTS Studio Sound. |
| Auto Volume | Turn on to adjust the sound volume automatically depending on the input signal. |
| Speaker | Turn on or turn off the TV speaker. |
| Audio Type | Select the type of audio output. Choices are Normal and Visually Impaired. |
| Visually Impaired | Adjust Speaker and Volume to help the visually-impaired viewers understand and enjoy the program. It is available only after "Visually Impaired" has been selected in "Audio Type". |
| Dialogue Enhancer | Select Dialogue Enhancer, choices are Off, Low, Medium and High. |
| Sound Reset | Reset sound settings. |
Audio output:
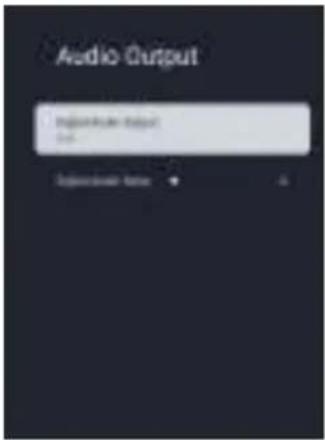
| Digital Audio Output | Set Digital Audio output, choice are Off, Auto, Dolby Digital, PCM, etc. |
| Digital Audio Delay | Set Digital Audio Delay value. |
Network & Internet: Connect the TV to the wireless or wired network.
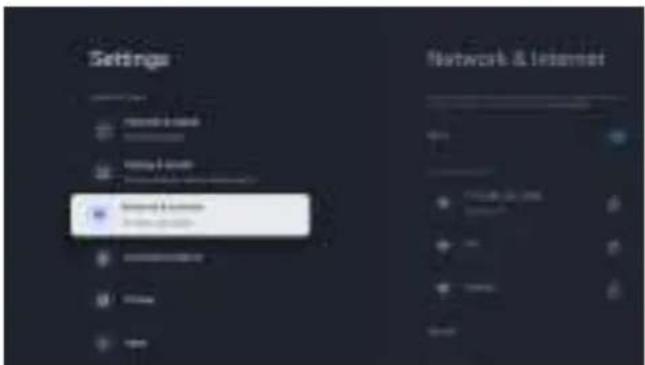
Accounts & Sign-in: Manage your Google Account.
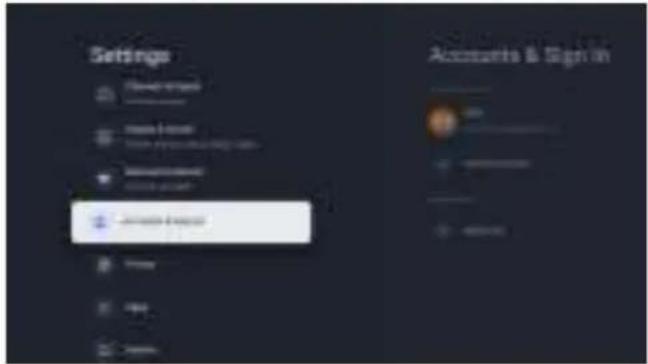
Privacy: Set Device settings, Account settings and APP settings.
Apps: Show the list of recently opened, and all installed apps. Setup specific app permissions.
System: Set system.
System:
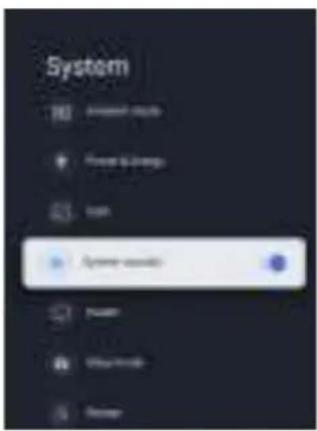
| Accessibility | Set Captions, Text, Accessibility shortcut, TalkBack, etc. |
| About | System update, Device information (Including software version), Factory reset, etc. |
| Date & Time | Set date , time and time zone. |
| Language | Choose the language you want. |
| Keyboard | Manage the Keyboards. |
| Storage | Show Device storage information. |
| Ambient mode | Choose the photos channel, more settings about Weather, Time , Personal photo data,etc. |
| Power & Energy | Choice Power on behaviors, Energy saver, Sleep timer, etc. |
| Cast | Cast notification control. |
| System sounds | When operating Remote Control, a short sound appear from the device. |
| Health | Choices are Night mode, Eye Protection and Auto Volume Control. |
| Shop mode | Choose Shop or Home mode. |
| Restart | Restart the device. |
Remotes & Accessories: Turn on or off Bluetooth devices or Pair other accessories.
Help & Feedback: Send feedback to Google
Chapter 3: Smart Features
Home Page
Please press Home button ( 🔗 ) to enter the home page to enjoy the following functions.
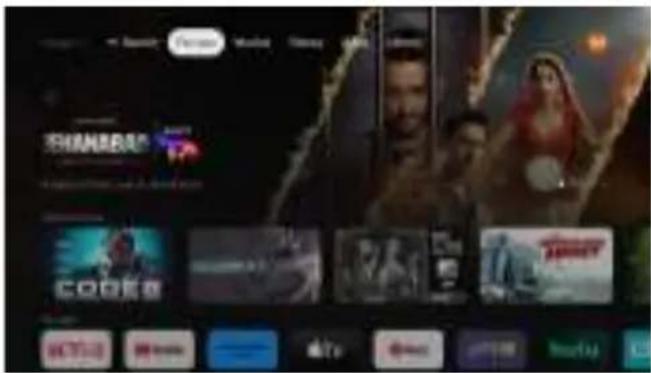
Note: The picture is only for reference.
- Search: Use Google Assistant or typing words to search what you desire.
- For you: Recommend the content lists of Top picks, Your apps, Continue watching, Popular movies, etc.
- Movies: Show Popular movies, New movies, Movies from your watch list, Trending on Google, etc.
- Shows: Show Popular shows, New shows, Shows from your watch list, Trending on Google, etc.
- Apps: Show Your apps, App categories, Apps from my other devices, etc.
- Library: Show purchased movies and shows, Watch list, etc.
Note:
1) The functions or contents of "Home Page" may vary by different countries or models.
2) Before using network functions in home page like network applications and so on, please connect the TV to the network firstly.
3) Icon copyrights are owned by the application providers.
Google Assistant
■ Google Assistant is available on your Google TV as your virtual personal helper. Press MIC button on your remote control to start and enjoy it. It is so wonderful that you will love it instantly! With Google Assistant, you can get what you want easily and quickly by using the power of your voice.
■ Before using Google Assistant, please make sure that you have connected your TV to the network, and that you have paired your Bluetooth remote control with the TV successfully, and also that you have signed in to your Google Account.
Note:
1) The pictures are only for reference.
2) Google Assistant is only available in some regions or some languages. Before using it, please make sure that you have paired your Bluetooth remote control with the TV successfully.
Chromecast Built-In
■ Definiton of Chromecast Built-in
"Chromecast Built-In" is a castting technology developed by Google that enables your mobile device or personal computer to initiate and control playback of internet-streamed audio/video content on the TV.
■ How to Cast Content
"Chromecast Built-In" offers two methods to cast content:
* The first employs mobile device and web apps that support Chromecast Built-In technology.
* The second allows mirroring of content from the web browser "Google Chrome" (with cast extension) running on a personal computer. In both cases, playback is initiated through the cast icon "☐" on the sender device.
■ Cast Screen/Audio (like Google Home)
Cast your mobile device's screen and audio to the TV.
Step 1: Connect your phone and the TV to the same wireless network successfully.
Step 2: Select and access "Home" application from your phone, then click existed "Bedroom TV", Which is set up in Initial Setup.
Step 3: Click "Cast my screen", then the contents on the screen of your phone has been cast onto the TV screen. You can cast picture, audio, movie, etc. to Google TV screen. Click "Stop mirroring" to stop casting.
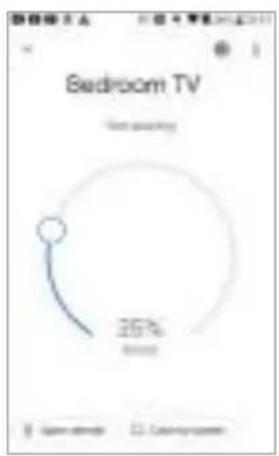
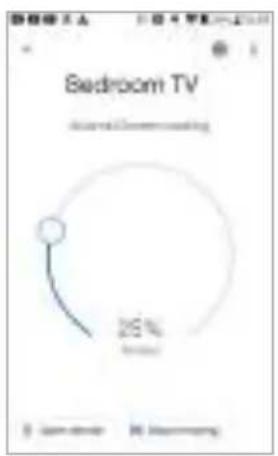
pie
Bedroom TV | Category | Percentage (%) | | :--- | :--- | | 1 - 2 minutes | 20 | | 3 - 5 minutes | 18 |■ Cast Live streams and Videos (like YouTube)
Cast your mobile device's live streams and videos to the TV.
Step 1: Connect your phone and the TV to the same wireless network successfully.
Step 2: Select and access "YouTube" application from your phone.
Step 3: Select the content you like, click cast icon "☐" and connect to a device you want, then to cast the content to the TV for playing the content by the TV instead of your phone. Click cast icon "☐" again to show a menu (including Voice search, Remote, Close and Disconnect), You can select the operation you want.
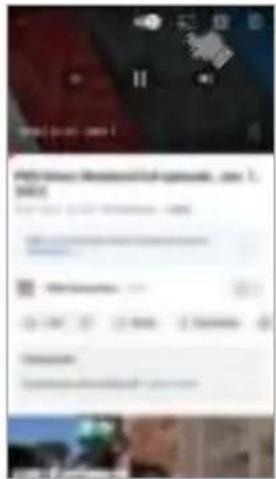
(May not be available depending on the actual remote control) Bellow buttons you can use on remote control while playing videos:
| OK | Play / Pause |
| < / > | Fast Backward / Fast Forward |
Note:
1) The pictures are only for references, and please refer to actual screens of your Android phone for clear images and correct contents.
2) For above YouTube cast feature, both smart phone & the TV Should be connected to the same network.
Disclaimer about Using Google TV
Network application contents and services are controlled by network application providers by means of networks and transmission facilities, which are subject to alteration, suspension, removal, termination or interruption, or invalid access at any time without further notice in that the manufacturer is unable to control or to be informed of the aforesaid change. The manufacturer makes a further declaration that it disclaims any responsibility or liability arising from customer's failure to use the network application contents and services caused by, including but not limited to, failure of network connection or communication lines, technological updates, or the alteration, suspension, interruption, termination, disabling, or removal of any contents or services by the network application providers etc.
Note:
- Some USB storage devices may not be compatible to operate smoothly with this TV.
- Back up all of the data in the USB storage device in case data was lost due to an unexpected accident.
- We do not assume any liability for the losses by misuse or malfunction. Data backup is consumer's responsibility.
- For large file sizes, the loading speed may be slightly longer.
- The recognition speed of a USB storage device may depend on each device.
- When connecting or disconnecting the USB storage device, ensure that the TV is not in USB mode otherwise the USB storage device or the files stored in it may be damaged.
- Please use only a USB storage device which is formatted in FAT16, FAT32, NTFS file system provided with the Windows operating system. In case of a storage device formatted as a different utility program which is not supported by Windows, it may not be recognized.
- When using a USB Hard Disk Drive which requires electric power source, ensure its rated power does not exceed the current marked at the USB terminal. If the power of the USB hard Disk exceeds the marked current, the TV system will be changed into standby mode, then you must pull away the USB Hard Disk and restart the TV system.
- An "Unsupported File" message will be displayed if the file format is unsupported or corrupted.
- FHD big picture needs longer time to process, which is not caused by the TV. Please be patient to wait.
- This TV may not support some multimedia files changed and upgraded as the change of encoding format or other technical advances.
- Use high-quality mobile device to record HD programs, otherwise the videos will be jammed during the playback. Back up all of the data in the USB storage device in case data was lost due to an unexpected accident.
- We do not assume any liability for the losses by misuse or malfunction. Data backup is consumer's responsibility.
- Do not power off the TV during the software upgrading process, otherwise the TV may not work, and the customer should be responsible.
- Manufacturer does not guarantee the operation of third-party web browsers. Third-party apps that have been downloaded and installed from the Google Play are supported by the company or developer who produced them.
- The browser may not support some web pages or videos due to network, region, format or internet service provider, which has nothing to do with the TV.
- Each trade mark indicated on this TV are the property of each trademark right holder, and all rights are reserved by them.
- The browser may stop responding, if the size of website is too large.
- For better & smooth experience, please delete web browser history regularly.
Multimedia Player
■ Preparation
- Insert your USB device on the TV to view compatible photo and movie on the TV screen or play compatible music through the TV.
- If the connected USB hard disk does not have an external power source, it may not be detected. Be sure to connect the external power source.
- To avoid losing the data on your USB device or damaging your USB device, it is recommended that you back up all data on your USB device.
- The control menu displays in media player may differ by different regions or models. And please take your actual TV as the standard.
- If you want to pull out your USB device, please exit USB mode firstly.
- For instructions on using your USB device, refer to the owner's manual of your USB device.
- Never remove the USB device or turn off the TV while using the USB device. Doing so may result in loss of data or damage to the USB device or the TV.
- Certain types of USB devices may not be compatible with the TV.
■ Media Operation
Step 1: Connect your USB device to the TV.
Step 2: Press SOURCE button to enter the ShortCuts → USB Device.
Step 3: Press UP/DOWN/LEFT/RIGHT and OK button to select and play the desired media file.
Step 4: Press OK button to start the playback.
Step 5: Press BACK button to exit the playback.
■ Watch Movies
While watching a movie, press the following buttons to control the movie playback.
| Button | Function |
| OK | Without control bar, call out the control bar. |
| With control bar, pause or play. | |
| ^ | Access movie menu settings. |
| √ | Show the movie playlist. |
| < / > | Fast backward or fast forward. |
■ Play Music
While playing music, press the following buttons to control the music playback.
| Button | Function |
| OK | Pause or play. |
| ^ | Show Playlist and Play Sequence. |
| √ | Show the music playlist. |
| < / > | Fast backward or fast forward. |
■ Browse Photos
While browsing a photo, press the following buttons to control the photo playback.
| Button | Function |
| OK | Access photo menu settings. |
| ^/√ | Show the photo playlist. |
| < / > | Skip to previous or next photo. |
■ Supported File Formats in Multimedia Player
| Type | Formats |
| Video | Video Codec: H,263, H,264, HEVC,H,265, VP8, VP9, AV1, MPEG1/2, MPEG4 |
| File Extension Name: avi, dat, mpeg, mpe, mag, vob, mp4, mov, mkv, ts, lp, trp, m2ts, mts, m4v, flv, fv, asf, 3gp, webm | |
| Audio | Audio Codec: AC3(DD), EAC3(DD+), 3EAMC |
| File Extension Name: mp3, AAC, m4a, flac, amr, mp2, mpga, ogg, AC3, wav | |
| Photo | JPEG, PNG, BMP |
Note:
- Under the following conditions, this system cannot decode the file and the file cannot be played normally:
-The parameters of file, such as the pixel of picture, code rate of audio and video file, sampling rate of audio file, exceed the limit of the system;
-The format of file is not matched or the file is harmed. Note: The code rate this system supports does not exceed 20Mbps.
-
Hot plug: Do not disconnect when the system is reading or transmitting data, avoid damaging the system or the device.
-
Pay attention to the power supply of the device when you are using a mobile hard disk or a digital camera. If the power supply is not sufficient or not stable, you may encounter problems during operating or can not operate at all. In this case, please restart the device, or unplug the device and plug it again, and ensure that its power supply is normal.
-
The system supports standard USB1.1, USB2.0 and USB3.0 devices, such as standard U-disks, MP3 players, mobile hard disks, etc..
-
For obtaining better audio and video quality, It is suggested to use the external device which accords with USB2.0 standard.
-
When playing the video with high compression ratio, these phenomenons, such as picture standstill and menu long time response, are normal.
-
For some USB device with power supply, such as large size hard disk, MP4, etc., Suggest using it with power to avoid electric power shortage. -The parameters of file, such as the pixel of picture, code rate of audio and video file, sampling rate of audio file, exceed the limit of the system.
-
The file may not be played normally because its parameters, such as the pixel of picture, code rate of audio and video file, sampling rate of audio file, exceed the limit of the system.
-
Some files may not be played back even if they fulfil these conditions.
-
The device may become unusable with this TV if the file or folder names are changed.
Chapter 4: Technical Information
Maintenance
First, remove the mains plug from the socket outlet.
Regular care:
Gently wipe the surface of the display panel, cabinet, or pedestal by using a soft cloth to clean the dirt or fingerprints.
For stubborn dirt:
First clean the dust on the surface. Dampen a soft cloth with clean water or diluted neutral detergent (1 part detergent to 100 parts water).
Wring the cloth and wipe the surface.
Finally, wipe away all the moisture.
Mains plug
Wipe the mains plug with a dry cloth at regular intervals. Moisture and dust may lead to fire or electrical shock.

Caution
Do not use a hard cloth or rub the surface too hard, otherwise this may cause scratches on the surface.
Take care not to subject the TV' surfaces to water or detergent Liquid inside the TV could lead to product failure.
Take care not to subject the surface to insect repellent, solvent, thinner or other volatile substances. This may degrade surface quality or cause peeling pf the paint.
- The surface of the display panel is specially treated and may be easily damaged. Take care not to tap or scratch the surface with your fingernail or other hard objects.
- Do not allow the cabinet and pedestal to make contact with a rubber or PVC substance for a long time. This may degrade surface quality.
Troubleshooting
Most problems you encounter with your TV can be corrected by consulting the following troubleshooting list.
No picture, no sound
- Check if the fuse or circuit breaker is working.
- Plug another electrical device into the outlet to make sure it is working or turned on.
• Power plug is in a bad contact with the outlet. - Check the signal source.
No colour
- Adjust the saturation.
Remote control does not work
• Change the batteries.
• Batteries are not installed correctly.
• Main power is not connected.
No picture, normal sound
- Adjust the brightness and contrast.
Normal picture, no sound
- Press the Vol+ button to increase volume.
• Volume is set to mute, press the mute button to restore sound.
Radio frequency interference
This interference produces moving ripples or diagonal streaks, and in some case, loss of contrast in the picture. Find out and remove the radio interference source.
Bluetooth remote control can't be paired successfully
- Retry to pair remote control for more times.
• Change the batteries.
Can't sign in Google account
- Retry to sign in again.
- Use another device to check if there is something wrong with the network.
- Use another Android device to check if there is something wrong with the Google server.
Can't use Google Assistant
- Check if the Bluetooth remote control has been paired successfully.
- Use another device to check if there is something wrong with the network.
- Use another Android device to check if there is something wrong with the Google server.
Specifications
| Model No. | TH-43NX600G | TH-50NX600G | TH-55NX600G | TH-65NX600G | |
| Power Source | 110 - 240 V~50/60 Hz | 110 - 240 V~50/60 Hz | 110 - 240 V~50/60 Hz | 110 - 240 V~50/60 Hz | |
| Power Consumption | Power Rating | 100 W | 120 W | 150 W | 200 W |
| Standby Condition | < 0.5W | < 0.5W | < 0.5W | < 0.5W | |
| Display Panel | Visible Screen Size | 108 cm | 126 cm | 139 cm | 164 cm |
| Resolution | 3840 X 2160 | 3840 X 2160 | 3840 X 2160 | 3840 X 2160 | |
| Dimensions (L X B X H) | with Pedestal TV only | 95.7 X 23.3 X 62.3 cm95.7 X 8.7 X 56.4 cm | 111.0 X 23.3 X 70.7 cm111.0 X 9.0 X 64.9 cm | 122.5 X 23.3 X 77.6 cm122.5 X 9.1X 71.8 cm | 144.5 X 27.2 X 90.5 cm144.5 X 9.7 X 83.7 cm |
| Net Weight | 6.3 kg (with Pedestal)6.2 kg (TV only) | 8.2 kg (with Pedestal)7.9 kg (TV only) | 11.3 kg (with Pedestal)11.2 kg (TV only) | 18.1 kg (with Pedestal)17.8 kg (TV only) | |
| Gross Weight | 9.3 kg | 11.3 kg | 16.1 kg | 24.5 kg | |
| Sound | Speaker | 6 Ω | 6 Ω | 6 Ω | 6 Ω |
| Audio Output | 10 W + 10 W | 10 W + 10 W | 10 W + 10 W | 10 W + 10 W | |
| TV System | DTV: DVB-T/T2/C | ||||
| ATV: PAL BG/I/DK | |||||
| Connection Terminals | AV IN | Mini AV Connector x 1 (Need AV converting cable) | |||
| ANTENNA IN | Aerial Connector x 1 | ||||
| HDMI | HDMI Connector x 3 | ||||
| USB | USB 2.0 Connector x 2, DC 5 V, Max. 500mA | ||||
| DIGITAL AUDIO OUT | Optical x 1 | ||||
| LAN IN | Network Connector x 1 | ||||
| Connectivity | WiFi Type | ieee 802.11 a/b/g/n/ac 2.4G+5G 2T2R | |||
| Bluetooth Ver. | 2.4G/5G | ||||
Note
- Design and Specifications are subject to change without notice.
- Weight and Dimensions shown herein are approximate
- The graphics in this manual are only for reference.
- Your TV may be slightly different from that shown in this manual.
- In dry environment due to static electricity, the product may restart and return to the main OSD interface, USB player interface or the previous source mode. It is normal and please continue to operate the TV.
OSS license
This product incorporates the following software:
(1) The software developed independently by or for Panasonic Entertainment & Communication Co., Ltd.,
(2) The software owned by third party and licensed to Panasonic Entertainment & Communication Co., Ltd.,
(3) The software licensed under the GNU General Public License, Version 2.0 (GPL V2.0),
(4) The software licensed under the GNU LESSER General Public License, Version 2.1 (LGPL V2.1), and/or
(5) Open source software other than the software licensed under the GPL V2.0 and/or LGPL V2.1.
The software categorized as (3) - (5) are distributed in the hope that it will be useful, but WITHOUT ANY WARRANTY, without even the implied warranty of MERCHANTABILITY or FITNESS FOR A PARTICULAR PURPOSE.
At least three (3) years from delivery of this product, Panasonic will give to any third party who contacts us at the contact information provided below, for a charge no more than our cost of physically performing source code distribution, a complete machine-readable copy of the corresponding source code covered under GPL V2.0, LGPL V2.1 or the other licenses with the obligation to do so, as well as the respective copyright notice thereof. Contact Information: osd-cd-request@gg.jp.panasonic.com

Google TV
Google TV is the name of this device's software experience and a trademark of Google LLC. Google, YouTube, and Chromecast built-in and other related marks are trademarks of Google LLC.

Dolby
AUDIO
Manufactured under license from Dolby Laboratories.
Dolby, Dolby Audio, and the double-D symbol are trademarks of Dolby Laboratories Licensing Corporation.

HEDD-DEFINITION MULTIPEND INTERFACE
The Adopted Trademarks HDMI, HDMI High-Definition Multimedia Interface, HDMI trade dress and the HDMI Logos are trademarks or registered trademarks of HDMI Licensing Administrator, Inc. in the United States and other countries.

For DTS patents, see http://patents.dts.com. Manufactured under license from DTS, Inc. or DTS Licensing Limited. DTS, TruSurround, and the DTS logo are registered trademarks or trademarks of DTS, Inc. in the United States and other countries. © 2021 DTS, Inc. ALL RIGHTS RESERVED.

Bluetooth®
The Bluetooth® word mark and logos are registered trademarks owned by Bluetooth SIG, Inc. and any use of such marks by Panasonic Entertainment & Communication Co., Ltd. is under license. Other trademarks and trade names are those of their respective owners.

Advance
Cited by a person at the first place of the
Covered by one or more claims of the HEVC patents listed at patentlist.accessadvance.com.
Diproduksi Oleh :
PT. Skyworth Industry Indonesia
East Jakarta Industrial Park Plot 5G Cikarang Selatan,
Bekasi 17530, Indonesia
Pusat Pelayanan Pelanggan :
Contact Center
Telp. 0804-1-111-111
E-mail: ccc@id.panasonic.com
Website: www.panasonic.com/id
Customer's Record
The model number and serial number of this product may be found on its rear panel. You should note this serial number in the space provided below and retain this book, plus your purchase receipt, as a permanent record of your purchase to aid in identification in the event of theft or loss, and for Warranty Service purposes.
Model Number
Serial Number
Panasonic Entertainment & Communication Co., Ltd.
Web Site: https://www.panasonic.com/id
- Panasonic®
- Bab 1: Pendahuluan
- Bab 2: Fitur Dasar
- Bab 3: Fitur Cerdas
- Bab 4: Informasi Teknis
- Peringatan
- Menangani steker dan kabel listrik
- Sumber daya
- Jangan gunakan penstabil tegangan eksternal dengan perangkat TV
- Jangan lepaskan penutup dan jangan pernah memodifikasi TV sendiri
- Jangan sampai terkena hujan atau kelembapan yang berlebihan
- Jangan masukkan benda asing ke dalam TV
- Jangan letakkan TV di permukaan yang miring atau tidak stabil, dan pastikan TV tidak menggantung di tepi alas
- Gunakan alas khusus/perlengkapan pemasangan
- Jangan sampai terkena sinar matahari langsung dan sumber panas lainnya
- Lingkungan Penggunaan
- Peringatan: Bahaya Stabilitas
- Pembersihan
- Menggantung TV di Dinding
- Perhatian
- Jangan menghalangi ventilasi udara belakang
- Kerusakan
- Simbol
- Tindakan Pencegahan untuk Menggunakan Remote Kontrol
- Memasang/Melepas Baterai Remote
- Aksesori Standar
- Catatan:
- Aksesori Opsional
- Braket gantung
- Pemasangan Alas
- Memindahkan alas TV
- Terminal TV
- DIGITAL AUDIO OUT
- ETHERNET
- HDMI IN
- USB
- ANTENNA IN
- AV IN
- Kontrol TV
- ■ Sambungan Daya
- ■ Menyalakan atau mematikan TV
- ■ Indikator Daya
- ■ Tombol Kontrol TV
- Tombol Kontrol TV (Terletak di bawah ikon ini)
- Remote Kontrol
- Cara Memasangkan Remote Kontrol Bluetooth dengan TV
- ■ Pasangkan Remote Kontrol Bluetooth dengan TV
- Pengaturan Awal
- Langkah 7: Pilih lingkungan penggunaan TV antara "Home" (Rumah) dan "Shop" (Toko).
- Memilih Sumber Masukan
- Pengaturan
- Halaman Utama
- Google Assistant
- Chromecast Built-In
- ■ Definisi Chromecast Built-In
- ■ Cara Cast Konten
- ■ Cast Layar/Audio (seperti Google Home)
- Penolakan tentang Menggunakan Google TV
- Pemutar Multimedia
- ■ Persiapan
- ■ Operasi Media
- ■ Menonton Film
- ■ Putar Musik
- ■ Menelusuri Foto
- ■ Format File yang Didukung di Pemutar Multimedia
- Bagian 4: Informasi Teknis
- Perawatan
- Perawatan rutin:
- Untuk kotoran membandel:
- Steker listrik
- Pemecahan Masalah
- Tidak ada gambar, tidak ada suara
- Tidak ada warna
- Remote kontrol tidak berfungsi
- Tidak ada gambar, suara normal
- Gambar normal, tidak ada suara
- Gangguan frekuensi radio
- Remote kontrol bluetooth tidak dapat dipasangkan
- Tidak dapat masuk ke akun Google
- Tidak dapat menggunakan Google Assistant
- Catatan
- Lisensi OSS
- Produk ini menyertakan perangkat lunak berikut ini:
- Catatan Pelanggan
- Operating Instructions
- LED TV
- Chapter 1: Introduction
- Chapter 2: Basic Features
- Chapter 3: Smart Features
- Chapter 4: Technical Information
- Warning
- Handling the mains plug and lead
- Power source
- Do not use external voltage stabilizer with the TV set
- Do not remove covers and never modify the TV by yourself
- Do not expose to rain or excessive moisture
- Do not insert external objects into the TV
- Do not place the TV on sloped or unstable surfaces, and ensure that the TV does not hang over the edge of the base
- Use only the dedicated pedestals/mounting equipments
- Do not expose to direct sunlight and other sources of heat
- Use Environment
- Warning: Stability Hazard
- Cleaning
- Hanging the TV Set on the Wall
- Caution
- Do not block the rear air vents
- Damages
- Symbol
- Precautions for Using Remote Control
- Installing/Removing Remote's Batteries
- Note:
- Optional Accessories
- Wall-hanging bracket
- - Screw Specifications
- Pedestal Installation
- Removing the pedestal from the TV
- TV Terminals
- TV Controls
- ■ Power Connection
- ■ Turn on or turn off the TV
- ■ Power Indicator
- ■ TV Control Button
- TV Control Button (Located under this icon)
- Remote Control
- How to Pair Bluetooth Remote Control with the TV
- ■ Pair Bluetooth Remote Control with the TV
- Initial Setup
- Selecting the Input Source
- Settings
- Home Page
- ■ Definiton of Chromecast Built-in
- ■ How to Cast Content
- ■ Cast Screen/Audio (like Google Home)
- ■ Cast Live streams and Videos (like YouTube)
- Disclaimer about Using Google TV
- Multimedia Player
- ■ Preparation
- ■ Media Operation
- ■ Watch Movies
- ■ Play Music
- ■ Browse Photos
- Maintenance
- Regular care:
- For stubborn dirt:
- Mains plug
- Troubleshooting
- No picture, no sound
- No colour
- Remote control does not work
- No picture, normal sound
- Normal picture, no sound
- Radio frequency interference
- Bluetooth remote control can't be paired successfully
- Can't sign in Google account
- Can't use Google Assistant
- Note
- OSS license
- This product incorporates the following software:
- Customer's Record
Mærke : PANASONIC
Model : TH-55NX600G
Kategori : Fjernsyn