INTV-43AT3100 - Fjernsyn Infiniton - Gratis brugsanvisning og manual
Find enhedens vejledning gratis INTV-43AT3100 Infiniton i PDF-format.

Brugerspørgsmål om INTV-43AT3100 Infiniton
0 spørgsmål om dette apparat. Besvar dem du kender, eller stil dit eget.
Stil et nyt spørgsmål om dette apparat
Download vejledningen til din Fjernsyn i PDF-format gratis! Find din vejledning INTV-43AT3100 - Infiniton og tag din elektroniske enhed tilbage i hånden. På denne side er alle dokumenter nødvendige for brugen af din enhed offentliggjort. INTV-43AT3100 af mærket Infiniton.
BRUGSANVISNING INTV-43AT3100 Infiniton
| Información de seguridad | 3 |
| Instalación | 5 |
| Introducción | 7 |
| Funcionamiento | 10 |
| Solución de problemas | 21 |
• Lea estas instrucciones.
- Conserve estas instrucciones.
- Preste atención a todas las advertencias.
- Siga todas las instrucciones.
• No utilice este producto cerca del agua.
• Límpielo sólo con un paño seco y que no sea abrasivo.
- No obstruya las aberturas de ventilación.
- Instale el aparato de acuerdo con las instrucciones del fabricante.
- No lo instale cerca de fuentes de calor como radiadores, rejillas de calefacción, cocinas u otros aparatos (incluidos amplificadores) que produzcan calor.
- No anule el propósito de seguridad del enchufe polarizado. Si el enchufe suministrado no encaja en su toma de corriente, consulte a un electricista para que sustituya la toma de corriente que ha quedado obsoleta.
- Proteja el cable de alimentación para evitar que sea pisado o pellizado, especialmente en los conectores, en las tomas de corriente y en el punto en el que sale del aparato.
- Utilice únicamente los accesorios especificados por el fabricante.
- Desenchufe este aparato durante tormentas eléctricas o cuando no lo vaya a utilizar durante largos periodos de tiempo.
- Para cualquier reparación, diríjase a personal cualificado. Es necesario reparar el aparato si éste ha sufrido algún tipo de daño, como por ejemplo si el cable de alimentación o el enchufe están dañados, si se ha derramado líquido o han caído objetos dentro del aparato, si éste ha estado expuesto a la lluvia o a la humedad, si no funciona con normalidad o si se ha caído.
- El enchufe de alimentación se utiliza como dispositivo de desconexión, que debe ser de fácil acceso.
- No cubra las aberturas de ventilación con objetos como periódicos, manteles, cortinas, etc.
- No deben colocarse sobre el aparato fuentes que desprendan llamas, como velas encendidas.
- Debe prestar atención a los factores ambientales del tratamiento de la batería.
- Utilice el producto en condiciones climáticas moderadas.
- El aparato no debe exponerse a goteos ni salpicaduras y no deben colocarse sobre el mismo objetos que contengan líquidos, como jarrones.
Advertencia:
Para reducir el riesgo de incendio o descarga eléctrica, no exponga este producto a la lluvia ni a la humedad.
Advertencia:
Evite exponer los acumuladores a un calor excesivo (luz solar, fuego, etc.).

Este símbolo indica que este producto tiene doble aislamiento entre la tensión eléctrica potencialmente peligrosa y el componente accesible al usuario. Para las reparaciones, sólo pueden utilizarse las mismas piezas de repuesto.
PRECAUCIÓN
RIESGO DE DESCARGA ELÉCTRICA. NO ABRA EL APARATO.

EL SÍMBOLO DE UN RAYO CON UNA FLECHA DENTRO DE UN TRIÁNGULO EQUILÁTERO ADVIERTE AL USUARIO DE UN "VOLTAJE PELIGROSO" SIN AISLAR DENTRO DEL GABINETE DEL PRODUCTO QUE PODRÍA TENER SUFICIENTE INTENSIDAD COMO PARA CONSTITUIR UN RIESGO DE DESCARGA ELÉCTRICA PARA LAS PERSONAS.

EL SIGNO DE EXCLAMACIÓN DENTRO DE UN TRIÁNGULO EQUILÁTERO ADVIERTE AL USUARIO DE LA PRESENCIA DE INSTRUCCIONES IMPORTANTES DE OPERACIÓN Y MANTENIMIENTO (REPARACIONES) EN LA INFORMACIÓN QUE ACOMPAÑA AL PRODUCTO.
ADVERTENCIA: PARA REDUCIR EL RIESGO DE INCENDIO O DESCARGA ELÉCTRICA, NO EXPONGA ESTE APARATO A LA LLUVIA NI A LA HUMEDAD.
- No modifique ninguna parte del interior del televisor ni los controles de ajuste no mencionados en este manual. Todos los televisores LED son aparatos de alta tensión. Cuando limpie el polvo o las gotas de agua de los PANELES LED o de los muebles, desenchufe el cable de alimentación de la toma de corriente y limpie el televisor con un paño suave y seco. Por favor, desconecte el cable de alimentación y el cable de antena para evitar daños en el televisor en caso de tormenta o incendio.
- Todas las reparaciones del televisor deben ser realizadas únicamente por personal cualificado del servicio técnico de televisores.

text_image
Warning sign depicting a sound wave with sound waves inside a trianglePrecaución: El empleo de auriculares a volumen alto durante períodos prolongados de tiempo puede provocar una pérdida auditiva permanente. Para Francia, los productos han sido sometidos a pruebas para comprobar que cumplen el requisito de nivel de presión sonora establecido en el NF EN 50332 L.5232-1 correspondiente.
Nota: Para evitar posibles daños auditivos, no escuches a volúmenes altos durante períodos largos.
Protección ambiental
Este aparato no contiene gases que podrían dañar la capa de ozono, ni en su circuito de refrigerante ni en los materiales de aislamiento. El aparato no debe desecharse junto con los residuos urbanos y la basura. La espuma de aislamiento contiene gases inflamables. El aparato debe desecharse de acuerdo con las regulaciones del aparato para obtener de las autoridades locales. Evite dañar la unidad de refrigeración, especialmente el intercambiador de calor. Los materiales utilizados en este aparato marcados con el símbolo son reciclables.
natural_image
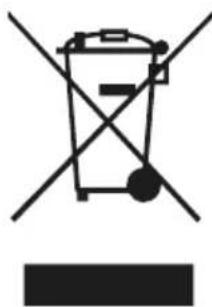
Symbol of a trash bin crossed with a diagonal line and a horizontal bar below (no text or numbers present)Este símbolo en el producto o en su embalaje indica que este producto no puede ser tratado como basura doméstica. En su lugar, debe llevarse al punto de recogida apropiado para el reciclaje de equipos eléctricos y electrónicos.
Al asegurarse de que este producto se elimine correctamente, ayudará a prevenir posibles consecuencias negativas para el medio ambiente y la salud humana, que de otro modo podrían ser causadas por el manejo inadecuado de los desechos de este producto.
Para obtener información más detallada sobre el reciclaje de este producto, comuníquese con las autoridades locales, el servicio de eliminación de desechos domésticos o la tienda donde adquirió el producto.
Materiales de embalaje
Los materiales con el símbolo son reciclables. Deseche el embalaje en un contenedor de recogida adecuado para reciclarlo.
Eliminación del aparato
- Desconecte el enchufe de la toma de corriente.
- Cortar el cable de alimentación y desecharlo.

text_image
Warning sign depicting a flame symbol in a triangular shape¡Advertencia! Durante el uso, servicio y eliminación del aparato, preste atención a este símbolo, el cual, se encuentra en la parte posterior del electrodoméstico (panel trasero o compresor). Dicho símbolo será de color amarillo o naranja. Es una señal de advertencia de riesgo de incendio. Hay materiales inflamables en las tuberías de refrigerante y compresor. Manténgase alejado de la fuente de fuego durante el uso, servicio y eliminación.
• Coloque el televisor en una habitación donde la luz no incida directamente sobre la pantalla.
- La oscuridad total o los reflejos en la pantalla pueden provocar fatiga ocular. Se recomienda una iluminación indirecta suave para una visualización cómoda.
- Deje suficiente espacio entre el televisor y la pared para que haya ventilación.
- Evite los lugares con temperaturas elevadas para evitar posibles daños en el mueble o que las piezas se estropeen prematuramente.
• No cubra la ventilación cuando utilice el televisor.
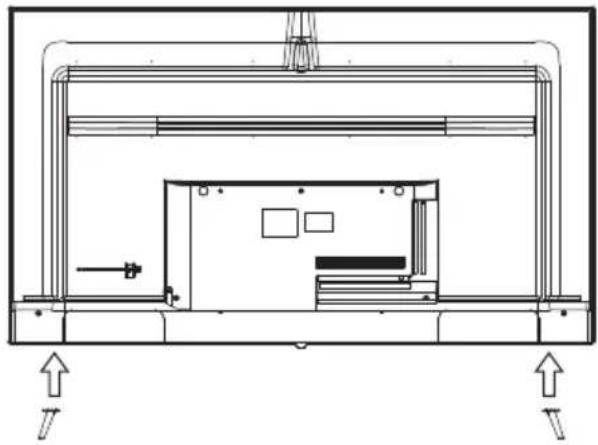
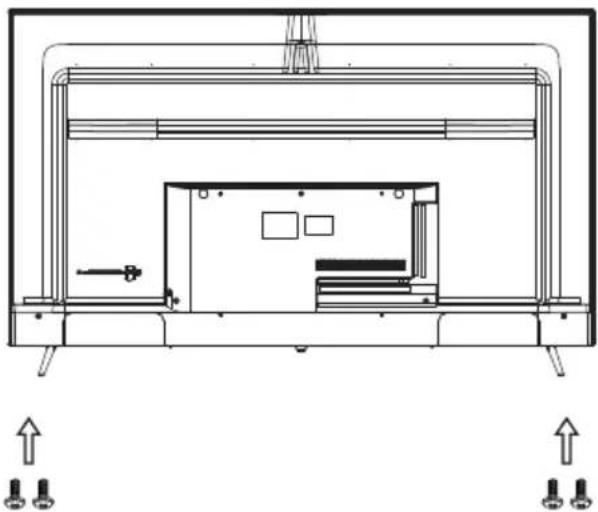
Instrucciones de montaje del soporte base
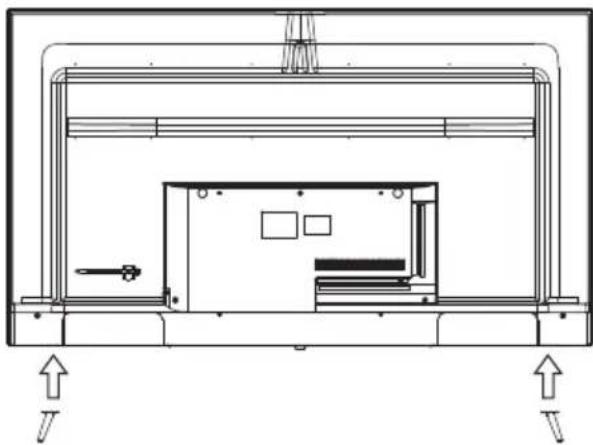
Asegúrese de colocar el televisor con la pantalla hacia abajo sobre una superficie plana. Se recomienda el uso de 2 personas para moverlo, debido al tamaño y peso de este televisor.
Asegúrese de que la mesa o escritorio que utilice disponga de una superficie plana y completamente limpia, y utilice un paño suave entre la cara del televisor y la mesa para proteger la pantalla del televisor.
natural_image
Technical line drawing of a mechanical assembly with no visible text or symbols- Coloque el televisor horizontalmente con la pantalla hacia abajo, introduzca el soporte en la ranura y ajuste los orificios de los tornillos para que coincidan entre sí.

natural_image
Technical line drawing of a mechanical assembly with no visible text or symbols- Introduzca los tornillos dentro de los orificios del soporte.
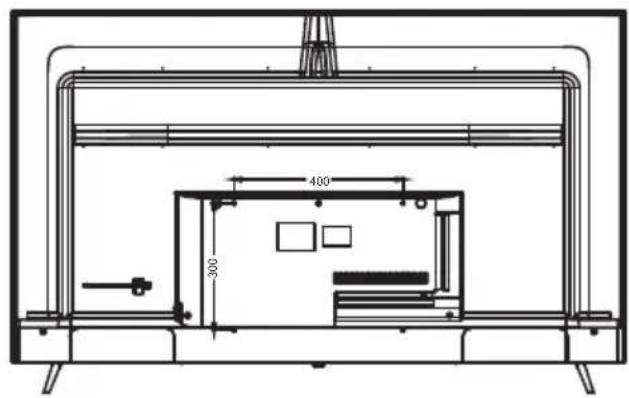
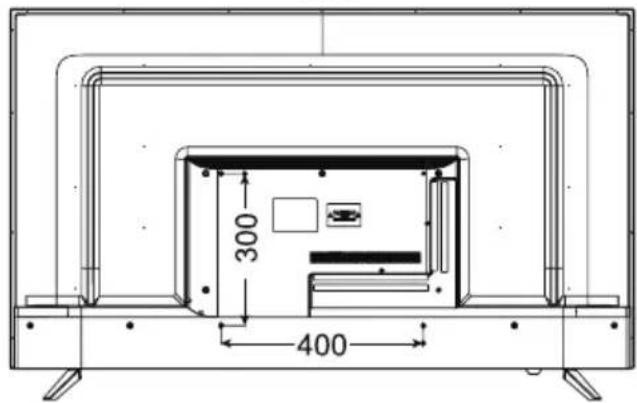
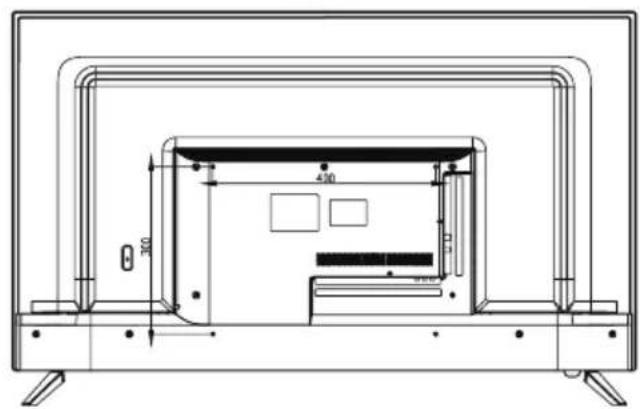
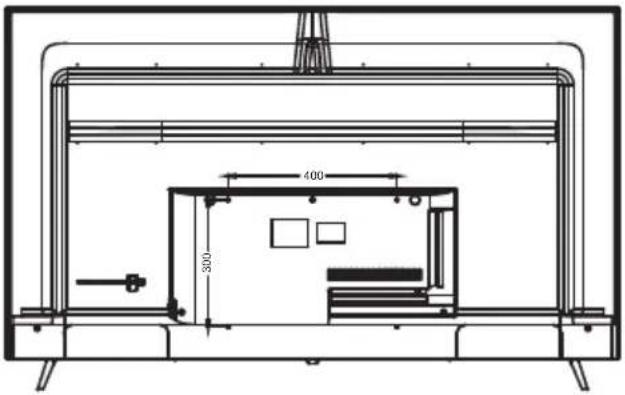
Instrucciones de montaje del soporte de pared
La longitud del tornillo especificada es sólo una recomendación. La longitud real requerida puede variar en función del tipo de soporte de pared utilizado.
El televisor no incluye un soporte de pared; debe adquirirse por separado. Utilice únicamente soportes de pared compatibles con VESA de acuerdo con las especificaciones recomendadas para este modelo. El uso de otros soportes de pared o una instalación inadecuada pueden causar lesiones personales o daños al televisor.
Siga todas las instrucciones del manual de instrucciones del soporte de pared elegido.
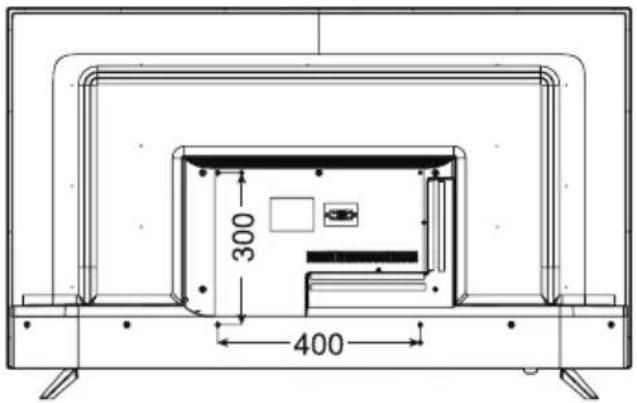
| Medidas VESA | Tamaño del tornillo para conectar el televisor al soporte de pared. |
| 400x300 | Cabeza del tornillo M6x16mm |
| 400x300 | Cabeza del tornillo M6x12mm |
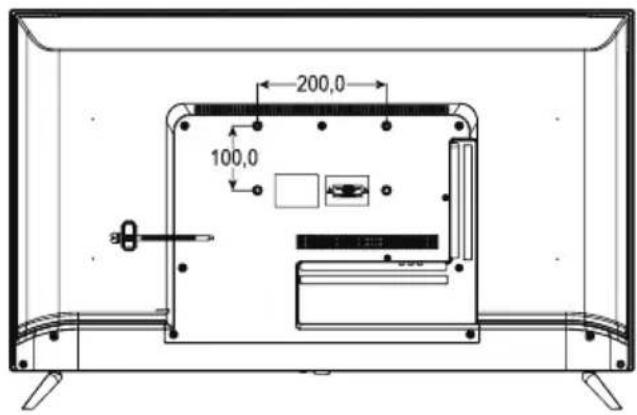
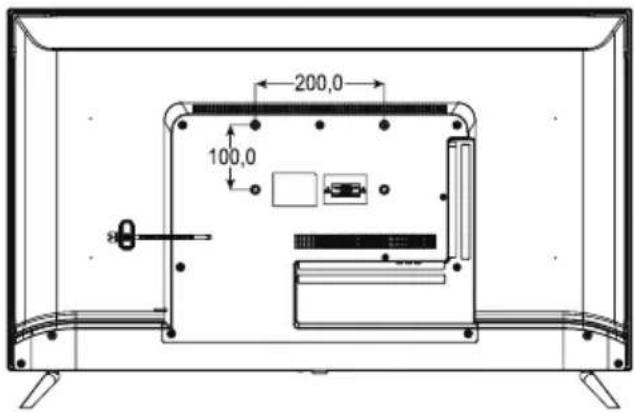
| 200x100 | Cabeza del tornillo M6x8mm |
65"
text_image
400 30055"
text_image
300 40050"
text_image
300 450 50043"
text_image
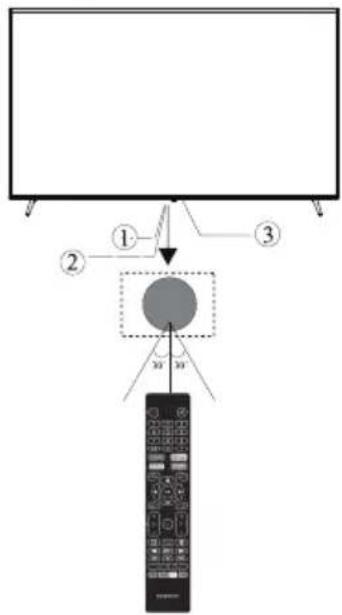
200,0 100,0Panel frontal
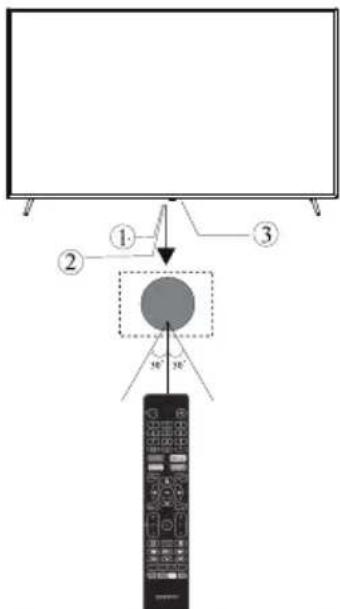
text_image
Diagram showing a remote control device with labeled components and directional arrows indicating movement or positioning.1: Sensor de control remoto.
2: Indicador LED: ROJO - EN ESPERA.
3: teclado
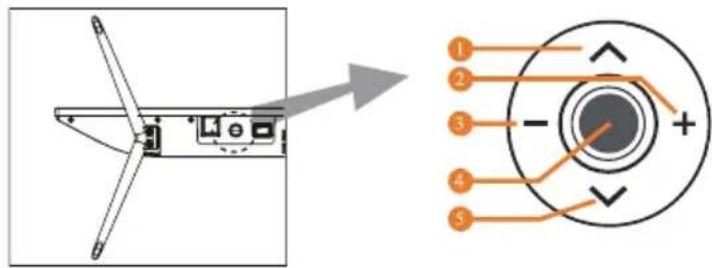
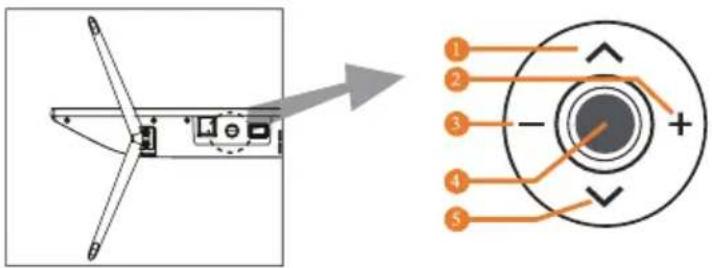
Teclas del panel
Los botones del televisor están situados en la parte inferior del televisor, cerca del indicador LED.
text_image
Technical diagram showing a mechanical component with labeled parts and an exploded view of the internal structure.1: Selecciona el canal siguiente o muévete hacia arriba.
2: Subir el volumen o desplazarse a la derecha.
3: Baje el volumen o desplácese a la izquierda.
4: Cuando el televisor esté en modo de espera, pulse para encenderlo.
Cuando el televisor esté encendido, pulse para entrar en el menú.
Utilice el joystick para navegar por la interfaz y pulse para entrar en el elemento resaltado.
Cuando el televisor esté encendido, mantenga pulsado para entrar en el modo de espera.
5: Seleccione el canal anterior o desplácese hacia abajo.
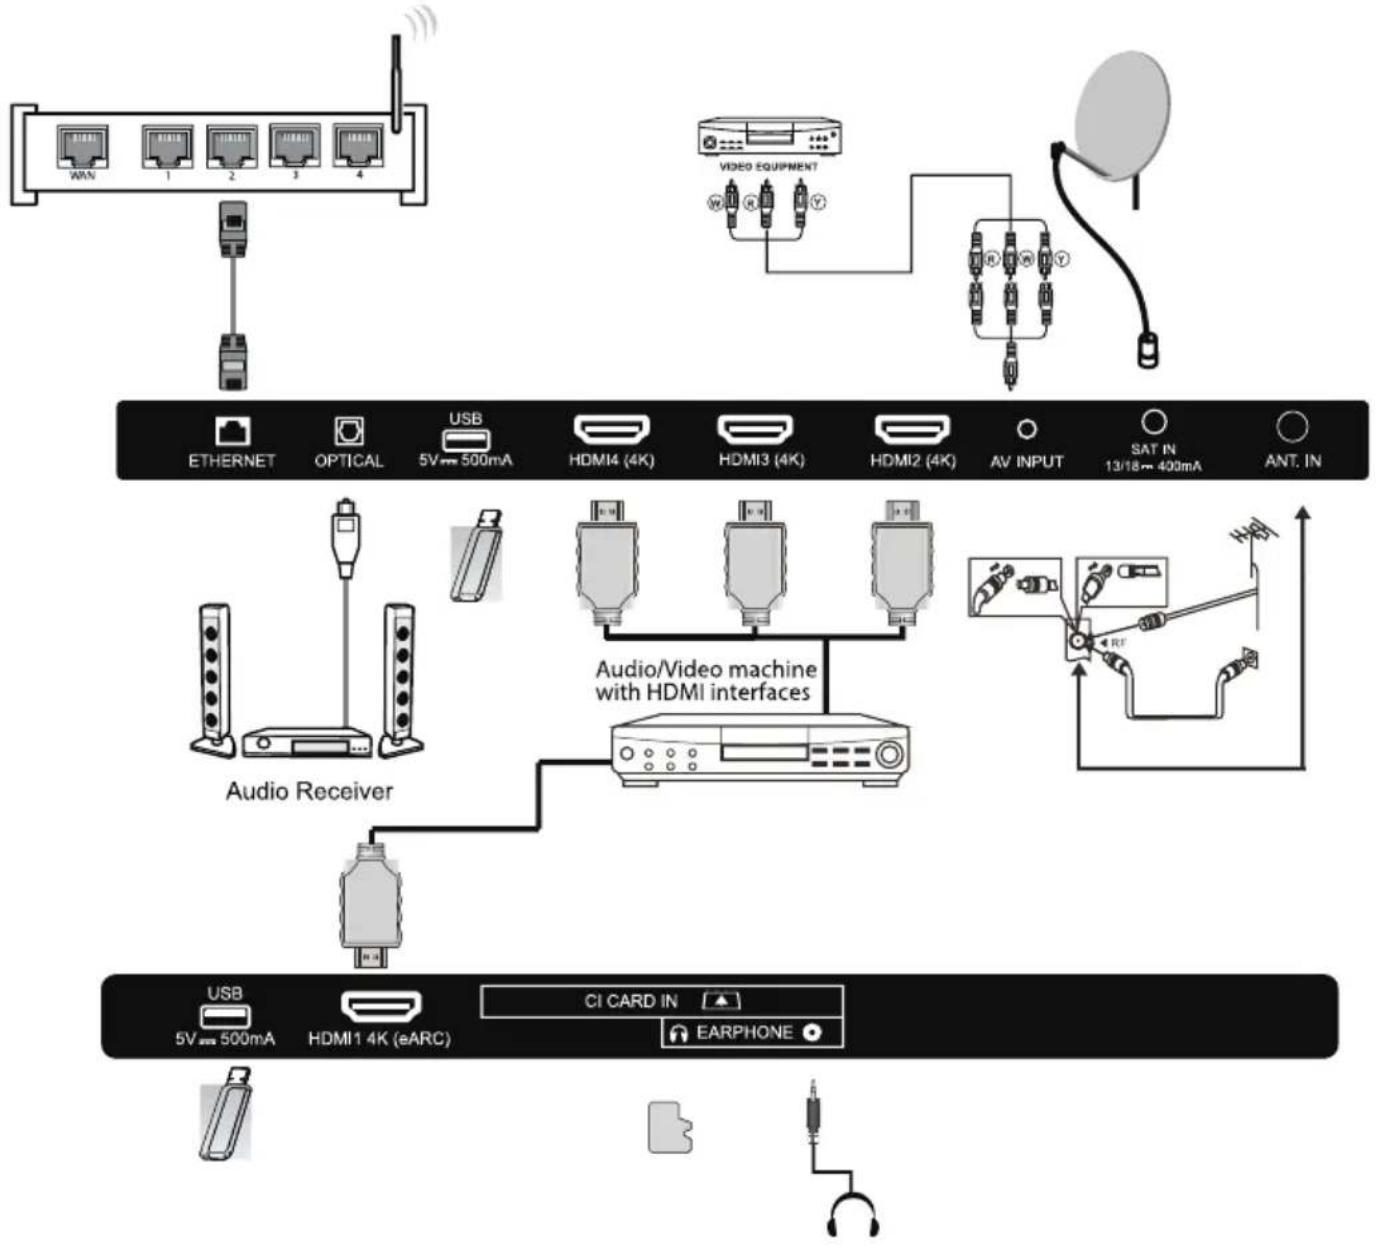
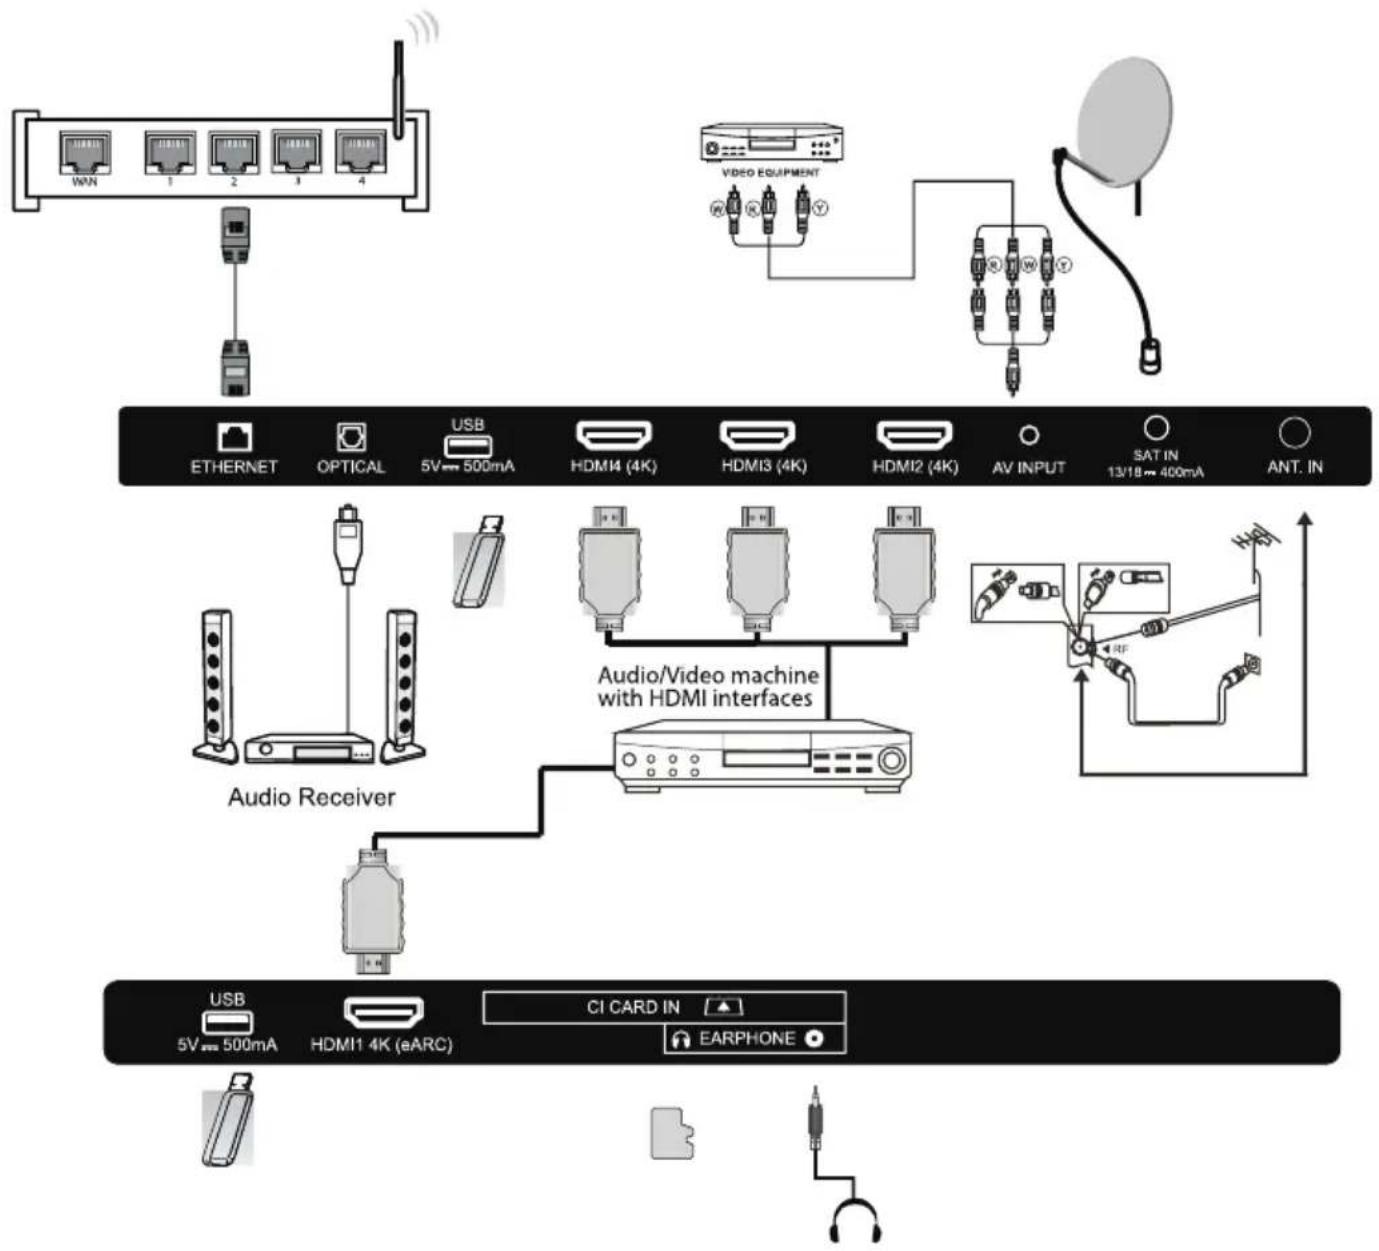
Conexiones AV Traseras

text_image
ETHERNET OPTICAL USB 5V=500mA HDMI (4K) HDMI (4K) HDMI2 (4K) AV INPUT SAT IN 13/18m 400mA ANT. IN ① ② ③ ④ ⑤ ⑥ ⑦Conexiones AV Traseras (Laterales)

text_image
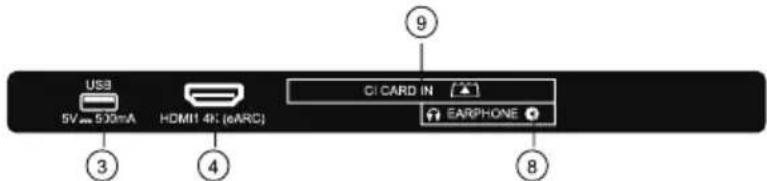
USB 5V am 5.32mA HOM1 4K (eARC) OI CARD IN EARPHONE ③ ④ ⑧- ETHERNET: Conecte la interfaz de red.
- ÓPTICA: Salida de audio digital óptica.
- USB: Conecte su dispositivo de memoria USB (por ejemplo, memoria USB) para la grabación PVR o para reproducir archivos compatibles que se almacenan en él.
- HDMI: Conéctalo a la salida HDMI de hasta 4 fuentes de vídeo externas (por ejemplo, un reproductor de DVD, una consola de juegos o un reproductor de Blu-ray).
- ENTRADA AV: Conéctalo a la toma AV OUT de tu fuente de vídeo externa (por ejemplo, un reproductor de DVD)*.
- ENTRADA SAT: Conecte el satélite para recibir la señal de TV.
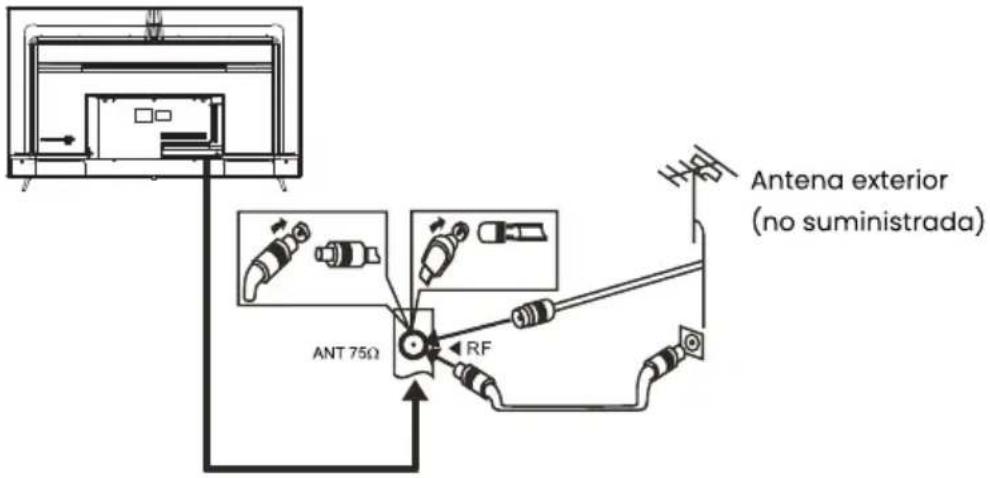
- ANT.IN: Conecte la antena o el cable coaxial de 75 Ohm para recibir la señal de TV.
- AURICULARES: Conecte aquí los auriculares. Nota: La conexión de los auriculares silenciará el sonido de los altavoces integrados en el televisor.
- CI CARD IN:
* Utilice el cable conector suministrado para convertir el puerto mini AV en entradas RCA.
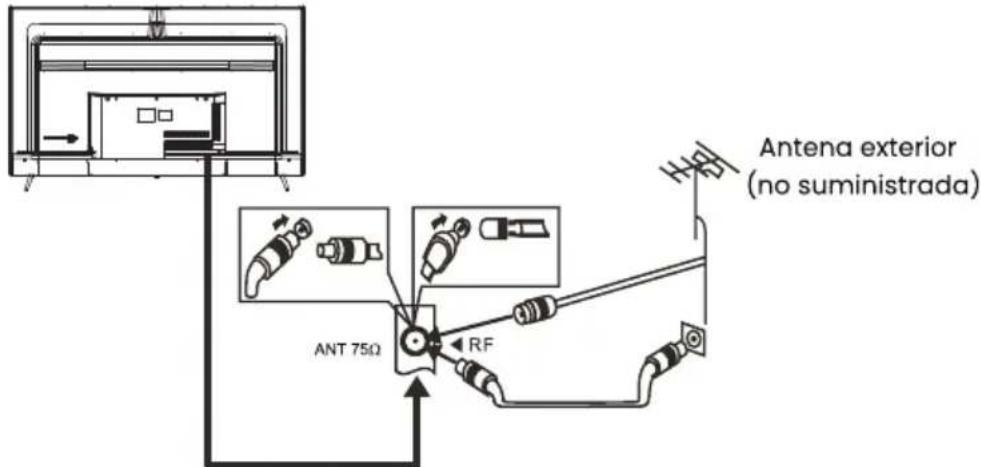
Antena
text_image
Antena exterior (no suministrada) ANT 75Ω RFNota:
Conexiones aéreas: IEC (hembra)
Impedancia de entrada: 75Ω sin balancear
Modo predefinido (HDMI)
| RESOLUTION | V.Freq.(Hz) |
| 640*480 | 50/60 |
| 800*600 | 50/60 |
| 1024*768 | 50/60 |
| 1360*768 | 50/60 |
| 1280*768 | 50/60 |
| 1920*108 0 | 50/60 |
| 3840*2160 | 24/25/30/60 |
Conexión de equipos audiovisuales
Se puede conectar a los siguientes dispositivos: VCR, reproductor multimedia, DVD, cámara de vídeo, videoconsola o equipo estéreo, etc...
Este televisor ofrece dos grupos de AV para conexiones con VCR, DVD u otro equipo de video.
Por favor, consulte el manual de usuario para los equipos.
Puede utilizar los terminales de entrada en el trasero del televisor.
flowchart
graph TD
    A["Network Device"] --> B["USB"]
    A --> C["USB 5V 500mA"]
    A --> D["HDMI4 (4K)"]
    A --> E["HDMI3 (4K)"]
    A --> F["HDMI2 (4K)"]
    A --> G["AV INPUT"]
    A --> H["SAT IN 13/18 400mA"]
    A --> I["ANT. IN"]
    J["Video Equipment"] --> K["Satellite"]
    K --> L["Antenna"]
    M["Audio Receiver"] --> N["Audio/Video machine with HDMI interfaces"]
    N --> O["Microcontroller with HDMI Interface"]
    P["USB 5V 500mA"] --> Q["HDMI1 4K (eARC)"]
    R["CI CARD IN"] --> S["EARPHONE"]
Formatos multimedia
| JPEG, JPEG, PNG, BMP, GIF | |
| AVI, MKV, MP4, MOV, VOB, DAT, FLV, MPG, WMV, TP, TRP, M3T, M2V, M4V, MPEG, 3GP, MJPEG, TS | |
| MP3, AC3, AAC, WAV, OGG, FLAC, M4A, AMR | |
| TXT |
Nota:
Para la reproducción multimedia, el formato debe ser FAT32
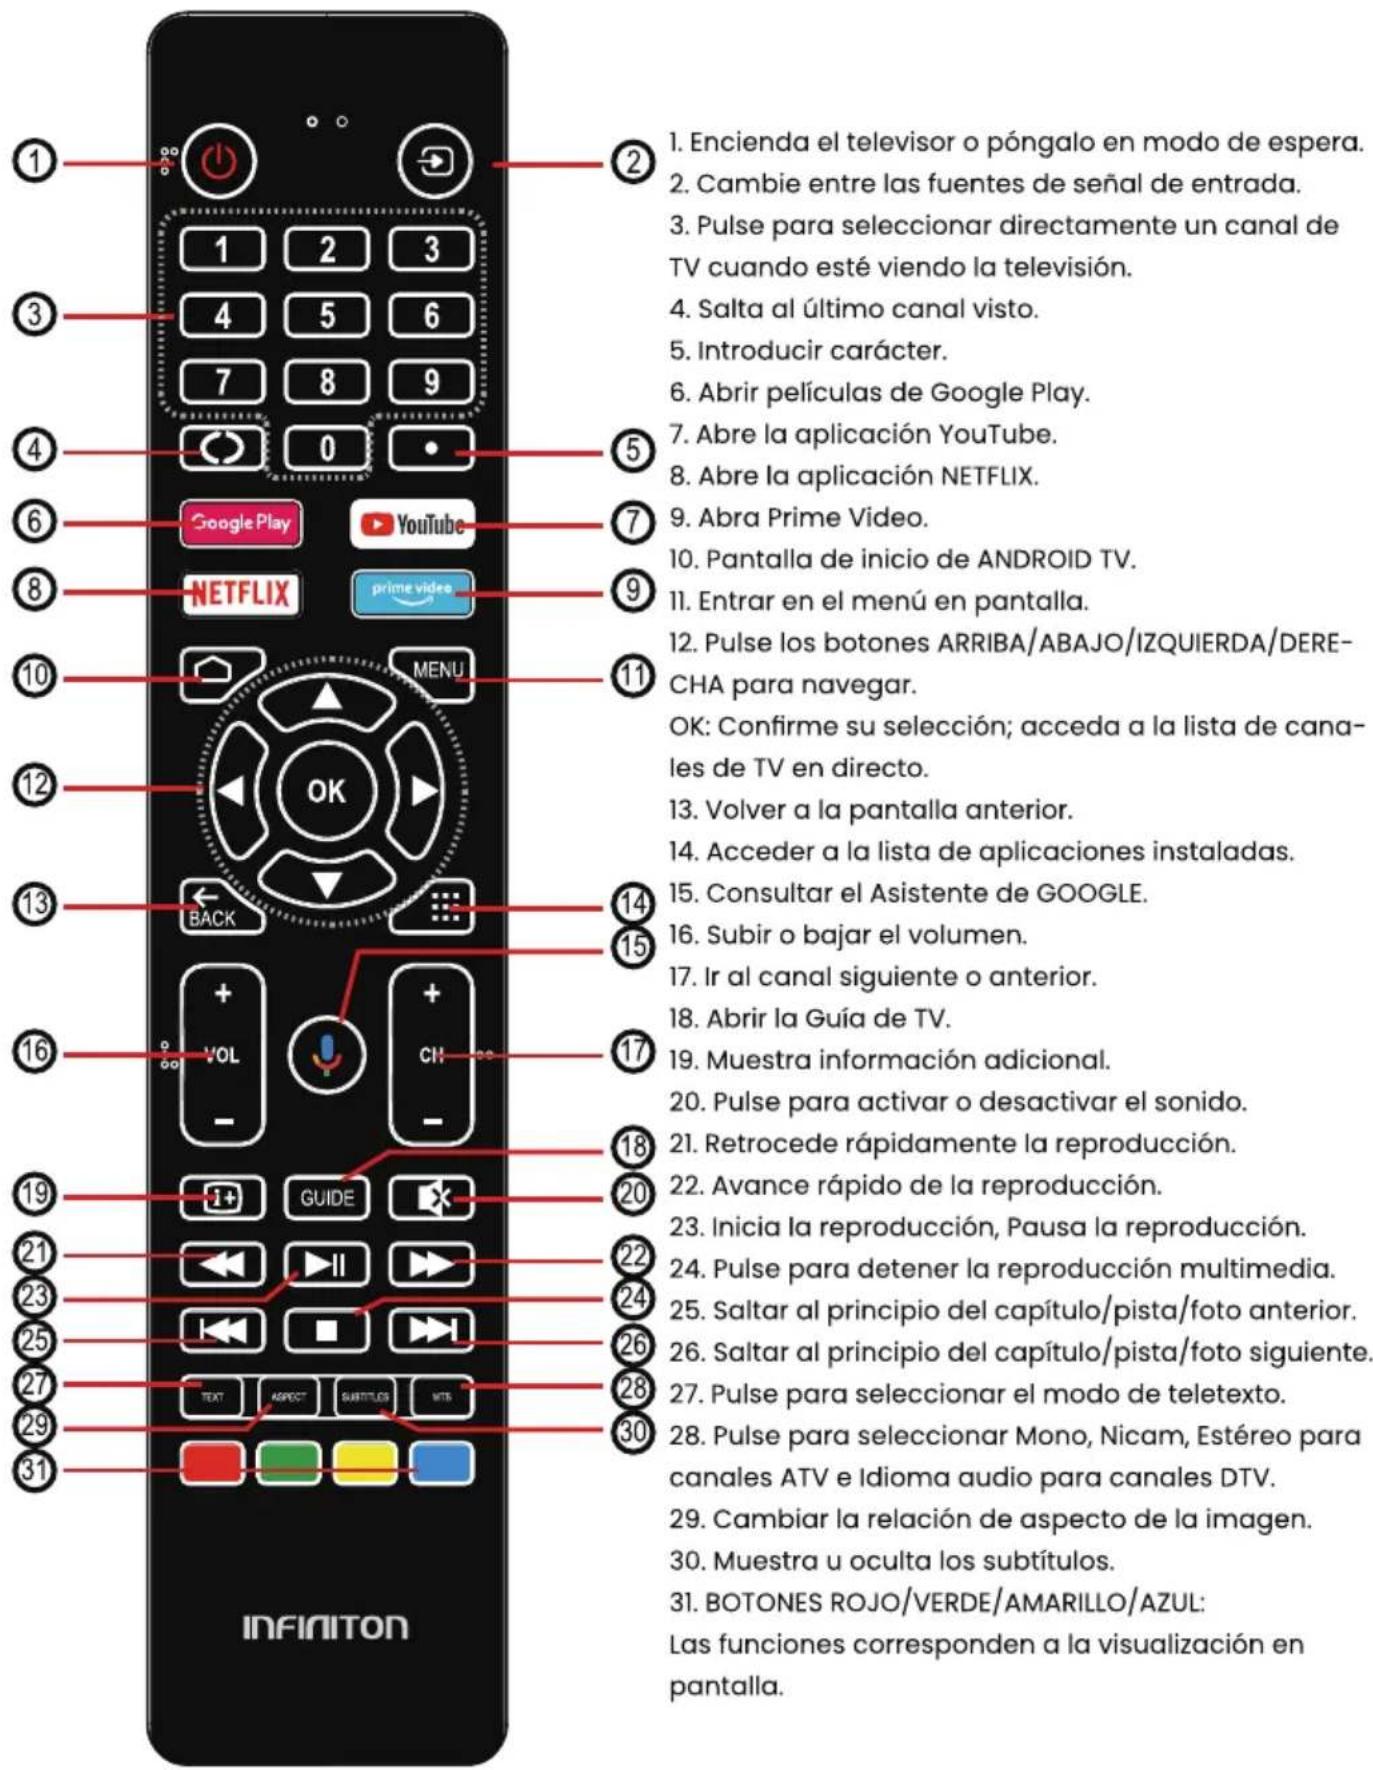
Mando a distancia
text_image
1. Encienda el televisor o póngalo en modo de espera. 2. Cambie entre las fuentes de señal de entrada. 3. Pulse para seleccionar directamente un canal de TV cuando esté viendo la televisión. 4. Salta al último canal visto. 5. Introducir carácter. 6. Abrir películas de Google Play. 7. Abre la aplicación YouTube. 8. Abre la aplicación NETFLIX. 9. Abra Prime Video. 10. Pantalla de inicio de ANDROID TV. 11. Entrar en el menú en pantalla. 12. Pulse los botones ARRIBA/ABAJO/IZQUIERDA/DERE-CHA para navegar. OK: Confirme su selección; acceda a la lista de canales de TV en directo. 13. Volver a la pantalla anterior. 14. Acceder a la lista de aplicaciones instaladas. 15. Consultar el Asistente de GOOGLE. 16. Subir o bajar el volumen. 17. Ir al canal siguiente o anterior. 18. Abrir la Guía de TV. 19. Muestra información adicional. 20. Pulse para activar o desactivar el sonido. 21. Retrocede rápidamente la reproducción. 22. Avance rápido de la reproducción. 23. Inicia la reproducción, Pausa la reproducción. 24. Pulse para detener la reproducción multimedia. 25. Saltar al principio del capítulo/pista/foto anterior. 26. Saltar al principio del capítulo/pista/foto siguiente. 27. Pulse para seleccionar el modo de teletexto. 28. Pulse para seleccionar Mono, Nicam, Estéreo para canales ATV e Idioma audio para canales DTV. 29. Cambiar la relación de aspecto de la imagen. 30. Muestra u oculta los subtítulos. 31. BOTONES ROJO/VERDE/AMARILLO/AZUL: Las funciones corresponden a la visualización en pantalla.Ajuste inicial
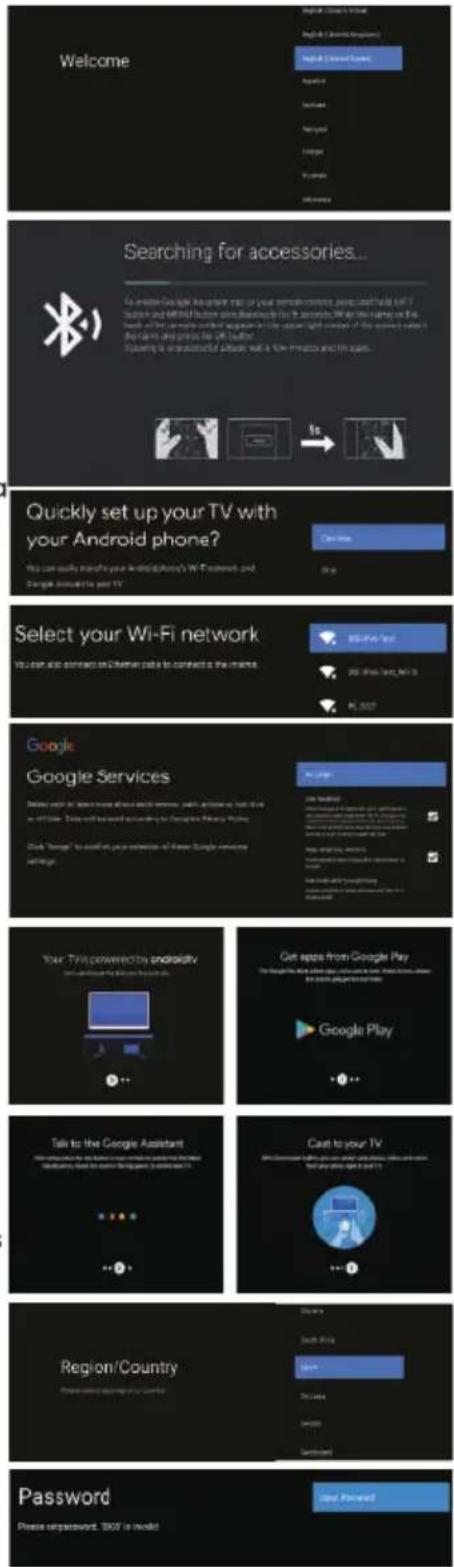
Cuando encienda el televisor por primera vez, el Asistente de configuración le guiará para configurar el televisor. Siga las instrucciones que aparecen en pantalla.
En este paso, puede seleccionar el idioma del sistema.
Utilice los botones ARRIBA/ABAJO para seleccionar el idioma del sistema y, a continuación, pulse OK/SELECT para confirmar.
En este paso, puede emparejar el mando a distancia Bluetooth con el televisor.
Pulse los botones IZQUIERDA + MENÚ (abajo) durante 3 segundos hasta que la luz roja empiece a parpadear. Selecciona y pulsa OK cuando el código del mando a distancia 'INFINITON S_AF' aparezca en la pantalla. Una vez conectado, puedes utilizar el mando a distancia Bluetooth para manejar el televisor.
Para conectar su smartphone Android™ al televisor, seleccione "Continuar".
PulseARRIBA/ABAJO para seleccionar la Wi-Fi a la que desea conectarse, introduzca la contraseña y, a continuación, confirme la conexión.
Si va a utilizar una conexión Ethernet, puede omitir este paso.
En este paso, puede aceptar las Condiciones de servicio de Google para mejorar la experiencia del producto. Seleccione "ACEPTAR" para continuar.
Ahora aparecerán pantallas informativas. Puede desplazarse por ellas pulsando el botón direccional "DERECHA".
Seleccione el país en el que está utilizando el dispositivo con los botones direcciones arriba/abajo.
Establezca una contraseña por motivos de seguridad.
text_image
Welcome Searching for accessories... Quickly set up your TV with your Android phone? Select your Wi-Fi network Google Google Services Your TV powered by androidy Get apps from Google Play Talk to the Google Assistant Cash to your TV Region/Country Password Please unpassword. 100% is invalidSeleccione la zona horaria en la que está utilizando el aparato con los botones direcciones.
En este paso, asegúrese de seleccionar "INICIO" si va a utilizar el televisor en casa.
Asegúrese de confirmar una vez que haya seleccionado "INICIO".
Asegúrese de configurar Chromecast built-in™ en "Activado", para que pueda transmitir todas sus películas, programas, aplicaciones, juegos y mucho más favoritos directamente a su televisor.
Para seleccionar el modo de sintonizador para la búsqueda, pulse ARRIBA/ABAJO para seleccionar y, a continuación, pulse OK para confirmar.

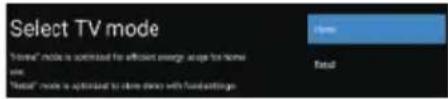
text_image
Select TV mode "Hotel" mode is optimized for efficient energy access to home screen. "Retail" mode is optimized to close down with fuel pastings.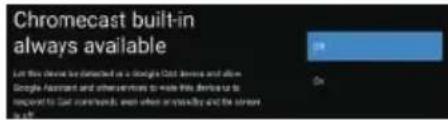
text_image
Chromecast built-in always available Let this device is detected as a Google Cloud Server and allows Google Assistant and other services to make this device to respond to our commands, even when availability and the server on
text_image
Tuner Mode Auto Multi NoneNOTA: Asegúrese de que el cable de antena (RF) está conectado al puerto ANT. IN situado en la parte posterior del televisor.
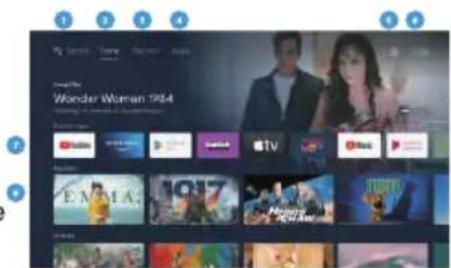
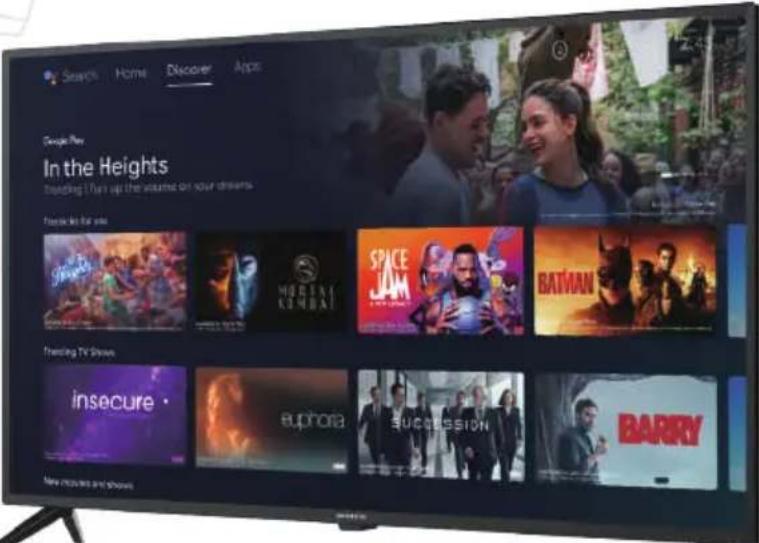
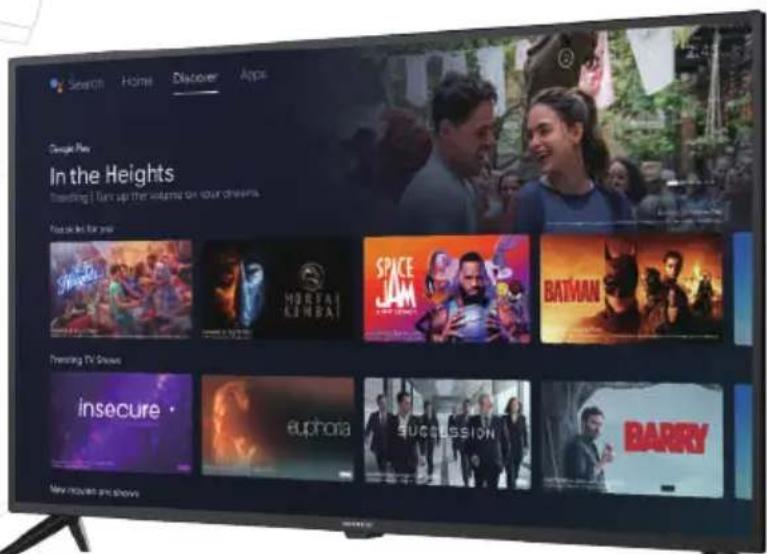
Android TV™ - Pantalla de inicio
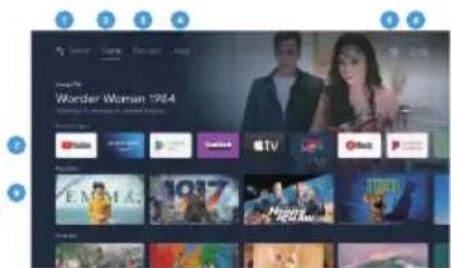
Una vez que haya completado la configuración inicial, entrará en la pantalla de inicio de Android TV.
- Pulsa el botón Asistente de Google del mando a distancia para hacer más cosas en el televisor utilizando tu voz.
- Inicio - Página principal para entrar en Live TV, ver tus aplicaciones preinstaladas y descargadas.
- Discovery - Inicia sesión en tu cuenta de Google para obtener recomendaciones de tus servicios de streaming, organizadas en temas y géneros en función de lo que ves.
- Aplicaciones - Aplicaciones que has descargado y aplicaciones que puedes buscar para instalar.
- Ajustes: Seleccione esta opción si desea acceder a la configuración de TV.
- Hora: Muestra la hora actual.
- Cada fila después de este punto mostrará contenido recomendado de las aplicaciones que ya tiene instaladas. Añadir aplicaciones
Al final de esta fila de apps, seleccione la casilla + y añada la app que ha descargado e instalado a la pantalla de inicio de su Android TV. - Películas o programas disponibles para reproducir a continuación.
text_image
Wonder Woman 1984
Google Play
GOOGLE PLAY
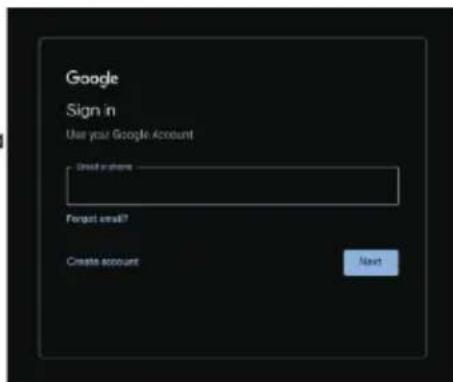
Una vez que abras Google Play, se te pedirá que inicies sesión o crees una nueva cuenta.
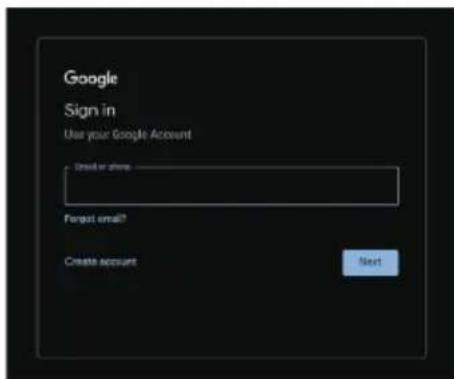
text_image
Google Sign in Use your Google Account Create accounts Forget email? Create account NextUna vez que haya iniciado sesión, se le llevará a la página de abajo, desplácese por la lista de aplicaciones disponibles para descargar O vaya al botón de búsqueda, y busque mediante la introducción de texto o pulsando el botón de Google Assistant en el mando a distancia.
Asistente de Google
Haz más cosas en tu televisor usando tu voz. Pulsa el botón del Asistente de Google en el mando a distancia para buscar rápidamente más de 400.000 películas y programas, obtener recomendaciones que se adapten a tu estado de ánimo, controlar dispositivos domésticos inteligentes y mucho más.
Pídele a Google que busque el último éxito de taquilla, que transmita programas o que abra juegos multijugador.
Haz que regule las luces conectando dispositivos domésticos inteligentes.
Gestiona tareas y consulta tu calendario.
Hazle preguntas y mira las respuestas en tu televisor.
Descubre
Descubre nuevas películas y programas de los servicios a los que ya tienes acceso. Las sugerencias basadas en lo que has visto y en tus intereses facilitan la búsqueda de tu próximo favorito.
Si aún no has iniciado sesión en Google Play con tu cuenta de Google, cuando selecciones la pestaña Descubre en la parte superior de la página de inicio, se te pedirá que inicies sesión.
- Una vez iniciada la sesión en Google, puedes seleccionar las aplicaciones para las que quieres recomendaciones dentro de la sección Descubrir
- Selecciona (Marca) las apps para las que deseas recomendaciones.
- Espere hasta 10 segundos para que Android TV recopile las recomendaciones.
- La sección Descubrir mostrará ahora las películas o programas de televisión recomendados.
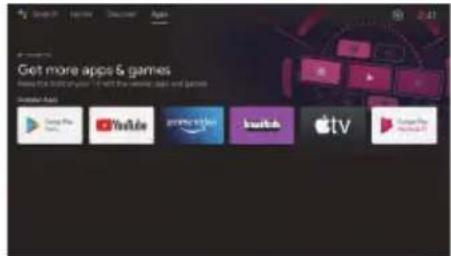
Menú Entrada
Para acceder al menú Entrada, pulse el botón INPUT del mando a distancia.
No podrá acceder a las entradas/puertos que no estén en uso.

text_image
Get more apps & games Where the next app is to get more apps and games My Info App Google Play YouTube Guruie Style Amazon Apple TV Guruie Play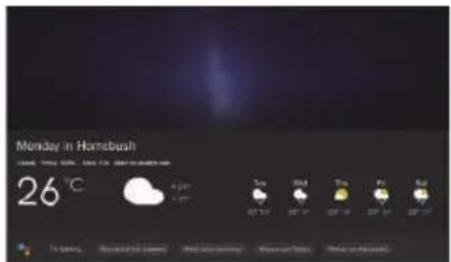
text_image
Monday in Homebush 26 °C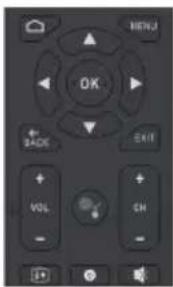
text_image
MENU OK BACK EXIT VOL CH
text_image
In the Heights The New York Times in the United States THE WINDING THE NEW YORK TIMES THE NEW YORK TIMES THE NEW YORK TIMES
text_image
Inputs Options Case Capture CCT Controller VDD11 VDD22Ajustes
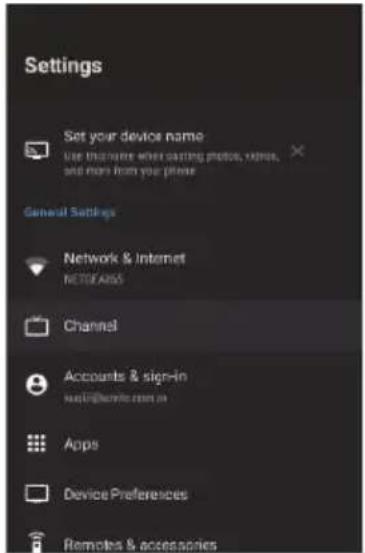
Para acceder al menú Ajustes, selecciona Ajustes (n° 5 en la página 11) a través de la pantalla de inicio o pulsa el botón Ajustes del mando a distancia.
Red e Internet
Para acceder al menú Red, seleccione el menú Ajustes (n° 5 en la página 11), baje y seleccione Red e Internet.
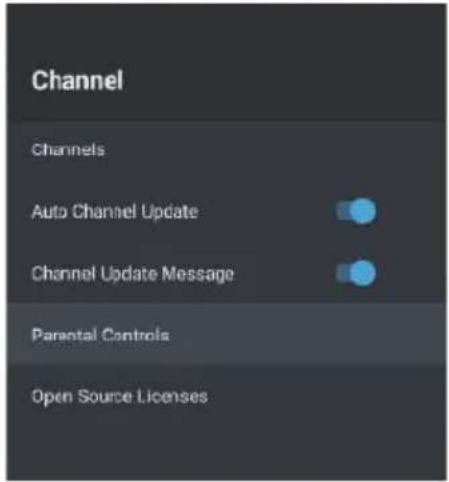
Menú Canal
Para acceder al menú Canal, seleccione Ajustes (#5 en la página 11) a través de la pantalla de INICIO.
A continuación, baje y seleccione "Canal".
Canal de actualización automática
Si está activada esta opción, el televisor
automáticamente si se realiza algún cambio en los canales de TDT escaneados.
Cómo sintonizar canales
Antena
- En LiveTV, pulse los botones INPUT de su mando a distancia, seleccione Antena.
- Pulse el botón MENU y seleccione la opción Configuración para acceder al menú de configuración, luego entre en el menú de canales.
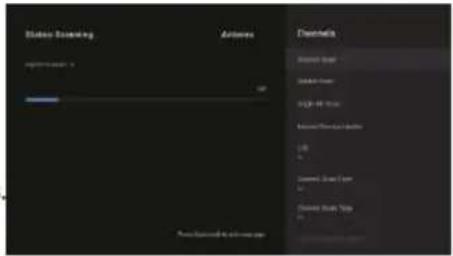
- Seleccione canales para entrar en el submenú, luego seleccione búsqueda de canales.
- Entra en la búsqueda automática de canales ATV y DTV disponibles.
- Actualizar búsqueda: Busca automáticamente puntos de frecuencia fuera de la emisora.
- Escaneo RF individual: Búsqueda manual de DTV en la que seleccionas un canal de RF y buscará los canales de DTV cercanos a esa frecuencia.
text_image
Settings Set your device name use brochure when starting photo, video, and more from your phone General Settings Network & Internet NETWORKS Channel Accounts & sign-in www.1000.com.cn Apps Device Preferences Remotes & accessories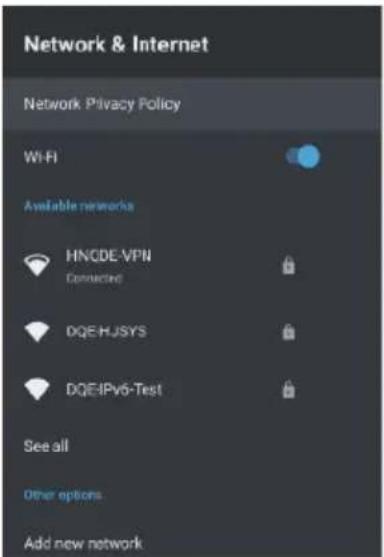
text_image
Network & Internet Network Privacy Policy Wi-Fi Available networks HNCDE-VPN Connected DQE-HJSYS DQEIPv6-Test See all Other options Add new network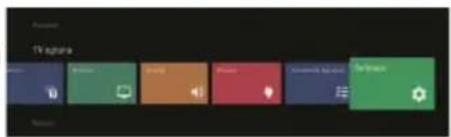
text_image
TV Aproria Video Action Video Music Playbox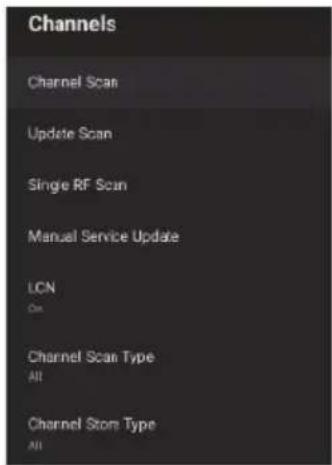
text_image
Channels Channel Scan Update Scan Single RF Scan Manual Service Update LCN On Channel Scan Type All Channel Store Type AllCable
- En LiveTV, pulse los botones INPUT de su mando a distancia, seleccione Cable.
- Pulse el botón MENU y seleccione la opción Configuración para acceder al menú de configuración, luego entre en el menú de canales.
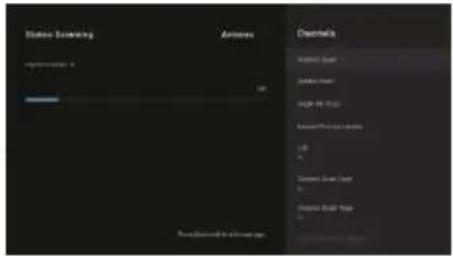
- Seleccione los canales para entrar en el submenú, luego seleccione el canal Scan.
- Configure el modo de escaneo, la frecuencia, el ID de red y, a continuación, seleccione Escanear.
Satélite
- En LiveTV, pulse los botones INPUT del mando a distancia y seleccione Satélite.
- Pulse el botón MENU y seleccione la opción Configuración para acceder al menú de configuración, luego entre en el menú de canales.
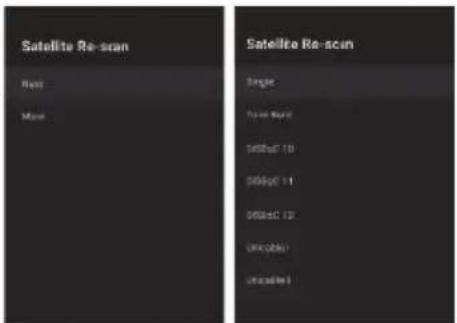
Pulse Satélite Re-scan para buscar satélites.
Seleccione Más para cambiar la conexión de la antena de satélite o Siguiente para utilizar la configuración de posición de satélite único. Seleccione el nombre del satélite para entrar en la configuración de los parámetros del satélite, que incluyen Selección de satélite (otro satélite), Modo de escaneo, Tipo de escaneo, Tipo de tienda, Tipo de tienda,
Configuraciones LNB, Transpondedor y otros parámetros. Una vez finalizada la configuración, vuelva al menú anterior y haga clic en Siguiente para escanear.
Añadir Satélite :
Añade otro satélite (se selecciona Satélite único. La opción Todos los satélites no está disponible).
Búsqueda Manual de Satélite:
Busca manualmente un TP específico.
text_image
Status scanning Actions Channels Image Scan Video Scan RGB-90 Image Movie/Physical Display USB Video Scan Scan Video Scan Scan Photo Scan Scan Photo Scan Scan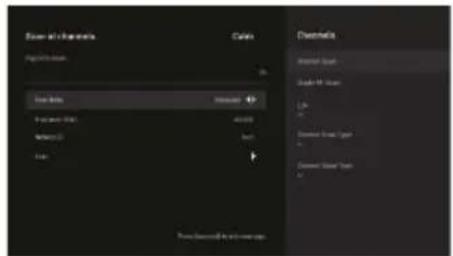
text_image
Power and Channels Cable Application: Load Bits Load Speed Load Speed Load Speed Load Speed Load Speed Desertal Water Sound Water Air Sound Light Light Water Sound Light Water Sound Light Water Sound Light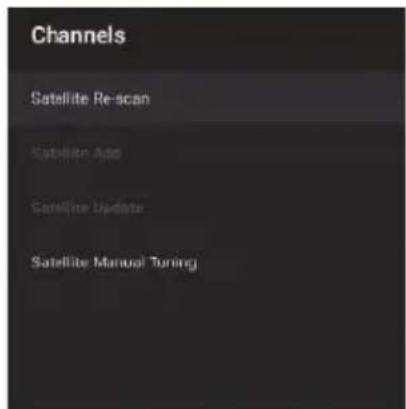
text_image
Channels Satellite Re-scan Satellite Add Satellite Update Satellite Manual Tuning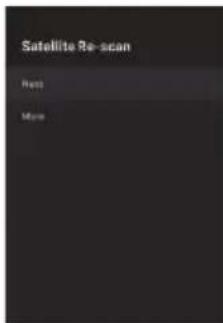
text_image
Satellite Re-scan Press More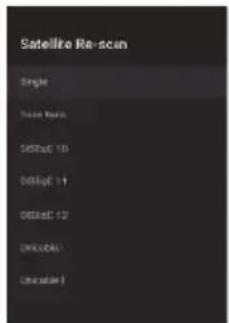
text_image
Satellite Re-scan Single Image Mask Digital 10 Digital 11 Digital 12 Digital Chinese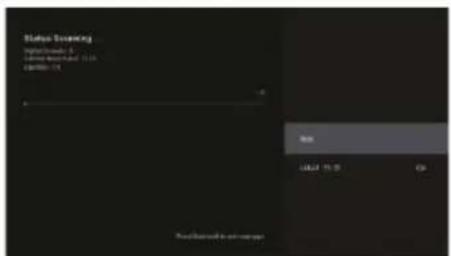
text_image
Status Screening September 2014 Time: 9:30-11:30 Date: 2015-11-14 OK Cancel 15:30 OK Previewed by user accountCanales favoritos
Una vez finalizada la búsqueda de canales, pulse OK/Enter en cualquier momento mientras ve la televisión para acceder a la información de canales y añadir canales a la lista de favoritos.
Nota: Este ajuste sólo puede realizarse cuando se ve la televisión en directo.
Añadir favorito
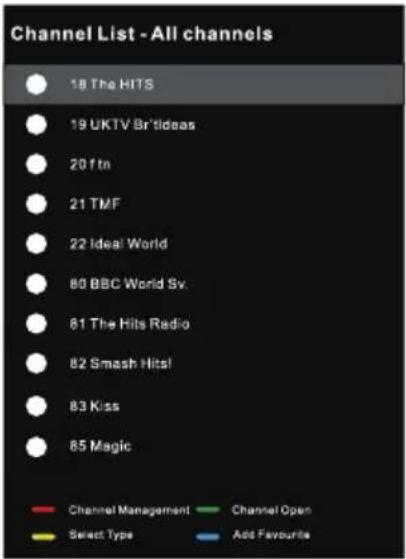
Cuando se muestre la lista de canales, pulse el botón Azul del mando a distancia para añadir el canal seleccionado a la lista de favoritos.
Ver lista de favoritos
Cuando se muestre la Lista de canales, pulse el botón Amarillo del mando a distancia para seleccionar Tipo de canales. Aquí desplácese hacia abajo y seleccione Favoritos para ver los canales añadidos a la lista de favoritos.

text_image
Channel List - All channels 18 The HITS 19 UKTV Br'tideas 20 Tin 21 TMF 22 Ideal World 80 BBC World Sv. 81 The Hits Radio 82 Smash Hits! 83 Kiss 85 Magic Channel Management Channel Open Select Type Add Favourite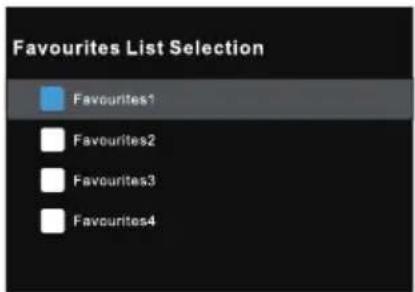
text_image
Favourites List Selection Favourites1 Favourites2 Favourites3 Favourites4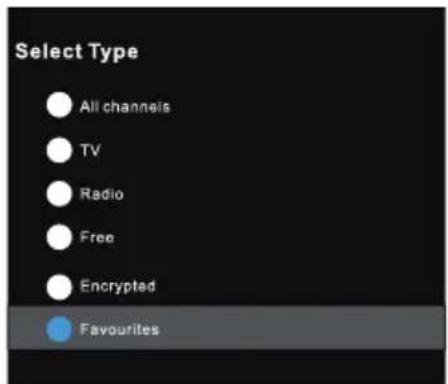
text_image
Select Type All channels TV Radio Free Encrypted Favourites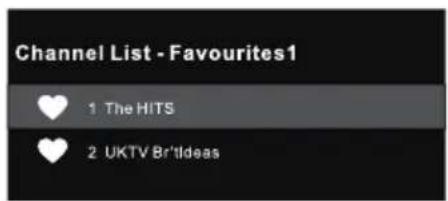
text_image
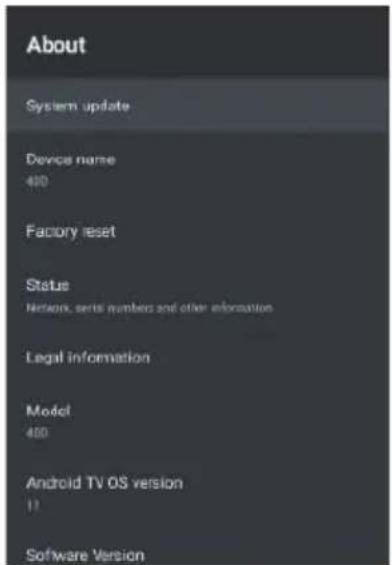
Channel List - Favourites1 1 The HITS 2 UKTV Brit'IdeasPreferencias del dispositivo - Acerca de
Para acceder al menú Acerca de:
- Seleccione el icono Configuración (n° 5 en la página 12) a través de la pantalla de inicio.
- Seleccione "Preferencias del dispositivo"
- A continuación, baje y seleccione "ACERCA DE".
Restablecimiento de fábrica
Seleccione "Restablecer valores de fábrica", para restaurar el sistema a los valores de fábrica. Tenga en cuenta que se borrarán todos los datos actuales del sistema.
Hora
- Para acceder al menú de Fecha y Hora, seleccione el icono de Configuración (#5 en la página 12) a través de la pantalla de Inicio.
- Seleccione "Preferencias del dispositivo"
- A continuación, baje y seleccione "Fecha y Hora".
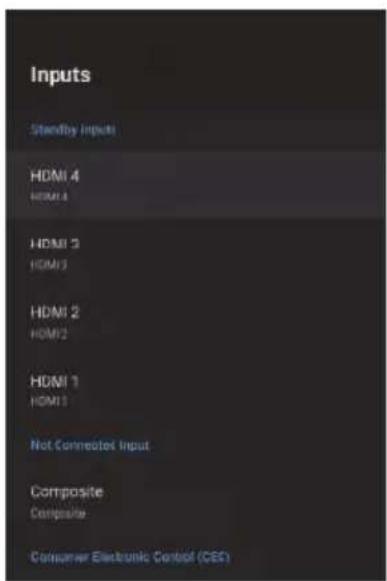
Menú de Ajustes de Entrada
Para acceder al menú Ajustes de entrada:
- Seleccione el icono Configuración (n° 5 en la página 12) a través de la pantalla de inicio.
- Seleccione "Preferencias del dispositivo"
- A continuación, baje y seleccione "Entradas".
text_image
Inputs Standby Inputs HDMI 4 HDMI 3 HDMI 2 HDMI 1 HDMI 1 Not Connected Input Composite Composite Consumer Electronic Control (CES)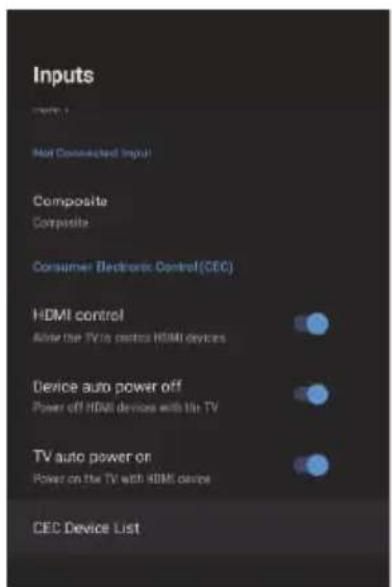
text_image
Inputs Not Connected Input Composite Composite Consumer Electronic Control(CEC) HDMI control After the TV to control HDMI devices Device auto power off Power off HDMI devices with 1st TV TV auto power on Power on the TV with HDMI device CED Device List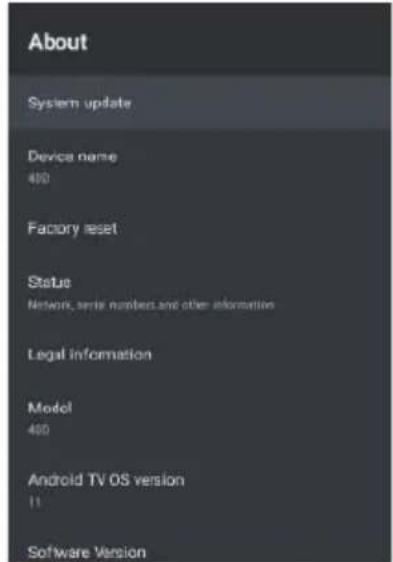
text_image
About System update Device name 400 Factory reset Status Network, serial numbers and other information Legal information Model 400 Android TV OS version 11 Software Version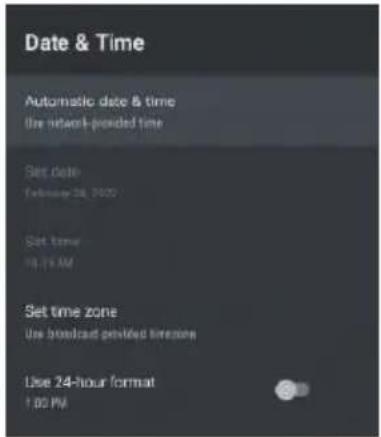
text_image
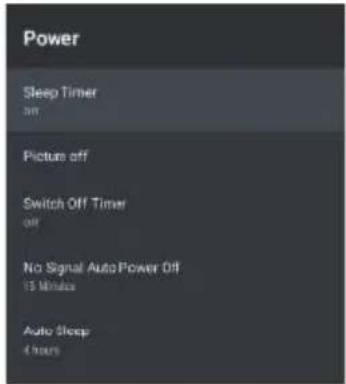
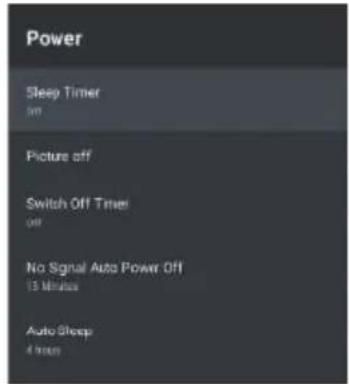
Date & Time Automatic date & time Use network-provided time Set Date: February 24, 2020 Set time: 18:15 AM Set time zone Use broadcast provided lineszone Use 24-hour format 1:00 PMMenú de configuración de energía
Para acceder al menú Ajuste de energía,
- Seleccione el icono Configuración (5) a través de la pantalla de INICIO.
- Seleccione "Preferencias del dispositivo"
- A continuación, baje y seleccione "Energía".
Sleep Timer - Opciones de Apagado, 10 mins, 20 mins, 30 mins, 40 mins, 50 mins, 60 mins, 90 mins y 120 mins para apagar automáticamente su TV.
Apagado de Imagen - Apaga la pantalla (se recomienda no seleccionar esta opción).
Apagado automático sin señal - Apaga el televisor si no se detecta señal.
Menú de configuración de imagen
Para acceder al menú de configuración de imagen:
-
- Seleccione el icono Ajuste (5) en la pantalla HOME.
- Seleccione "Preferencias del dispositivo"
- A continuación, baje y seleccione "Imagen".
Modo de imagen - Opciones a elegir - Estándar, Vívido, Deporte, Película, Juego, Ahorro de energía, Usuario.
Menú de configuración de sonido
Para acceder al menú de configuración de sonido,
- Seleccione el icono Configuración (5) a través de la pantalla de inicio.
- Seleccione "Preferencias del dispositivo"
- A continuación, baje y seleccione "Sonido".
text_image
Power Sleep Timer am Picture off Switch Off Timer off No Signal AutoPower Off 15 Minutes Auto Sleep 4 hours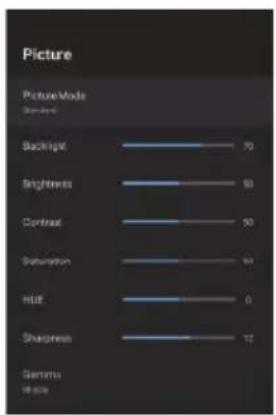
text_image
Picture Picture Mode Standard Backlight 70 Brightness 93 Contrast 50 Saturation 94 Hull 0 Sharpness 12 Gamtura Abacus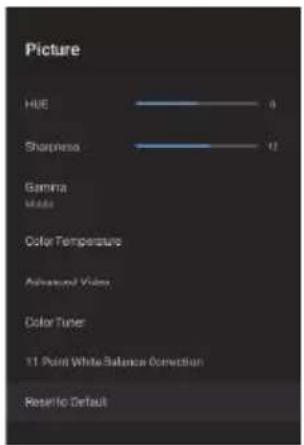
text_image
Picture HUE 0 Sharpness 12 Gamma Made Color Temperature Advanced Video Color Tuner 11 Point White Balance Correction Reset to Default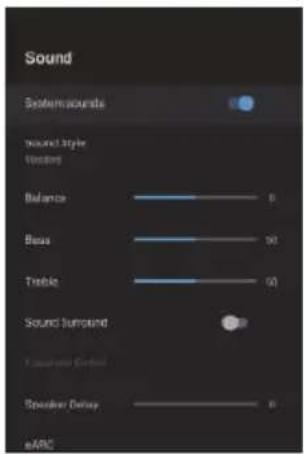
text_image
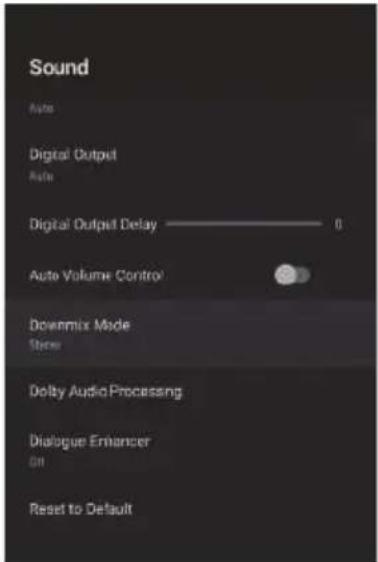
Sound System sounds Sound style Vectors Balance 0 Bass 90 Tangible 60 Sound Turnout 100 Circuit Control Speaker Delay 0 eARCEstilo de sonido - Opciones a elegir - Estándar, Vívido, Deportes, Película, Música, Noticias, Usuario.
Salida digital - Auto, Bypass, PCM, Dolby Digital Plus, Dolby Digital. (Se recomienda seleccionar AUTO, ya que detectará automáticamente la calidad del sonido producido por el contenido).
Pantalla de Inicio
Para acceder al menú de la Pantalla de Inicio:
- Seleccione el icono AJUSTE (#5 en la página 12) a través de la pantalla de inicio.
-
- Seleccione "Preferencias del dispositivo"
- A continuación, baje y seleccione "Pantalla de inicio".
Salvapantallas
Para acceder al menú Protector de pantalla:
- Seleccione el icono Configuración (n° 5 en la página 12 a través de la pantalla de inicio.
- Seleccione "Preferencias del dispositivo"
- A continuación, baje y seleccione "Protector de pantalla".
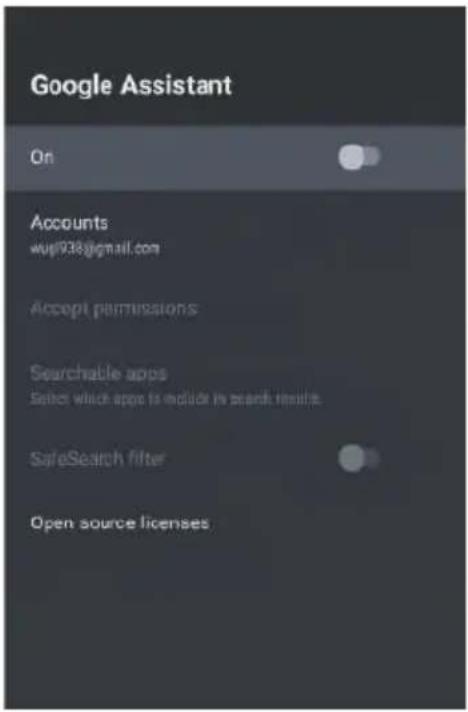
Para acceder a Google Assistant en el menú Ajustes.
- Seleccione el icono Ajustes (n° 5 en la página 12) a través de la pantalla de inicio.
- Selecciona "Preferencias del dispositivo"
- A continuación, baja y selecciona "Asistente de Google".
Sólo se podrá acceder a las cuentas si se ha conectado una cuenta de Gmail en Google Play.
Se necesita una cuenta de Gmail para descargar e instalar aplicaciones en Google Play.
text_image
Google Assistant On Accounts wup938@gmail.com Accept permissions Searchable apps Select which apps to include in search results SafeSearch filter Open source licenses
text_image
Sound Apts Digital Output Auto Digital Output Delay ———— 0 Auto Volume Control Dowitmix Mode States Doby Audio Processing Dialogue Enhancer 011 Reset to Default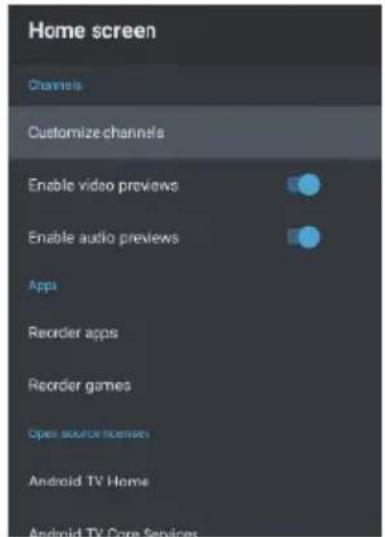
text_image
Home screen Channels Customize channels Enable video previews Enable audio previews Apps Recorder apps Recorder games Open source licenses Android TV Home Android TV Core Services
text_image
Screen saver Screen cover Backup When to start After 5 minutes of machine Start nowControl parental
Para acceder al menú Control Parental:
-
Seleccione el icono Configuración (n° 5 en la página 12) a través de la pantalla de inicio.
-
A continuación, baje y seleccione.
-
Seleccione "Control Parental".
Desde aquí tiene la opción de seleccionar y crear una nueva contraseña para bloquear determinados canales.
Nota: Asegúrese de almacenar/guardar la contraseña en algún lugar al que pueda acceder posteriormente.
Si olvida la contraseña, tendrá que restablecer de fábrica el televisor para volver a utilizarla.
Canales Bloqueados - Bloquee canales específicos para restringir su uso.
Restricciones de Programas - Puede restringir programas específicos de un canal de TV para que sean bloqueados.
Entradas Bloqueadas - Bloquee una entrada de puerto de TV para restringir su uso.
Cambiar PIN - Cambie el PIN existente seleccionado al entrar por primera vez en este menú.
text_image
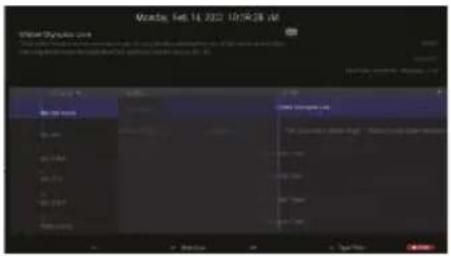
Channel Channels Auto Channel Update Channel Update Message Parental Controls Open Source LicensesGuía/EPG
- Cuando vea la televisión en directo, pulse el botón Guía del mando a distancia para abrir la interfaz EPG.
- Se mostrará la información del programa y podrá manejar el menú EPG utilizando los botones de color.
- Pulse el botón PVR para configurar un programa de grabación.
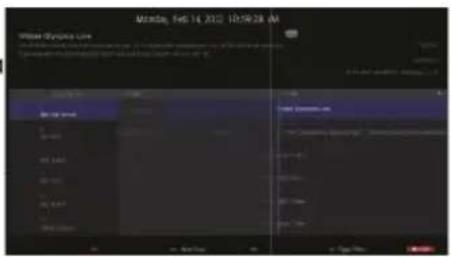
text_image
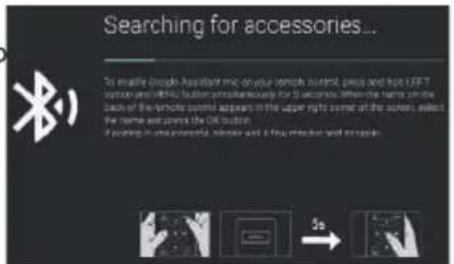
Monday, Feb 14, 2012 10:59:28 AM Wiseer Dynamics Line System Status: No. 100 Name: Wiseer Dynamics Line Address: Wiseer Dynamics Line System Status: No. Name: Wiseer Dynamics Line Address: Wiseer Dynamics Line System Status: No. Name: Wiseer Dynamics Line Address: Wiseer Dynamics Line System Status: No. Name: Wiseer Dynamics Line Address: Wiseer Dynamics Line System Status: No. Name: Wiseer Dynamics Line Address: Wiseer Dynamics Line System Status: No. Name: Wiseer Dynamics Line Address: Wiseer Dynamics LineCómo emparejar el mando a distancia
En este menú, puede emparejar su mando a distancia Bluetooth u otros dispositivos Bluetooth.
- Pulse los botones "MENU" e "IZQUIERDA" en la parte inferior del mando a distancia durante 5 segundos.
- Cuando el LED empiece a parpadear, suéltalo.
El mando a distancia enviará la señal de emparejamiento al televisor y mostrará la información del mando a distancia en la parte derecha de la pantalla.
- Pulse el botón OK para visualizar el emparejamiento.
Si se muestra el emparejamiento, la conexión se ha realizado correctamente. - Si aparece "Couldn't Pair", la conexión ha fallado.
Espere 30 segundos y pulse los botones "MENU" e "IZQUIERDA" en la parte inferior del mando a distancia durante 5 segundos para repetir los pasos anteriores.
- Pulse el botón "BACK" para volver al menú anterior.
text_image
Searching for accessories... To enable Google headstart me on your remote control, press and hot USB remote and write the button. Clickout periodically for 3 seconds. When the name will be bevel of the remote control appears in the upper right corner of the screen. Apply the name and press the OK button. If closing in any computer, click out a new user with access.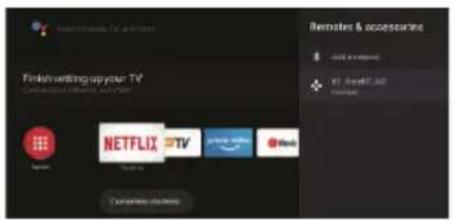
text_image
Finish waiting up your TV NETFLIX TV e-Net Customize online Remote & accessible + 20% or more + X: Free87.40 + Connected| PROBLEMA DE IMAGEN | PROBLEMA DE SONIDO | INSPECCIONAR |
| Nieve | Ruido | Posición, dirección o conexión de la antrena |
| Imagen fantasma | Audio normal | Posición, dirección o conexión de la antrena |
| Interferencias | Ruido | Equipo electrónico, luz de automovil/moto-cicleta, luz fluorescente |
| Imagen normal | Silencio | Volumen (compruebe si el silencio está activado o si las conexiones del sistema de audio no son correctas) |
| Sin imagen | Silencio | El cable eléctrico no está enchufado,no está encendido el interruptor,O las perillas de brillo y contraste y volumen no están activadas.Presione la tecla standby en el control remoto para inspeccionar el aparato. |
| Sin color | Audio normal | Control de color |
| Imagen que se rompe | Audio normal o débil | Sintonice de nuevo el canal |
| Sin color | Ruido | Sistema de TV |
| Barrera negra en la parte inferior y superior de la imagen | Audio normal | cambiar el aspecto para hacer zoom |
Archivo no reproducido desde el dispositivo USB:
- Comprueba que el archivo está en un formato compatible.
Problema con el acceso a Internet:
- Comprueba si el cable de red / wifi está conectado correctamente.
INFINITON
androidtv
text_image
Search Home Discover Apps Google Peru In the Heights Standing I Turn up the stars on your dreams Tracking for you insecure euphora succession BARRY Transiting TV Shows New resources and moviesTELEVISION
INTV-40AT790
ean: 8445639002810
INTV-43AT3100
ean: 8445639002827
INTV-50AT3100
ean: 8445639002834
INTV-55AT3100
can: 8445639002841
INTV-65AT3100
can: 8445639002858
Before using your new Infiniton product, please read this user manual carefully to learn how to safely and efficiently use the features offered by this device.
| Safety warnings | 3 |
| Installation | 5 |
| Introduction | 7 |
| How to use | 10 |
| Troubleshooting | 21 |
Dolby Audio
Manufactured under license from Dolby Laboratories. Dolby, Dolby Audio, and the double-D symbol are trademarks of Dolby Laboratories Licensing Corporation.
HDMI
The terms HDMI, HDMI High-Definition Multimedia Interface, HDMI Trade dress and the HDMI Logos are trademarks or registered trademarks of HDMI Licensing Administrator, Inc.
- Read these instructions.
- Keep these instructions.
• Heed all warnings.
• Follow all instructions.
• Do not use this product near water.
• Clean only with a dry, non-abrasive cloth.
• Do not block ventilation openings.
• Install in accordance with the manufacturer's instructions. - Do not install near any heat sources such as radiators, heat registers, cookers, or other apparatus (including amplifiers) that produce heat.
- Do not defeat the safety purpose of the polarized plug. If the provided plug does not fit into your outlet, consult an electrician for replacement of the obsolete outlet.
- Protect the power cord from being walked on or pinched particularly at plugs, convenience receptacles, and the point where they exit from the apparatus.
• Only use attachments/accessories specified by the manufacturer.
• Unplug this apparatus during lightning storms or when unused for long periods of time. - Refer all servicing to qualified service personnel. Servicing is required when the apparatus has been damaged in any way, such as power-supply cord or plug is damaged, liquid has been spilled or objects have fallen into the apparatus, the apparatus has been exposed to rain or moisture, does not operate normally, or has been dropped.
• The mains plug is used as the disconnect device and should be easily accessible. - Do not cover the ventilation openings with items such as newspapers, table-cloths, curtains, etc.
• No naked flame sources, such as lighted candles, should be placed on the apparatus.
• Attention should be paid to the environmental factors of battery treatment.
• Use the product in moderate climatic conditions. - The apparatus shall not be exposed to dripping or splashing and no objects filled with liquids, such as vases, shall be placed on the apparatus.
Warning:
To reduce the risk of fire or electric shock, do not expose this product to rain or moisture.
Warning:
Avoid exposing accumulators to excessive heat (sunlight, fire, etc.).

This symbol indicates that this product has double insulation between the potentially hazardous electrical voltage and the user accessible component. For repairs, only the same spare parts may be used.
CAUTION
RISK OF ELECTRIC SHOCK. DO NOT OPEN THE APPLIANCE.

THE LIGHTNING FLASH WITH ARROWHEAD SYMBOL WITHIN AN EQUILATERAL TRIANGLE IS INTENDED TO ALERT THE USER TO THE PRESENCE OF UNINSULATED "DANGEROUS VOLTAGE" WITHIN THE PRODUCT'S ENCLOSURE THAT MAY BE OF SUFFICIENT MAGNITUDE TO CONSTITUTE A RISK OF ELECTRIC SHOCK TO PERSONS.

THE EXCLAMATION POINT WITHIN AN EQUILATERAL TRIANGLE IS INTENDED TO ALERT THE USER TO THE PRESENCE OF IMPORTANT OPERATING AND MAINTENANCE (SERVICING) INSTRUCTIONS IN THE LITERATURE ACCOMPANYING THE PRODUCT.
WARNING: TO REDUCE THE RISK OF FIRE OR ELECTRIC SHOCK, DO NOT EXPOSE THIS APPLIANCE TO RAIN OR MOISTURE.
- Do not modify any part of the interior of the TV or adjustment controls not mentioned in this manual. All LED TV sets are high voltage appliances. When cleaning dust or water droplets from LED PANELS or furniture, unplug the power cord from the power outlet and wipe the TV with a soft, dry cloth. Please unplug the power cord and antenna cable to prevent damage to the TV in the event of a storm or fire.
• All repairs to the TV should only be carried out by qualified TV service personnel.

text_image
Warning sign depicting a traffic cone with sound waves inside a triangleCaution: Use of headphones at high volume levels for prolonged periods of time may result in permanent hearing loss. For France, the products have been tested to ensure that they meet the sound pressure level requirement set out in the relevant NF EN 50332 L.5232-1.
Note: To avoid possible hearing damage, do not listen at high volumes for long periods of time.
Environmental protection
This appliance does not contain gases that could damage the ozone layer, neither in its refrigerant circuit nor in the insulation materials. The appliance must not be disposed of with municipal waste and rubbish. The insulation foam contains flammable gases. The appliance must be disposed of in accordance with the regulations of the appliance to be obtained from the local authorities. Avoid damaging the cooling unit, especially the heat exchanger. The materials used in this appliance marked with the symbol are recyclable.
natural_image
Symbol of a trash bin crossed with a diagonal line and a horizontal bar below (no text or labels)This symbol on the product or on its packaging indicates that this product must not be treated as household waste. Instead, it must be taken to the appropriate collection point for the recycling of electrical and electronic equipment.
By ensuring this product is disposed of correctly, you will help prevent potential negative consequences for the environment and human health, which could otherwise be caused by inappropriate waste handling of this product.
For more detailed information about recycling of this product, please contact your local authorities, your household waste disposal service or the shop where you purchased the product.
Packaging materials
Materials with the symbol 🎨 are recyclable. Please dispose of the packaging in a suitable collection container for recycling.
Disposal of the appliance
Disconnect the mains plug from the mains socket.
Cut off the power cord and dispose of it.

text_image
Warning sign depicting a flame symbol with hazard symbol inside a triangleWarning! During use, service and disposal of the appliance, pay attention to this symbol, which is located on the back of the appliance (rear panel or compressor). This symbol will be yellow or orange in colour. It is a fire hazard warning sign. There are flammable materials in the refrigerant and compressor piping. Keep away from the source of fire during use, service and disposal.
Place the TV in a room where light does not fall directly on the screen.
Total darkness or reflections on the screen may cause eye fatigue. Soft indirect lighting is recommended for comfortable viewing.
Allow enough space between the TV and the wall for ventilation.
Avoid locations with high temperatures to prevent possible damage to the cabinet or premature damage to parts.
Do not cover the ventilation when using the TV.
Base Stand Mounting Instructions
Be sure to place the TV with the screen facing down on a flat surface. The use of 2 people to move it is recommended due to the size and weight of this TV.
Make sure that the table or desk you use has a completely clean, flat surface and use a soft cloth between the TV face and the table to protect the TV screen.
natural_image
Technical line drawing of a mechanical assembly with mounting brackets and directional arrows (no text or symbols)Place the TV horizontally with the screen facing downwards, insert the bracket into the slot and adjust the screw holes to match each other.
natural_image
Technical line drawing of a mechanical assembly with mounting brackets and internal components (no text or symbols)- Insert the screws into the holes in the bracket.
Wall bracket mounting instructions
The specified screw length is only a recommendation. The actual length required may vary depending on the type of wall bracket used.
The TV does not come with a wall mount; it must be purchased separately. Use only VESA compatible wall mounts in accordance with the recommended specifications for this model. Use of other wall mounts or improper installation may result in personal injury or damage to the TV.
Follow all instructions in the instruction manual for your chosen wall mount.
| VESA Measures | Screw size for connecting the TV to the wall bracket. |
| 400x300 | Bolt head M6x16mm |
| 400x300 | Bolt head M6x12mm |
| 200x100 | Bolt head M6x8mm |
65"
text_image
400 30055"
text_image
300 40050"

text_image
400 30043"
text_image
200,0 100,0Front panel
flowchart
graph TD
    A["Input"] --> B["Processing Step"]
    B --> C["Output: Remote Control Panel"]
    style A fill:#f9f,stroke:#333
    style C fill:#ccf,stroke:#333
1: Remote control sensor.
2: LED indicator: RED - STANDBY.
3: Keypad
Keypad
The buttons on the TV are located on the bottom of the TV, near the LED indicator.
text_image
Technical diagram showing a mechanical component with labeled parts and an exploded view of the internal structure.1: Select the next channel or scroll up.
2: Increase the volume or scroll right.
3: Decrease the volume or scroll left.
4: When the TV is in standby mode, press to switch on.
When the TV is switched on, press to enter the menu.
Use the joystick to navigate through the interface and press to enter the highlighted item.
When the TV is on, press and hold to enter standby mode.
5: Select the previous channel or scroll down.
Rear AV connections

text_image
ETHERNET OPTICAL USB 5V=500mA HDMI4 (4K) HDMI3 (4K) HDMI2 (4K) AV INPUT SAT IN 13/16=400mA ANT. IN ① ② ③ ④ ⑤ ⑥ ⑦Rear (Side) AV Connections
text_image
USB 5V 530mA HOM11 4K (eARC) CI CARD IN [▲] EARPHONE ● ③ ④ ⑧-
ETHERNET: Connect the network interface.
-
OPTICAL: Optical digital audio output.
-
USB: Connect your USB memory device (e.g. USB memory stick) for PVR recording or to playback compatible files stored on it.
-
HDMI: Connect to the HDMI output of up to 4 external video sources (e.g. DVD player, game console or Blu-ray player).
-
AV IN: Connect to the AV OUT jack of your external video source (e.g. DVD player)*.
-
SAT INPUT: Connect the satellite to receive the TV signal.
-
ANT.IN: Connect the antenna or 75 Ohm coaxial cable to receive the TV signal.
-
HEADPHONES: Connect the headphones here. Note: Connecting the headphones will mute the sound from the TV's built-in speakers.
-
CI CARD IN:
* Use the supplied connector cable to convert the mini AV port to RCA inputs.
Antena
text_image
Antena exterior (no suministrada) ANT 75Ω RFNote:
Air connections: IEC (female)
Input impedance: 75Ω
Default mode (HDMI)
| RESOLUTION | V.Freq.(Hz) |
| 640*480 | 50/60 |
| 800*600 | 50/60 |
| 1024*768 | 50/60 |
| 1360*768 | 50/60 |
| 1280*768 | 50/60 |
| 1920*108 0 | 50/60 |
| 3840*2160 | 24/25/30/60 |
Connection of audiovisual equipment
It can be connected to the following devices: VCR, media player, DVD, camcorder, game console or stereo system, etc...
This TV offers two AV groups for connections to VCR, DVD or other video equipment.
Please refer to the user manual for the equipment.
You can use the input terminals on the rear of the TV.
flowchart
graph TD
    A["USB 5V 500mA"] --> B["Audio Receiver"]
    C["USB 5V 500mA"] --> D["Audio Receiver"]
    E["USB 5V 500mA"] --> F["Audio Receiver"]
    G["USB 5V 500mA"] --> H["Audio Receiver"]
    I["HDMI1 4K (eARC)"] --> J["Audio/Video machine with HDMI interfaces"]
    K["CI CARD IN"] --> L["EARPHONE"]
    M["VIDEO EQUIPMENT"] --> N["AV INPUT"]
    O["SAT IN 13/18 400mA"] --> P["ANT. IN"]
    Q["USB"] --> R["USB"]
    S["HVAC"] --> T["HVAC"]
    U["RF"] --> V["RF"]
    W["Satellite"] --> X["Satellite"]
Multimedia formats
| JPEG, JPEG, PNG, BMP, GIF | |
| AVI, MKV, MP4, MOV, VOB, DAT, FLV, MPG, WMV, TP, TRP, M3T, M2V, M4V, MPEG, 3GP, MJPEG, TS | |
| MP3, AC3, AAC, WAV, OGG, FLAC, M4A, AMR | |
| TXT |
Note:
For multimedia playback, the format must be FAT32.
Remote control

text_image
1. Turn on the TV or put it in standby mode. 2. Switch between input signal sources. 3. Press to directly select a TV channel when you are watching TV. 4. Skip to the last channel watched. 5. Enter character. 6. Open movies from Google Play. 7. Open YouTube application. 8. Open the NETFLIX application. 9. Open Prime Video. 10. ANDROID TV home screen. 11. Enter the on-screen menu. 12. Press the UP/DOWN/LEFT/RIGHT buttons to navigate. OK: Confirm your selection; access the list of live TV channels. 13. Return to the previous screen. 14. Access the list of installed applications. 15. GOOGLE Wizard Start a voice or speak to Google Assistant. 16. Turn the volume up or down. 17. Go to the next or previous channel. 18. Open the TV Guide. 19. Display additional information. 20. Press to switch sound on or off. 21. Fast rewind playback. 22. Fast forward playback. 23. Start playback, Pause playback. 24. Press to stop media playback. 25. Skip to the beginning of the previous chapter/track/photo. 26. Skip to the beginning of the next chapter/track/photo. 27. Press to select teletext mode. 28. Press to select Mono, Nicam, Stereo for ATV channels and Audio Language for DTV channels. 29. Change the aspect ratio of the picture. 30. Show or hide the subtitles. 31. RED/GREEN/YELLOW/BLUE BUTTONS: Functions correspond to the on-screen display.Initial setting
When you turn on the TV for the first time, the Setup Wizard will guide you to set up the TV.
wizard will guide you through setting up the TV. Follow the on-screen instructions on the screen.
In this step, you can select the system language.
Use the UP/DOWN buttons to select the system language, then press OK.
system language, then press OK/SELECT to confirm.
In this step, you can pair the Bluetooth remote control with the TV.
Press the LEFT + MENU (down) buttons for 3 seconds until the red light starts flashing. Select and press OK when the remote control code 'IN-FINITON S_AF' appears on the screen.
on the display. Once connected, you can use the Bluetooth remote control to operate the TV.
To connect your Android™ smartphone to the TV, select.
"Continue".
PressUP/DOWN to select the Wi-Fi you want to
connect to, enter the password, and then confirm the connection.
If you are using an Ethernet connection, you can skip this step.
In this step, you can accept the Google Terms of Service to improve the product experience. Select "ACCEPT" to continue.
Informative screens will now appear. You can scroll through them by pressing the "RIGHT" directional button.
Select the country in which you are using the device with the up/down directional buttons.
Set a password for security reasons.

text_image
Welcome English User Official English (Shared Company) English (Shared Source) English English English English English English English English
text_image
Searching for accessories... To understand how according to your own control, you will find a DFT data and MPMS data simultaneously for the correct. What is your own control, you will find a MPMS data suitable for your own control. If you are able to access the MPMS data, you will find a MPMS data suitable for your own control. If you are able to access the MPMS data suitable for your own control.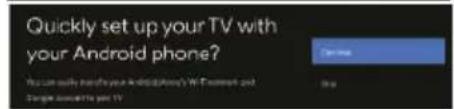
text_image
Quickly set up your TV with your Android phone? You can quickly set up your Android's Wi-Fi network out Google will get your TV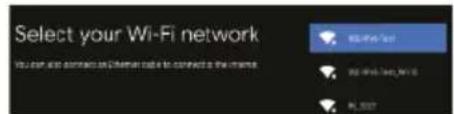
text_image
Select your Wi-Fi network You can also contact us a Wi-Fi card to connect to the website. Hi-Fi Card Card Hi-Fi Card Card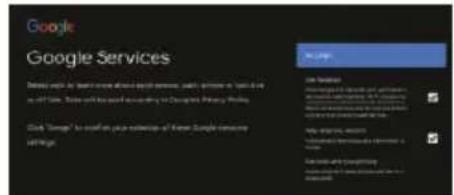
text_image
Google Google Services Details include: Google Service, Google Services, Google Services, Google Services, Google Services, Google Services, Google Services, Google Services, Google Services, Google Services, Google Services, Google Services, Google Services, Google Services, Google Services, Google Services, Google Services, Google Services, Google Services, Google Services, Google Services, Google Services, Google Services, Google Services, Google Services, Google Services, Google Services, Google Services, Google Services, Google Services, Google Services, Google Services, Google Services, Google Services, Google Services Click "Browse" to install your website or "Know Simple services" Browse.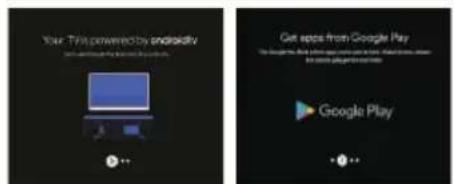
text_image
Your TV is powered by Android Get apps from Google Play Google Play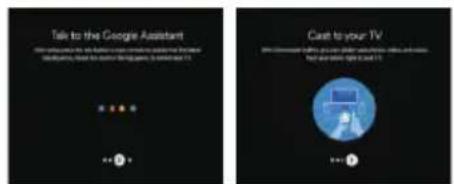
text_image
Talk to the Google Assistant CCT: http://www.google.12345.com/s/12345.org/12345.org/12345.org/12345.org/12345.org/12345.org/12345.org/12345.org/12345.org/12345.org/12345.org/12345.org/12345.org/12345.org/12345.org/6 Cast to your TV
text_image
Region/Country Save in Back Office save Set Date Next Switched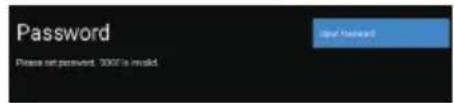
text_image
Password Please not password. 3000 is invalidSelect the time zone in which you are using the device with the directional buttons.
In this step, be sure to select "HOME" if you are going to use the TV at home.
Make sure to confirm once you have selected "HOME".
Make sure you set Chromecast built-in™ to "On", so you can stream all your favourite movies, shows, apps, games and more directly to your TV.
To select the tuner mode for searching, press UP/DOWN to select, then press OK to confirm.


text_image
Select TV mode "New" mode is optimized for efficient energy, upgrade for new mode. "Retail" mode is optimized to store audio with soundstrength.
text_image
Chromecast built-in always available Let this device be delivered as a Google Cloud server and then Google Server and other services to write this device up to required to Cloud server/squt, when when an additional and the server is on.
text_image
Tuner Mode Tunes modes and video formats Tunes track whole content of video format Audio 1 Audio 2 Audio 3 Audio 4 Audio 5 Audio 6 Audio 7 Audio 8 Audio 9 Audio 10NOTE: Make sure that the antenna (RF) cable is connected to the ANT.
IN port on the back of the TV.
Android TV™ - Home screen
Once you have completed the initial setup, you will enter the Android TV home screen.
- Press the Google Assistant button on the remote control to do more do more things on the TV using your voice.
- Home - Home page to enter Live TV, view your pre-installed and downloaded apps.
- Discovery - Sign in to your Google account to get recommendations recommendations from your streaming services, organised into themes and genres based on what you watch.
- Apps - Apps you've downloaded and apps you can search for to install.
- Settings - Select this option if you want to access your TV settings.
- Time - Displays the current time.
- Each row after this point will display recommended content from the applications you already have installed. Add apps
At the end of this row of apps, select the + box and add the app you have downloaded and installed to your Android TV home screen. - Movies or programmes available to play next.
GOOGLE PLAY
Once you open Google Play, you will be prompted to sign in or create a new account.
text_image
Wonder Woman 1984
Google Play
text_image
Google Sign in Use your Google Account Send to where Forgot email? Create account NextOnce you are logged in, you will be taken to the page below, scroll through the list of apps available for download OR go to the search button, and search by entering text or pressing the Google Assistant button on the remote control.
Google Assistant
Do more things on your TV using your voice. Press the Google Assistant button on the remote to quickly search over 400,000 movies and shows, get recommendations to suit your mood, control smart home devices and more.
Ask Google to search for the latest blockbuster, stream shows or open multiplayer games.
Have it dim the lights by connecting smart home devices.
Manage tasks and check your calendar.
Ask it questions and watch the answers on your TV.
Discover
Discover new movies and shows from services you already have access to. Suggestions based on what you've watched and your interests make it easy to find your next favourite.
If you're not already signed in to Google Play with your Google Account, when you select the Discover tab at the top of the home page, you'll be prompted to sign in.
- Once you are signed in to Google, you can select the applications you want recommendations for within the Discover section.
- Select (Check) the apps you want recommendations for.
- Wait up to 10 seconds for Android TV to collect the recommendations.
- The Discover section will now display the recommended movies or TV shows.
Input menu
To access the Input menu, press the INPUT button on the remote control.
Inputs/ports that are not in use cannot be accessed.
text_image
Get more apps & games How do this account your 14375 apps and games Number less Google Play YouTube Amazon eakblue Apple TV Euronix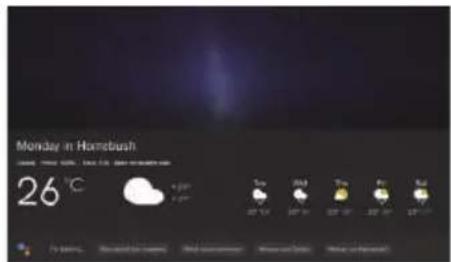
text_image
Monday in Homebush 26 °C Rain Hot Cooling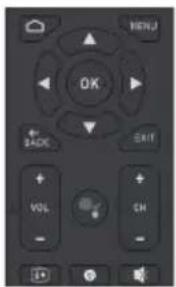
text_image
OK + BACK VOL CH
text_image
In the Heights The Air Back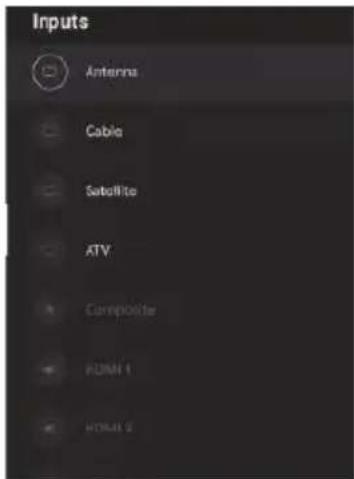
text_image
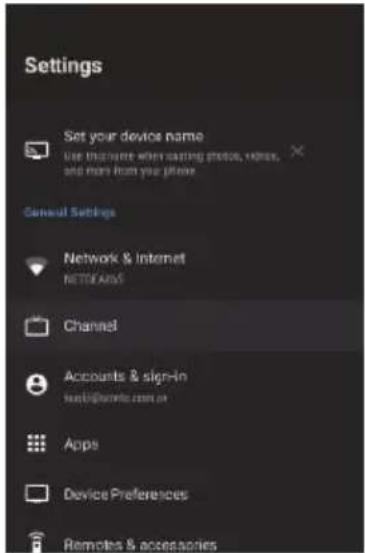
Inputs Antenna Cable Satellite ATV Composite FIDIM 1 HDMI 2Settings
To access the Settings menu, select Settings (no. 5 on page 11) via the home screen or press the Settings button on the remote control.
Network and Internet
To access the Network menu, select the Settings menu (#5 on page 11), scroll down and select Network and Internet.
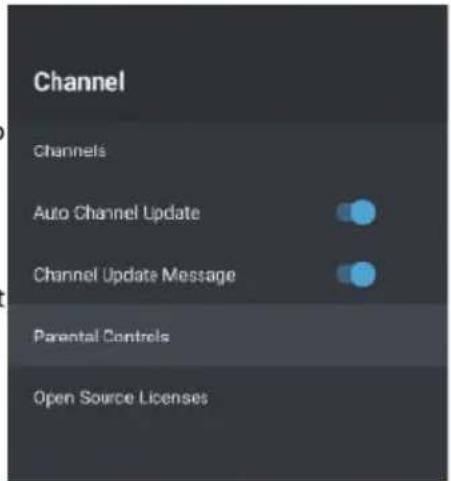
Channel menu
To access the Channel menu, select Settings (#5 on page 11) via the HOME screen.
Then scroll down and select "Channel".
Auto Refresh Channel
If this option is enabled, the TV will automatically update if any changes are made to the scanned DVB-T channels.
To Tune Channels
Antenna
- In LiveTV, press the INPUT buttons on your remote control, select Antenna.
- Press the MENU button and select the Setup option to enter the setup menu, then enter the channel menu.
- Select Channels to enter the submenu, then select Channel Scan.
- Enter the automatic search for available ATV and DTV channels.
- Update Scan: Automatically searches for frequency points outside the station.
- Individual RF Scan: Manual DTV scan in which you select an RF channel and it will search for DTV channels near that frequency.
text_image
Settings Set your device name Use this name when saying photo, video, and more from your phone. General Settings Network & Internet NETWORKS Channel Accounts & sign-in http://www.com.cn Apps Device Preferences Remotes & accessories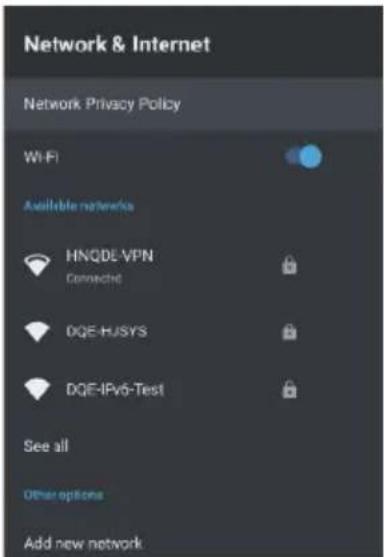
text_image
Network & Internet Network Privacy Policy Wi-Fi Available networks HNQDE-VPN Connected DQE-HUSYS DQE-IPv6-Test See all Other options Add new network
text_image
Duration 17 seconds Video Video Video Video Video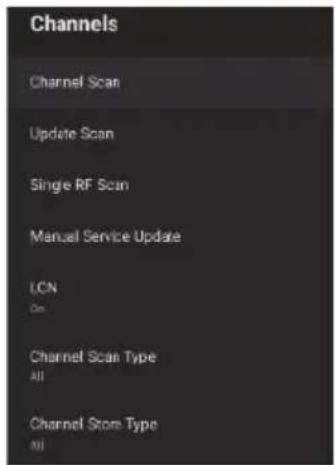
text_image
Channels Channel Scan Update Scan Single RF Scan Manual Service Update LCN On Channel Scan Type All Channel Store Type AllCable
- In LiveTV, press the INPUT buttons on your remote control, select Cable.
- Press the MENU button and select the Setup option to enter the setup menu, then enter the channel menu.
- Select the channels to enter the submenu, then select the Scan channel.
- Set the scan mode, frequency, network ID, then select Scan.
Satellite
- In LiveTV, press the INPUT buttons on the remote control and select Satellite.
- Press the MENU button and select the Setup option to enter the setup menu, then enter the channel menu.
Press Satellite Re-scan to search for satellites.
Select More to change the satellite antenna connection or Next to use the single satellite position setting.
Select the satellite name to enter the satellite parameter settings, which include Satellite Select (other satellite), Scan Mode, Scan Type, Store Type, Store Type, LNB Settings, Transponder and other parameters. Once settings are complete, return to the previous menu and click Next to scan.
text_image
Status Screening Antenna Checklist Product Size Database Size High-90 Plus Access/Physical Data Size Content: Image Size Data Scale Type Data Standard to Accuracy Page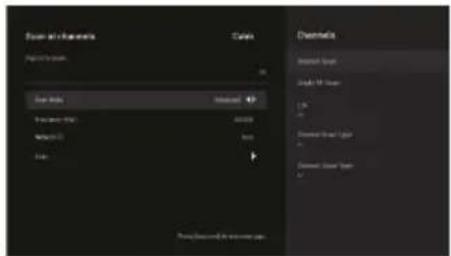
text_image
Basic and Channels Codes Parameters: Data Sets Selected Chromatic Dramatic Image Dramatic Image Dramatic Image Dramatic Image Dramatic Image Dramatic Image Dramatic Image Dramatic Image Dramatic Image Dramatic Image Dramatic Image Dramatic Image Dramatic Image Dramatic Image Dramatic Image Dramatic Image Dramatic Image Dramatic Image Dramatic Image Dramatic Image Dramatic Graph Dramatic Graph Dramatic Graph Dramatic Graph Dramatic Graph Dramatic Graph Dramatic Graph Dramatic Graph Dramatic Graph Dramatic Graph Dramatic Graph Dramatic Graph Dramatic Graph Dramatic Graph Dramatic Graph Dramatic Graph Dramatic Graph Dramatic Graph Dramatic Graph Dramatic Graph DramaticGraph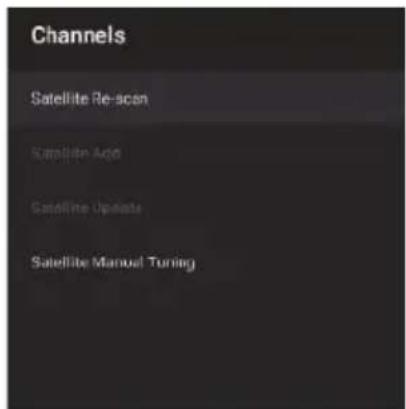
text_image
Channels Satellite Re-scan Satellite Ago Satellite Update Satellite Manual TuningAdd Satellite :
Add another satellite (Single satellite is selected. All Satellites option is not available).
Manual Satellite Search:
Manually searches for a specific TP.
text_image
Satellite Re-scan Rest More Satellite Re-scan Single Power Mode S400pC 10 S400pC 11 S600pC 12 Unlocked Unlocked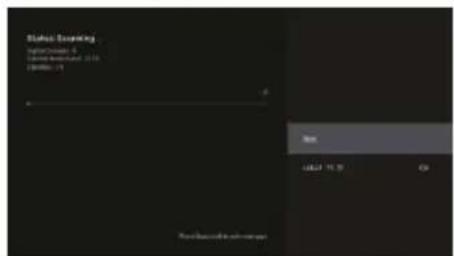
text_image
Status: Statusing Status: Statusing 1 Status: Statusing 2016 Status: Statusing 31 OK Cancel OK Cancel CancelFavourite channels
Once the channel search is complete, press OK/Enter at any time while watching TV to access the channel information and add channels to the Favourite list.
Note: This setting can only be made when watching live TV.
Add Favourite
When the channel list is displayed, press the Blue button on the remote control to add the selected channel to the favourite list.
View Favourite List
When the Channel List is displayed, press the Yellow button on the remote control to select Channel Type. Here scroll down and select Favourites to view the channels added to the favourite list.
text_image
Channel List - All channels 18 The HITS 19 UKTV Br'tideas 20 f tn 21 TMF 22 Ideal World 80 BBC World Sv. 81 The Hits Radio 82 Smash Hits! 83 Kiss 85 Magic Channel Management Channel Open Select Type Add Favourite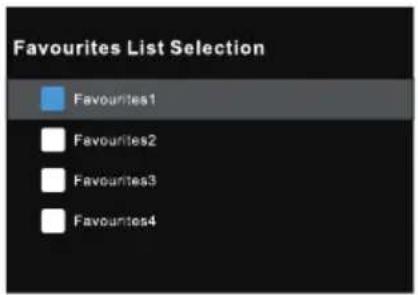
text_image
Favourites List Selection Favourites1 Favourites2 Favourites3 Favourites4
text_image
Select Type All channels TV Radio Free Encrypted Favourites
text_image
Channel List - Favourites1 1 The HITS 2 UKTV BrûlIdeasDevice Preferences - About
To access the About menu:
- Select the Settings icon (#5 on page 12) via the home screen.
- Select "Device Preferences".
- Then scroll down and select "About".
Factory Reset
Select "Factory Reset", to restore the system to factory settings. Please note that all current system data will be erased.
Time
- To access the Date & Time menu, select the Settings icon (#5 on page 12) via the Home screen.
- Select "Device Preferences".
- Then scroll down and select "Date & Time".
Input Settings Menu
To access the Input Settings menu:
- Select the Settings icon (#5 on page 12) via the home screen.
- Select "Device Preferences".
- Then scroll down and select "Inputs".
text_image
About System update Device name 400 Factory reset Status History, serial numbers and other information Legal information Model 400 Android TV OS version 12 Software Version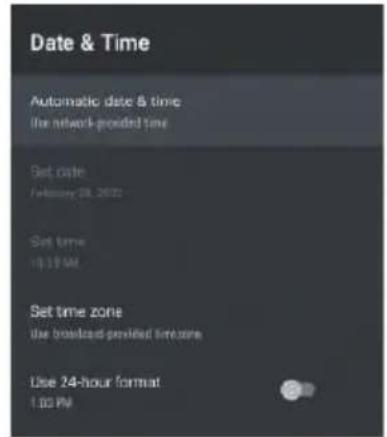
text_image
Date & Time Automatic date & time the network-provided time Set date: February 28, 2022 Set time 19:19 AM Set time zone Use broadcast-provided timezone Use 24-hour format 1:00 PM
text_image
Inputs Steadily Inputs HDMI 4 HDMI 4 HDMI 3 HDMI 3 HDMI 2 HDMI 2 HDMI 1 HDMI 1 Not Connected Input Composite Composite Consumer Electronics Control(CEC)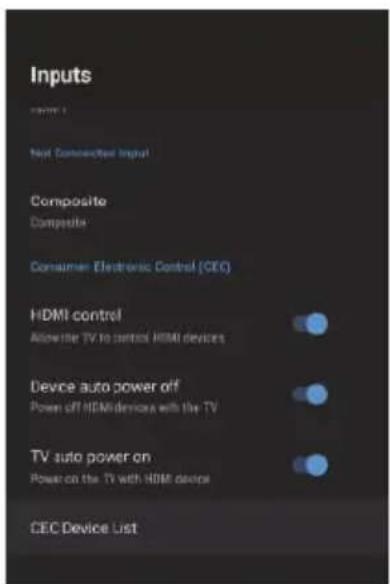
text_image
Inputs Next Connected Input Composite Composite Consumer Electronic Control (CEC) HDMI control Allow the TV to control HDMI devices Device auto power off Power off HDMI devices with the TV TV auto power on Power on the TV with HDMI devices CEC Device ListPower Setting Menu
To access the Power Setting menu,
- Select the Settings icon (5) via the HOME screen.
- Select "Device Preferences".
- Then scroll down and select "Power".
Sleep Timer - Options of Off, 10 mins, 20 mins, 30 mins, 40 mins, 50 mins, 60 mins, 90 mins and 120 mins to automatically turn off your TV. Picture Off - Turns off the screen (it is recommended not to select this option).
Auto Power Off No Signal - Turns off the TV if no signal is detected.
Picture Settings Menu
To access the Picture Settings menu:
- Select the Setting icon (5) on the HOME screen.
- Select "Device Preferences".
- Then scroll down and select "Picture".
Picture Mode - Options to choose from - Standard, Vivid, Sport, Movie, Game, Power Save, User.
Sound Settings Menu
To access the sound settings menu,
- Select the Settings icon (5) via the home screen.
- Select "Device Preferences".
- Then scroll down and select "Sound".
text_image
Power Sleep Timer lm Picture off Switch Off Timer off No Signal Auto Power Off 15 Minutes Auto Sleep 4 hours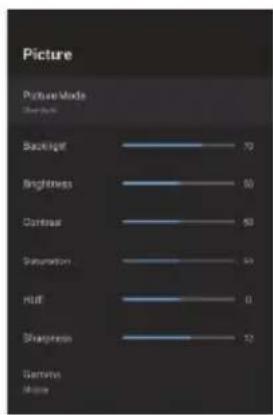
text_image
Picture Picture Mode Share Rank Backlight 70 Brightness 60 Contrast 50 Saturation 40 Hill 0 Sharpness 12 Gerritius Misses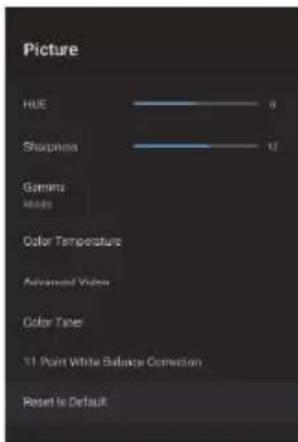
text_image
Picture HUE 0 Sharpness 12 Gamma Mass Color Temperature Advanced Video Color Tanes 11 Point White Balance Correction Reset to Default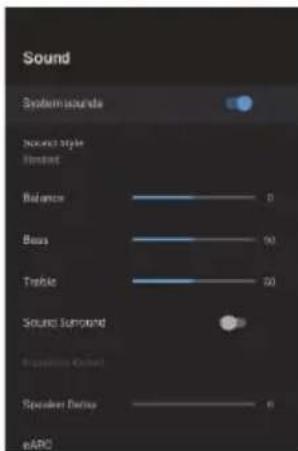
text_image
Sound System sound Balance Bias Tangible Sound Surstand Speaker Delay eARCSound Style - Choice of options - Standard, Vivid, Sport, Movie, Music, News, User.
Digital Output - Auto, Bypass, PCM, Dolby Digital Plus, Dolby Digital. (It is recommended to select AUTO as it will automatically detect the sound quality produced by the content).
Home Screen
To access the Home Screen menu:
- Select the SETTINGS icon (#5 on page 12) through the Home Screen.
- Select "Device Preferences".
- Then scroll down and select "Home Screen".
Screensaver
To access the Screen Saver menu:
- Select the Settings icon (#5 on page 12 via the Home screen.
- Select "Device Preferences".
- Then scroll down and select "Screen Saver".
To access Google Assistant from the Settings menu.
- Select the Settings icon (No. 5 on page 12) via the Home screen.
- Select "Device Preferences".
- Then scroll down and select "Google Assistant".
Accounts can only be accessed if a Gmail account is logged into Google Play.
A Gmail account is required to download and install applications on Google Play.
text_image
Sound Auto Digital Output Auto Digital Output Delay ———— 0 Auto Volume Control Downmix Mode Store Dolby Audio Processing Dialogue Enhancer Off Reset to Default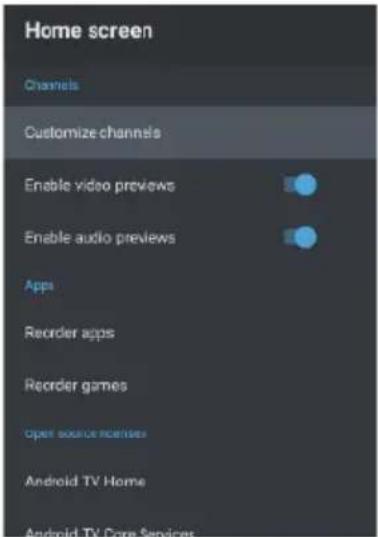
text_image
Home screen Channels Customize channels Enable video previews Enable audio previews Apps Reorder apps Reorder games Open source licenses Android TV Home Android TV Core Services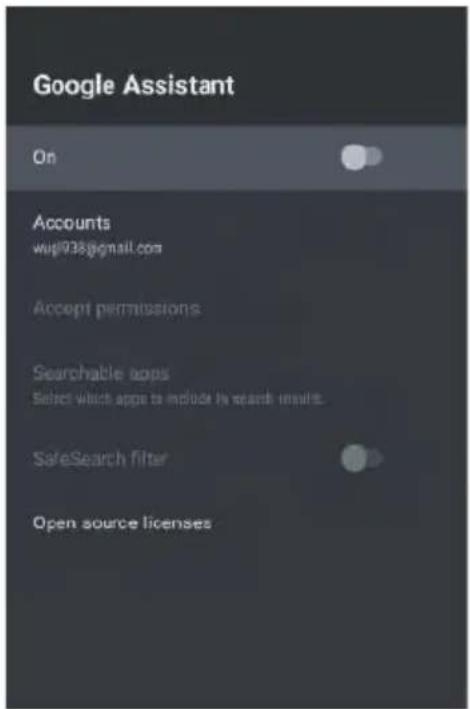
text_image
Google Assistant On Accounts wup938@gmail.com Accept permissions Searchable apps Select which apps to include by search results. SafeSearch filter Open source licenses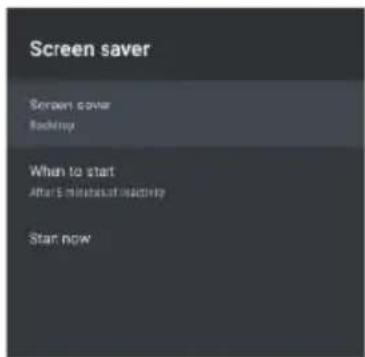
text_image
Screen saver Screen cover Backup When to start After 5 minutes last time Start nowParental Controls
To access the Parental Control menu:
- Select the Settings icon (#5 on page 12) via the Home screen.
- Then scroll down and select.
- Select "Parental Controls".
From here you have the option to select and create a new password to block certain channels.
Note: Make sure you store/save the password somewhere you can access it later.
If you forget the password, you will have to factory reset the TV to use it again.
Locked Channels - Lock specific channels to restrict their use.
Programme Restrictions - You can restrict specific programmes on a TV channel to be blocked.
Locked Inputs - Lock a TV port input to restrict its use.
Change PIN - Change the existing PIN selected when you first enter this menu.
text_image
Channel Channels Auto Channel Update Channel Update Message Parental Controls Open Source LicensesGuide/EPG
- When watching live TV, press the Guide button on the remote control to open the EPG interface.
- The programme information will be displayed and you can operate the EPG menu using the coloured buttons.
- Press the PVR button to set up a recording programme.
Pairing the remote control
In this menu, you can pair your Bluetooth remote control or other Bluetooth devices.
- Press the "MENU" and "LEFT" buttons on the bottom of the remote control for 5 seconds.
- When the LED starts flashing, release it.
The remote control will send the pairing signal to the TV and display the remote control information on the right side of the screen.
- Press the OK button to display the pairing.
If the pairing is displayed, the connection is successful.
4. If "Couldn't Pair" is displayed, the connection has failed.
Wait 30 seconds and press the "MENU" and "LEFT" buttons on the bottom of the remote control for 5 seconds to repeat the above steps.
- Press the "BACK" button to return to the previous menu.
text_image
Monday, Feb 14, 2022 10:19:28 AM Wiley Physics Corp www.wiley.com http://www.wiley.com www.wiley.com http://www.wiley.com http://www.wiley.com http://www.wiley.com http://www.wiley.com http://www.wiley.com http://www.wiley.com http://www.wiley.com http://www.wiley.com http://www.wiley.com http://www.wiley.com http://www.wiley.com http://www.wiley.com http://www.wiley.com http://www.wiley.com http://www.ewline.com http://www.ewline.com http://www.ewline.com http://www.ewline.com http://www.ewline.com http://www.ewline.com http://www.ewline.com http://www.ewline.com http://www.ewline.com http://www.ewline.com http://www.ewline.com http://www.ewline.com http://www.ewline.com http:/www.ewline.com http://www.ewline.com http://www.ewline.com http://www.ewline.com http://www.ewline.com http://www.ewline.com http://www.ewline.com http://www.ewline.com http://www.ewline.com http://www.ewline.com http://www.ewline.com http://www.ewline.com http://www.ewLine.com http://www.ewLine.com http://www.ewLine.com http://www.ewLine.com http://www.ewLine.com http://www.ewLine.com http://www.ewLine.com http://www.ewLine.com http://www.ewLine.com http://www.ewLine.com http://www.ewLine.com http://www.ewLine.com http://www.ewLine.com http://www.eowline.com/ http://www.eowline.com/ http://www.eowline.com/ http://www.eowline.com/ http://www.eowline.com/ http://www.eowline.com/ http://www.eowline.com/ http://www.eowline.com/ http://www.eowline.com/ http://www.eowline.com/ http://www.eowline.com/ http://www.eowline.com/ http://www.eowline.com/ http://www.eowLine.com/ http://www.eowLine.com/ http://www.eowLine.com/ http://www.eowLine.com/ http://www.eowLine.com/ http://www.eowLine.com/ http://www.eowLine.com/ http://www.eowLine.com/ http://www.eowLine.com/ http://www.eowLine.com/ http://www.eowLine.com/ http://www.eowLine.com/ http://www.eowLine.com/ http://www.eowline.com/ http://www.eowLine.com/ http://www.eowLine.com/ http://www.eowLine.com/ http://www.eowLine.com/ http://www.eowLine.com/ http://www.eowLine.com/ http://www.eowLine.com/ http://www.eowLine.com/ http://www.eowLine.com/ http://www.eowLine.com/ http://www.eowLine.com/ http://www.eowline.com/ http://www.eowline.com/ http://www.eowline.com/ http://www.eowline.com/ http://www.eowline.com/ http://www.eowline.com/ http://www.eowline.com/ http://www.eowline.com/ http://www.eowline.com/ http://www.eowline.com/ http://www.eowline.com/ http://www.eowline.com/ http://www.eowline.com/ http://www.eowline.com/ http://www.eowline.com/ http://www.eowline.com/ http://www.eowline.com/ http://www.eowline.com/ http://www.eowline.com/ http://www.eowline.com/ http://www.eowline.com/ http://www.eowline.com/ http://www.eowline.com/ http://www.eowline.com/ http://wifc/2022/06/01/01/01/01/01/01/01/01/01/01/01/01/01/01/01/01/01/01/01/01/01/01/01/01/01/01/01/01/01/01/01/01/01/01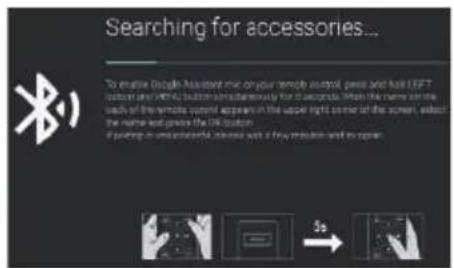
text_image
Searching for accessories... To enable Google Assistant mice on your remote control, press and hold LEFT button search with the button instead of it. We note that each of the remote control appears in the upper right corner of the screen, about the name and price the 100 button. If pointing in a web browser, interest with a new icon and its open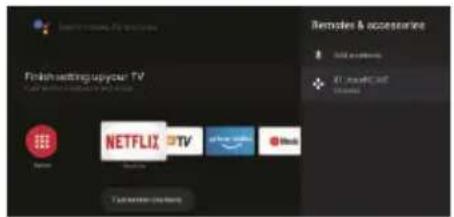
text_image
Finish setting up your TV NETFLIX TV 1. Live all CNT Remodel & accessories OK! (all users) +1. Live all CNT 100%| IMAGE PROBLEM | SOUND PROBLEM | CHECK |
| Snow | Noise | Antrenna position, direction or connection |
| Ghost image | Normal audio | Position, direction or connection of the an-trenna |
| Interference | Noise | Electronic equipment, car/motorcycle light, fluorescent light |
| Normal image | Mute | Volume (check if mute is on or if audio sys-tem connections are not correct) |
| No image | Mute | Power cord is not plugged in, switch is not turned on, OR the brightness and contrast and volume knobs are not on, press the standby key on the remote control to check the device. |
| No colour | Normal audio | Colour control |
| Broken image | Normal or weak audio | Retune the channel |
| No colour | Noise | TV System |
| Black barrier at the bottom and top of the image | Normal audio | change the aspect ratio to zoom |
File not played from USB device:
- Check that the file is in a compatible format.
Problem with Internet access:
- Check if the network cable / wifi is connected correctly.
INFINITON
androidtv
text_image
Search Home Discover Apps Google Map In the Heights Steaming I fun up the video on your dreams Facebook for your Space Jam BATTAM Newspiring TV Show insecure euphona SUSCUSSION BARRY New movies are showsTELEVISOR
INTV-40AT790
ean: 8445639002810
INTV-43AT3100
ean:8445639002827
INTV-50AT3100
ean: 8445639002834
INTV-55AT3100
can: 8445639002841
INTV-65AT3100
can: 8445639002858
Antes de utilizar o seu novo produto Infiniton, leia atentamente este manual do utilizador para aprender a utilizar com segurança e eficiência as funcionalidades oferecidas por este dispositivo.
Índice
Português
Avisos de segurança 3
Instalação 5
Introdução 7
Como utilizar 10
Resolução de problemas 21
• Leia estas instruções.
• Guarde estas instruções.
- Preste atenção a todos os avisos.
- Seguir todas as instruções.
- Não utilizar este produto perto de água.
- Limpar apenas com um pano seco e não abrasivo.
- Não bloquear as aberturas de ventilação.
- Instalar de acordo com as instruções do fabricante.
- Não instalar perto de quaisquer fontes de calor, tais como radiadores, registos de calor, fogões, ou outros aparelhos (incluindo amplificadores) que produzam calor.
- Não contrariar o objectivo de segurança da ficha polarizada. Se a ficha fornecida não couber na sua tomada, consulte um electricista para substituir a tomada obsoleta.
- Proteja o cabo de alimentação de ser pisado ou apertado particularmente em fichas, receptáculos de conveniência, e o ponto de saída do aparelho.
- Utilizar apenas os acessórios/acessórios especificados pelo fabricante.
- Desligar este aparelho durante tempestades de relâmpagos ou quando não for utilizado durante longos períodos de tempo.
- Remeter toda a manutenção a pessoal de serviço qualificado. A manutenção é necessária quando o aparelho tiver sido danificado de alguma forma, tal como o cabo de alimentação ou a ficha de alimentação estiver danificada, se tiver derramado líquido ou se objectos tiverem caído no aparelho, se o aparelho tiver sido exposto à chuva ou humidade, não funcionar normalmente, ou se tiver caído.
- A ficha de alimentação é utilizada como dispositivo de desconexão e deve ser de fácil acesso.
- Não cobrir as aberturas de ventilação com artigos tais como jornais, toalhas de mesa, cortinas, etc.
- Nenhuma fonte de chama nua, tais como velas acesas, deve ser colocada sobre o aparelho.
- Deve ser dada atenção aos factores ambientais do tratamento de baterias.
- Utilizar o produto em condições climáticas moderadas.
- O aparelho não deve ser exposto a pingos ou salpicos e nenhum objecto cheio de líquidos, como vasos, deve ser colocado sobre o aparelho.
Advertência:
Para reduzir o risco de incêndio ou choque eléctrico, não exponha este produto à chuva ou humidade. Advertência:
Evitar expor os acumuladores a calor excessivo (luz solar, fogo, etc.).

Este símbolo indica que este produto tem um duplo isolamento entre a tensão eléctrica potencialmente perigosa e o componente acessível ao utilizador. Para reparações, só podem ser utilizadas as mesmas peças sobressalentes.
CUIDADO
RISCO DE CHOQUE ELÉCTRICO. NÃO ABRIR O APARELHO.

O RELÂMPAGO COM SÍMBOLO DE PONTA DE SETA DENTRO DE UM TRIÂNGULO EQUILÁTERO DESTINA-SE A ALERTAR O UTILIZADOR PARA A PRESENÇA DE "TENSÃO PERIGOSA" NÃO ISOLADA DENTRO DO RECINTO DO PRODUTO QUE PODE SER DE MAGNITUDE SUFICIENTE PARA CONSTITUIR UM RISCO DE CHOQUE ELÉCTRICO PARA AS PESSOAS.

O PONTO DE EXCLAMAÇÃO DENTRO DE UM TRIÂNGULO EQUILÁTERO DESTINA-SE A ALERTAR O UTILIZADOR PARA A PRESENÇA DE IMPORTANTES INSTRUÇÕES DE OPERAÇÃO E MANUTENÇÃO (MANUTENÇÃO) NA LITERATURA QUE ACOMPANHA O PRODUTO.
AVISO: PARA REDUZIR O RISCO DE INCÊNDIO OU CHOQUE ELÉCTRICO, NÃO EXPONHA ESTE APARELHO À CHUVA OU HUMIDADE.
- Não modificar nenhuma parte do interior da televisão ou controlos de ajustamento não mencionados neste manual. Todos os aparelhos de TV LED são aparelhos de alta tensão. Ao limpar pó ou gotas de água dos PAINÉIS LED ou mobiliário, desligue o cabo de alimentação da tomada e limpe a TV com um pano macio e seco. Desligue o cabo de alimentação e o cabo da antena para evitar danos na TV em caso de tempestade ou incêndio.
- Todas as reparações da TV só devem ser efectuadas por pessoal qualificado do serviço de TV.

text_image
Warning sign depicting a sound wave with sound waves inside a triangleCuidado: A utilização de auscultadores a níveis de volume elevados durante períodos de tempo prolongados pode resultar em perda auditiva permanente. Para a França, os produtos foram testados para assegurar que cumprem os requisitos do nível de pressão sonora da NF EN 50332 L.5232-1 relevante.
Nota: Para evitar possíveis danos auditivos, não ouvir em volumes elevados durante longos períodos de tempo.
Protecção ambiental
Este aparelho não contém gases que possam danificar a camada de ozono, nem no seu circuito de refrigeração nem nos materiais de isolamento. O aparelho não deve ser eliminado com resíduos e lixo municipal. A espuma de isolamento contém gases inflamáveis. O aparelho deve ser eliminado de acordo com os regulamentos do aparelho a serem obtidos junto das autoridades locais. Evitar danificar a unidade de arrefecimento, especialmente o permutador de calor. Os materiais utilizados neste aparelho marcados com o símbolo são recicláveis.
natural_image
Symbol of a trash bin crossed with a diagonal line and a horizontal bar below (no text or labels)Este símbolo no produto ou na sua embalagem indica que este produto não deve ser tratado como lixo doméstico. Em vez disso, deve ser levado para o ponto de recolha apropriado para a reciclagem de equipamento eléctrico e electrónico.
Ao garantir que este produto é eliminado correctamente, ajudará a evitar potenciais consequências negativas para o ambiente e a saúde humana, que de outra forma poderiam ser causadas por um manuseamento inadequado dos resíduos deste produto.
Para informações mais detalhadas sobre a reciclagem deste produto, queira contactar as autoridades locais, o serviço de eliminação de resíduos domésticos ou a loja onde adquiriu o produto.
Materiais de embalagem
Os materiais com o símbolo são recicláveis. Por favor, eliminar a embalagem num recipiente de recolha adequado para reciclagem.
Eliminação do aparelho
Desligar a ficha da tomada da rede eléctrica.
Cortar o cabo de alimentação e eliminá-lo.

text_image
Warning sign depicting a flame symbol with hazard symbol inside a triangleAdvertência! Durante a utilização, serviço e eliminação do aparelho, prestar atenção a este símbolo, que se encontra na parte de trás do aparelho (painel traseiro ou compressor). Este símbolo será de cor amarela ou laranja. É um sinal de aviso de perigo de incêndio. Existem materiais inflamáveis na tubagem do refrigerante e do compressor. Manter afastado da fonte de incêndio durante a utilização, manutenção e eliminação.
Colocar a televisão numa sala onde a luz não caia directamente no ecrã.
A escuridão total ou reflexos no ecrã podem causar fadiga ocular. Recomenda-se uma iluminação suave indirecta para uma visualização confortável.
Deixar espaço suficiente entre a TV e a parede para ventilação.
Evitar locais com temperaturas elevadas para evitar possíveis danos no armário ou danos prematuros em peças.
Não cobrir a ventilação ao utilizar o televisor.
Instruções de montagem do suporte de base
Certifique-se de colocar a televisão com o ecrã virado para baixo sobre uma superfície plana. Recomenda-se a utilização de 2 pessoas para a mover, devido ao tamanho e peso desta televisão.
Certifique-se de que a mesa ou mesa que utiliza tem uma superfície completamente limpa e plana e utilize um pano macio entre a face do televisor e a mesa para proteger o ecrã do televisor.
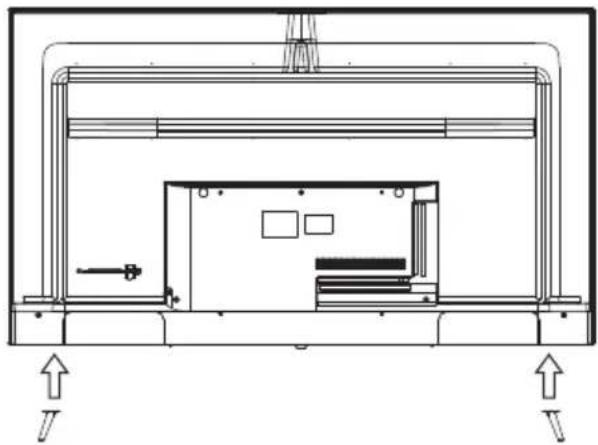
natural_image
Technical line drawing of a mechanical assembly with mounting brackets and directional arrows (no text or symbols)- colocar a TV horizontalmente com o ecrã virado para baixo, inserir o suporte na ranhura e ajustar os orifícios dos parafusos de modo a corresponderem uns aos outros.
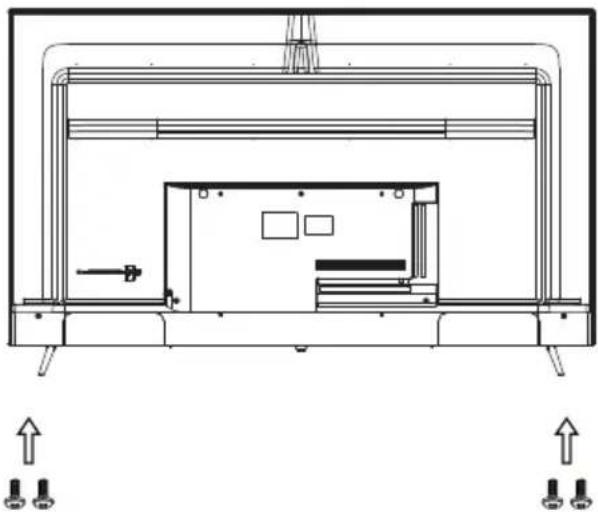
natural_image
Technical line drawing of a mechanical assembly with mounting brackets and internal components (no text or symbols)- inserir os parafusos nos orifícios do suporte.
Instruções de montagem do suporte de parede
O comprimento do parafuso especificado é apenas uma recomendação. O comprimento real requerido pode variar dependendo do tipo de suporte de parede utilizado.
A televisão não vem com um suporte de parede; deve ser comprada separadamente. Utilizar apenas suportes de parede compatíveis com VESA, de acordo com as especificações recomendadas para este modelo. A utilização de outros suportes de parede ou instalação inadequada pode resultar em danos pessoais ou danos para o televisor.
Siga todas as instruções do manual de instruções para o seu suporte de parede escolhido.
| Medidas VESA | Tamanho do parafuso para ligar o televisor ao suporte de parede. |
| 400x300 | Cabeza del tornillo M6x16mm |
| 400x300 | Cabeza del tornillo M6x12mm |
| 200x100 | Cabeza del tornillo M6x8mm |
65"
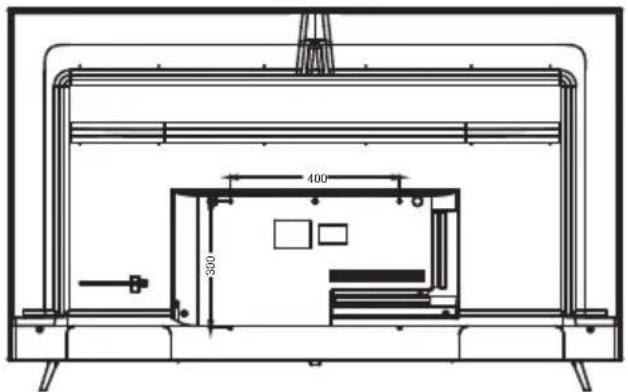
text_image
400 30055"
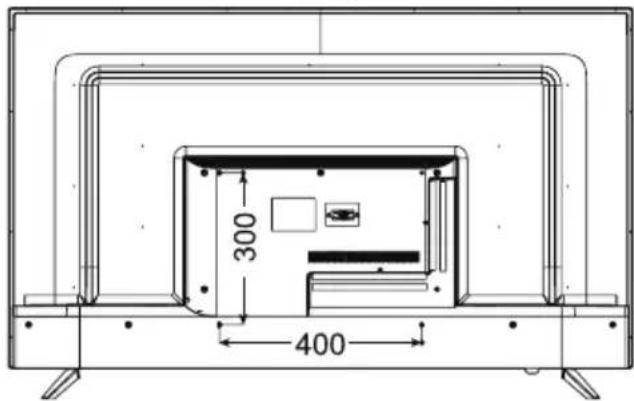
text_image
300 40050"
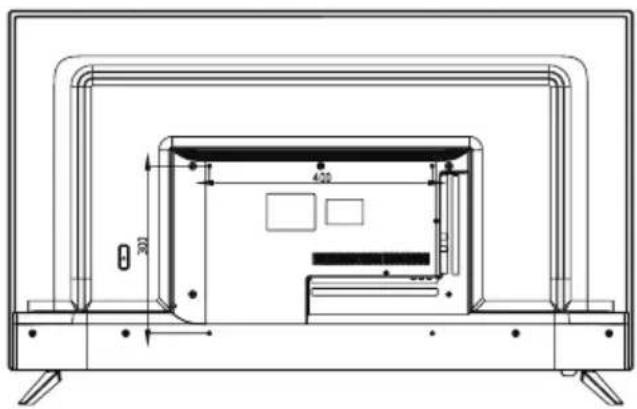
text_image
400 30043"
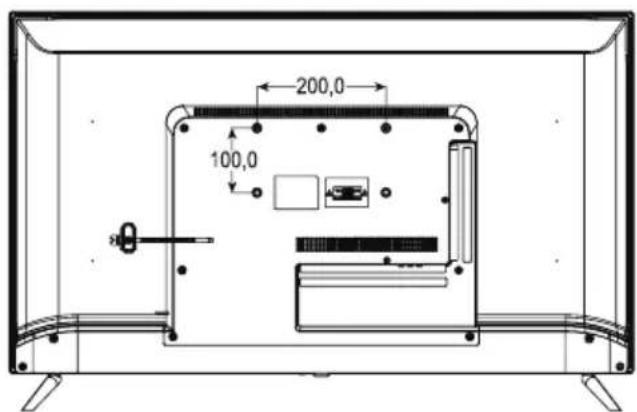
text_image
200,0 100,0Painel frontal
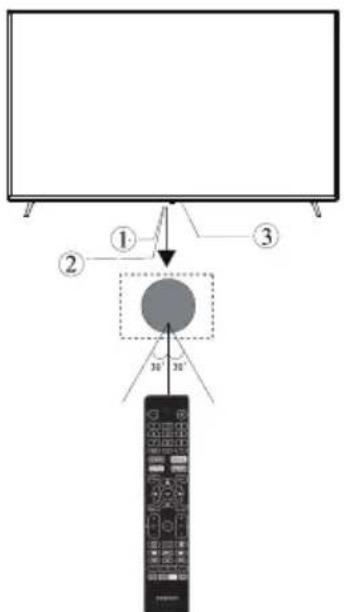
text_image
Diagram showing a monitor setup with labeled components and a remote control panel, including numbered arrows and a dotted circle.1: Sensor de controlo remoto.
2: Indicador LED: VERDE - STANDBY.
3: Teclado
Keypad
Os botões da televisão estão localizados na parte inferior da televisão, perto do indicador LED.
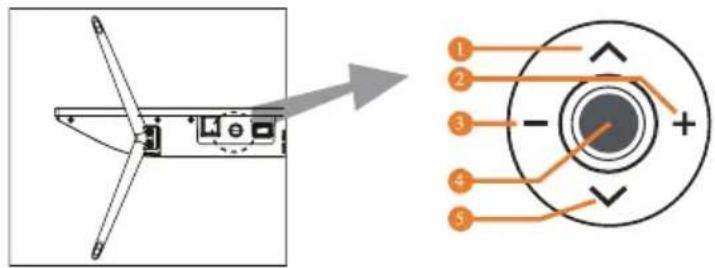
text_image
Technical diagram showing a wind turbine blade assembly with labeled components and a close-up of the internal structure.1: Seleccionar o canal seguinte ou rolar para cima.
2: Aumentar o volume ou rolar para a direita.
3: Diminuir o volume ou rolar para a esquerda.
4: Quando o televisor estiver em modo de espera, carregar para ligar.
Quando o televisor estiver ligado, premir para entrar no menu.
Utilize o joystick para navegar através da interface e prima para entrar no item realçado.
Quando a televisão estiver ligada, premir e manter premida para entrar no modo de espera.
5: Seleccione o canal anterior ou desloque-se para baixo.
Ligações AV traseiras

text_image
ETHERNET OPTICAL USB 5V=500mA HDMI (4K) HDMI (4K) HDMI2 (4K) AV INPUT SAT IN 13/18=400mA ANT. IN ① ② ③ ④ ⑤ ⑥ ⑦Ligações AV traseiras (Lateral)
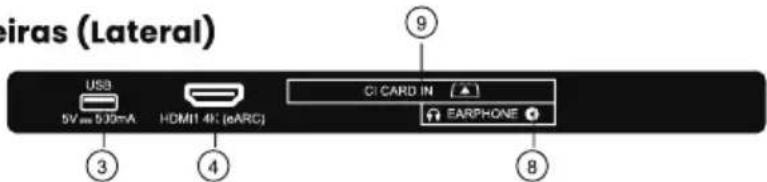
text_image
Epiras (Lateral) USB 5V = 5.39mA HDMI 4K (eARC) CI CARD IN (▲) EARPHONE ③ ④ ⑧- ETHERNET: Ligar a interface da rede.
- OPTICAL: Saída de áudio digital óptico.
- USB: Ligue o seu dispositivo de memória USB (por exemplo, cartão de memória USB) para gravação de PVR ou para reproduzir ficheiros compatíveis armazenados no mesmo.
- HDMI: Ligue à saída HDMI de até 4 fontes de vídeo externas (por exemplo, leitor de DVD, consola de jogos ou leitor de Blu-ray).
- AV IN: Ligue à tomada AV OUT da sua fonte de vídeo externa (p. ex., leitor de DVD)*.
- SAT INPUT: Ligue o satélite para receber o sinal de TV.
- ANT.IN: Ligue a antena ou o cabo coaxial de 75 Ohm para receber o sinal de TV.
- HEADPHONES: Ligar os auscultadores aqui. Nota: Ligar os auscultadores irá silenciar o som dos altifalantes embutidos da TV.
- CI CARD IN:
* Use o cabo conector fornecido para converter a porta mini AV em entradas RCA.
Antena
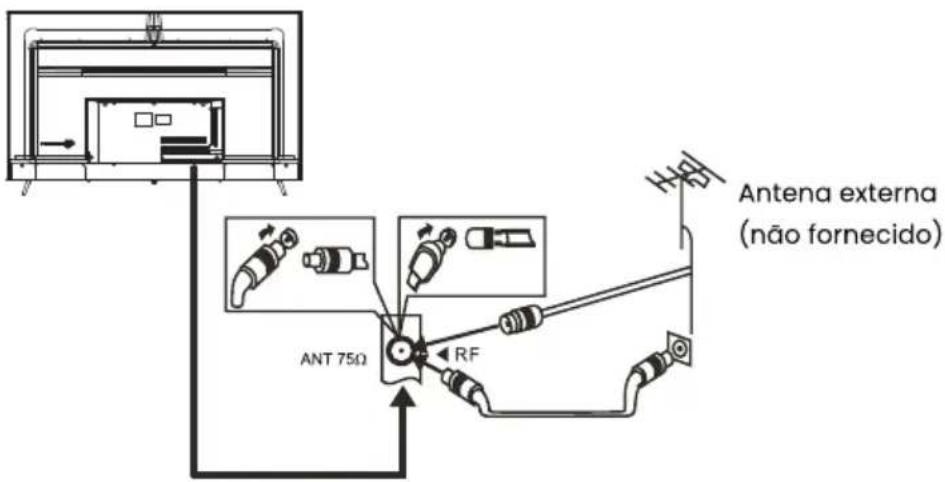
text_image
Antena externa (não fornecido) ANT 75Ω RFNota:
Ligações aéreas: IEC (feminino)
Impedância de entrada: 75Ω desequilibrado
Modo por defeito (HDMI)
| RESOLUTION | V.Freq.(Hz) |
| 640*480 | 50/60 |
| 800*600 | 50/60 |
| 1024*768 | 50/60 |
| 1360*768 | 50/60 |
| 1280*768 | 50/60 |
| 1920*108 0 | 50/60 |
| 3840*2160 | 24/25/30/60 |
Ligação de equipamento audiovisual
Pode ser ligado aos seguintes dispositivos: VCR, leitor multimédia, DVD, câmara de vídeo, consola de jogos ou sistema estéreo, etc...
Esta TV oferece dois grupos AV para ligações a VCR, DVD ou outro equipamento de vídeo.
Consultar o manual do utilizador para o equipamento.
Pode utilizar os terminais de entrada na parte de trás da TV.
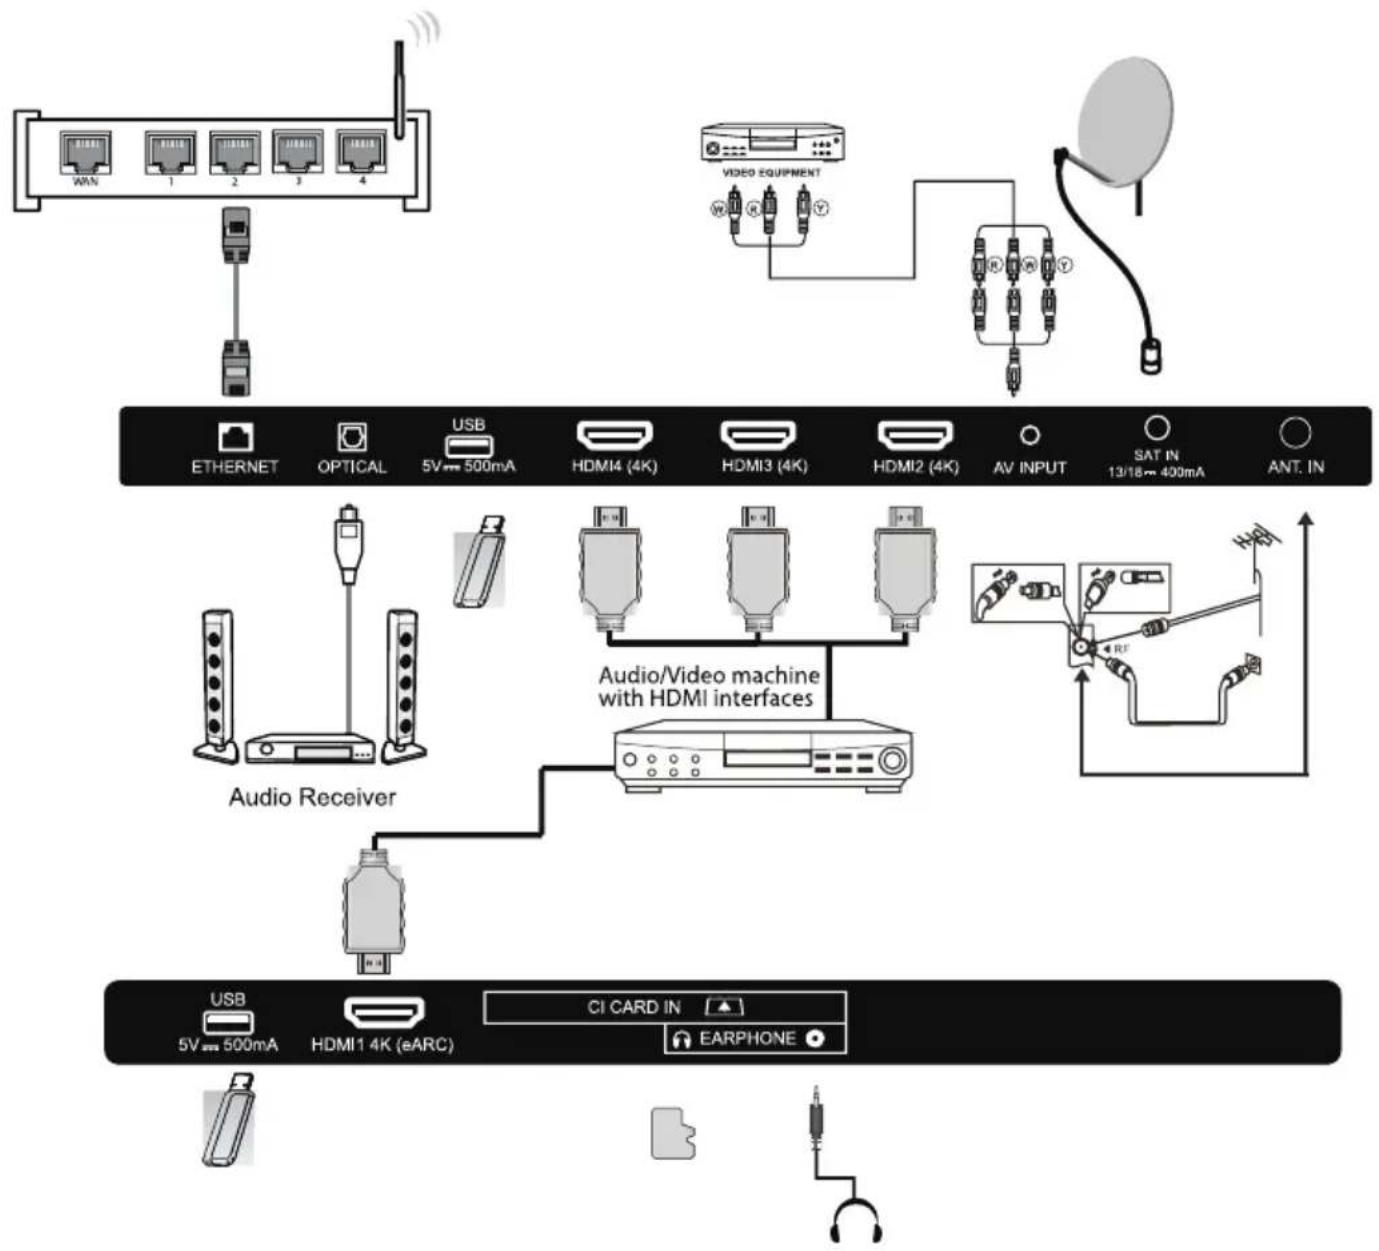
flowchart
graph TD
    A["USB 5V 500mA"] --> B["Audio Receiver"]
    C["USB 5V 500mA"] --> D["Audio Receiver"]
    E["USB 5V 500mA"] --> F["Audio Receiver"]
    G["USB 5V 500mA"] --> H["Audio Receiver"]
    I["HDMI1 4K (eARC)"] --> J["Audio/Video machine with HDMI interfaces"]
    K["CI CARD IN"] --> L["Audio/Video machine with HDMI interfaces"]
    M["EARPHONE"] --> N["Audio/Video machine with HDMI interfaces"]
    O["VIDEO EQUIPMENT"] --> P["AV INPUT"]
    Q["SAT IN 13/18~400mA"] --> R["AV INPUT"]
    S["ANT. IN"] --> T["AV INPUT"]
Formatos multimedia
| JPEG, JPEG, PNG, BMP, GIF | |
| AVI, MKV, MP4, MOV, VOB, DAT, FLV, MPG, WMV, TP, TRP, M3T, M2V, M4V, MPEG, 3GP, MJPEG, TS | |
| MP3, AC3, AAC, WAV, OGG, FLAC, M4A, AMR | |
| TXT |
Nota:
Para a reprodução multimédia, o formato deve ser FAT32.
Controlo remoto
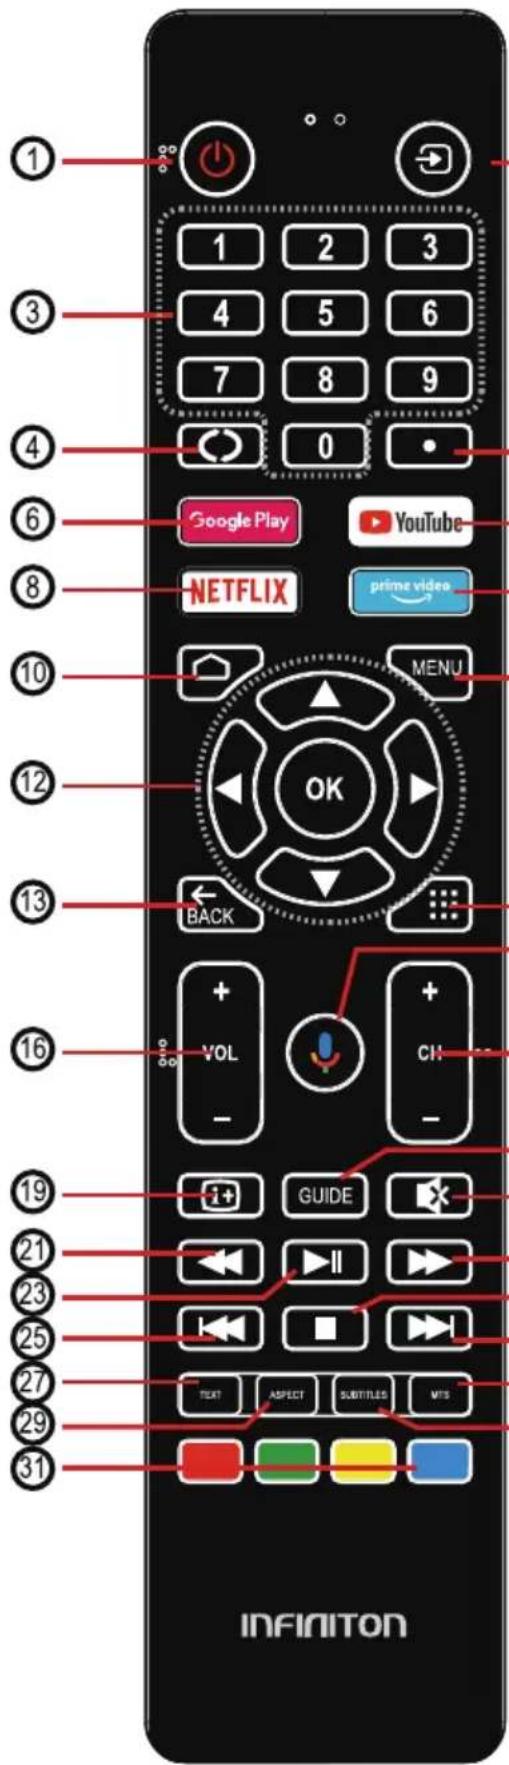
text_image
1 2 3 4 5 6 7 8 9 0 Google Play YouTube NETFLIX prime video MENU OK BACK VOL CH GUIDE TEXT ASPECT SUBTITLES MTS INFINITION
-
Ligue a televisão ou coloque-a em modo de espera.
-
Alternar entre as fontes de sinal de entrada.
-
Pressione para seleccionar directamente um canal de TV quando estiver a ver TV.
-
Saltar para o último canal visto.
-
Introduza o carácter.
-
Filmes abertos de Google Play.
-
Abrir aplicação YouTube.
-
Abrir a aplicação NETFLIX.
-
Abrir o Prime Video.
-
ANDROID TV home screen.
II. Entrar no menu no ecrã.
- Prima os botões UP/DOWN/LEFT/RIGHT (Para cima/para baixo/para a direita) para navegar.
OK: Confirme a sua selecção; aceda à lista de canais de televisão em directo.
-
Voltar ao ecrã anterior.
-
Aceder à lista de aplicações instaladas.
-
Consultar o GOOGLE Wizard.
-
Aumente ou diminua o volume.
-
Ir para o canal seguinte ou anterior.
-
Abrir o Guia da TV.
-
Mostrar informação adicional.
-
Premir para ligar ou desligar o som.
-
Reprodução rápida de rebobinagem.
-
Reprodução rápida para a frente.
-
Iniciar a reprodução, Pausar a reprodução.
-
Premir para parar a reprodução de meios.
-
Saltar para o início do capítulo/faixa/foto anterior.
-
Saltar para o início do próximo capítulo/faixa/foto.
-
Premir para seleccionar o modo teletexto.
-
Premir para seleccionar Mono, Nicam, Stereo para canais ATV e Linguagem áudio para canais DTV.
-
Alterar a relação de aspecto da imagem.
-
Mostrar ou ocultar as legendas.
-
BOTÕES VERMELHO/VERDE/AMARELO/AZUL:
As funções correspondem à exibição no ecrã.
Configuração inicial
Quando ligar a televisão pela primeira vez, o Assistente de Configuração irá guiá-lo a configurar a televisão.
O assistente irá guiá-lo ao configurar a televisão. Siga o ecrã instruções no ecrã.
Nesta etapa, é possível seleccionar a língua do sistema.
Utilize os botões UP/DOWN para seleccionar a língua do sistema, depois prima OK.
idioma do sistema, depois premir OK/SELECT para confirmar.
Neste passo, pode emparelhar o controlo remoto Bluetooth com a televisão.
Prima as teclas ESQUERDA + MENU (para baixo) durante 3 segundos até que a luz vermelha comece a piscar. Seleccione e prima OK quando o código do comando à distância 'INFINITON S_AF' aparecer no ecrã.
no visor. Uma vez ligado, pode utilizar o controlo remoto Bluetooth para operar a televisão.
Para ligar o seu Android™ smartphone ao televisor, seleccione.
"Continuar".
PrimaUP/DOWN para seleccionar o Wi-Fi a que pretende ligar, introduza a palavra-passe e introduza o código de controlo ligar, introduzir a palavra-passe, e depois confirmar a ligação.
Se estiver a utilizar uma ligação Ethernet, pode saltar este passo.
Nesta etapa, pode aceitar os Termos de Serviço do Google para melhorar a experiência do produto. Seleccione "ACCEPT" para continuar.
Aparecerão agora ecrãs informativos. Pode percorrê-los premindo o botão direccional "RIGHT".
Seleccione o país em que está a utilizar o dispositivo com a direcção para cima/para baixo
botões direcionais para cima/baixo.
Definir uma palavra-passe por razões de segurança.
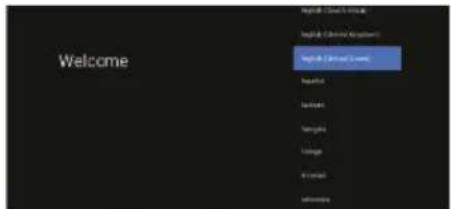
text_image
Welcome Refresh - Default Refresh - Default Options Refresh - Default Options Refresh - Default Options Refresh - Default Options Refresh - Default Options Refresh - Default Options Refresh - Default Options Refresh - Default Options Refresh - Default Options Refresh - Default Options Refresh - Default Options Refresh - Default Options Refresh - Default Options Refresh - Default Options Refresh - Default Options Refresh - Default Options Refresh - Default Options Refresh - Default Options Refresh - Default Options Refresh - Default Options Refresh - Default Types Refresh - Default Types Refresh - Default Types Refresh - Default Types Refresh - Default Types Refresh - Default Types Refresh - Default Types Refresh - Default Types Refresh - Default Types Refresh - Default Types Refresh - Default Types Refresh - Default Types Refresh - Default Types Refresh - Default Types Refresh - Default Types Refresh - Default Types Refresh - Default Types Refresh - Default Types Refresh - Default Types Refresh - Default Types Refresh - Default Type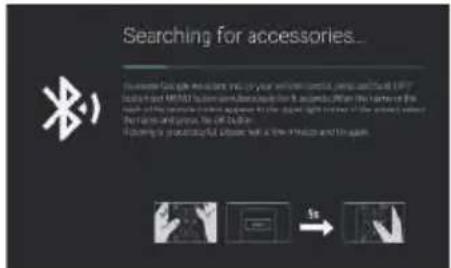
text_image
Searching for accessories... How much you're looking out or your own version of a tool and call the USB to select the USB210 system and access to the next page. When the next page is selected, the USB210 system will be used in the open light screen of the power screen, which is also designed to use the USB210 device. If this is done, it is not allowed to use the USB210 device to use the USB210 device to use the USB210 device to use the USB210 device to use the USB210 device to use the USB210 device to use the USB210 device to use the USB210 device to use the USB210 device to use the USB210 device to use the USB210 device to use the USB210 device to use the USB210 device to use theUSB210 device to use the USB210 device to use the USB210 device to use the USB210 device to use the USB210 device to use the USB210 device to use the USB210 device to use the USB210 device to use the USB210 device to use the USB210 device to use the USB210 device to use the USB210 device to use the USB210 If you want to use this device, then you want to use it You want to use this device, then you want to use it You want to use this device, then you want to use it You want to use this device, then you want to use it You want to use this device, then you want to use it You want to use this device, then you want to use it You want to use this device, then you want to use it You want to use this device, then you want to use it You wantto use this device, then you wantto use it You wantto use this device, then you wantto use it You wantto use this device, then you wantto use it You wantto use this device, then you wantto use it You wantto use this device, then you wantto use it You wantto use this device, then you wantto use it You wantto use this device, then you wantto use it You wantto use this device, then you wantto use It You wantto use this device, then you wantto Use It You wantto use this device, then you wantto Use It You wantto use this device, then you wantto Use It You wantto use this device, then you wantto Use It You wantto use this device, then you wantto Use It You wantto use this device, then you wantto Use It You wantto use this device, then you wantto Use It You wantto use this device, then you wantto Use It
text_image
Quickly set up your TV with your Android phone? You can't use your mobile phone's WTP email and Google email's or TV
text_image
Select your Wi-Fi network You can also contact Wi-Fi via to contact the Wi-Fi. SELECT your Wi-Fi network GET-1947-701 GET-1947-702, 701 PC.202
text_image
Google Google Services Design tools to ensure that all services are necessary, which will be used in the following: Name and address of the Google Services Service Show "Change" to install your website or other Google services settings.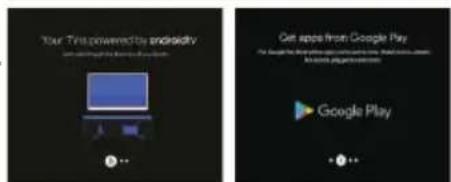
text_image
Your This power/My endpoint Get apps from Google Play Google Play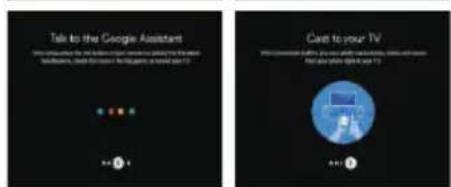
text_image
Talk to the Google Assistant Click using the Google Assistant to navigate the Google backslash, create a new user's video game on the next 12 + - 5 Cast to your TV What can't change the Google's video game, it's going to make up the video game on the next 12 + - 5
text_image
Region/Country Please note that Region/Country Name On Locus SendTo Suggested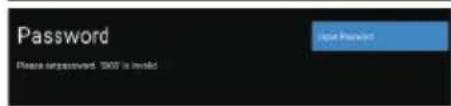
text_image
Password Please import password. 100% is invalid I am passwordSeleccione o fuso horário em que está a utilizar o dispositivo com os botões direcionais.
Neste passo, certifique-se de seleccionar "HOME" se vai utilizar a televisão em casa.
TV em casa.
Certifique-se de confirmar depois de ter seleccionado "HOME".
Assegure-se de configurar o Chromecast built-in™ para "On", para que possa transmitir todos os seus filmes, programas, aplicações, jogos e mais directamente para a sua TV.
Para seleccionar o modo sintonizador para pesquisa, prima UP/DOWN para seleccionar, depois prima OK para confirmar. confirme.
NOTA: Certifique-se de que o cabo da antena (RF) está ligado à ANT. IN na parte de trás do televisor.
Android TV™ - Ecrã inicial
Uma vez terminada a configuração inicial, entrará no ecrã inicial da TV Android.


text_image
Select TV mode "None" mode is optimized to efficient energy needs for home site. "None" mode is optimized to store devices with fuel detections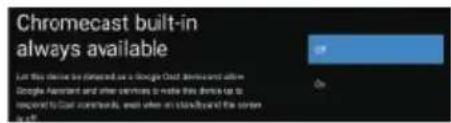
text_image
Chromecast built-in always available Let this device be directed as a Google Cloud Devices and where Google Assistant and other services to make this device is to response to Cloud timestamps, even when an island/yard of the server is all.
text_image
Tuner Mode Open Open Delete Open Open Delete- prima o botão Google Assistant no comando à distância para fazer mais coisas na televisão usando a sua voz.
- Home - Página inicial para entrar na TV em directo, ver as suas aplicações pré-instaladas e descarregadas.
- Discovery - Inicie sessão na sua conta Google para obter recomendações dos seus serviços de streaming, organizados por temas e géneros baseados no que se observa.
- Apps - Apps que descarregou e aplicações que pode procurar para instalar.
- Configurações - Seleccione esta opção se quiser aceder às configurações da sua televisão.
- Hora - Mostra a hora actual.
- Cada linha após este ponto exibirá o conteúdo recomendado das aplicações que já tem instaladas. Adicionar aplicações
No final desta linha de aplicações, seleccione a caixa + e adicione a aplicação que descarregou e instalou ao ecrã inicial da sua TV Android. - Filmes ou programas disponíveis para reprodução a seguir.
GOOGLE PLAY
Uma vez aberto o Google Play, ser-lhe-á pedido que inicie sessão ou crie uma nova conta.
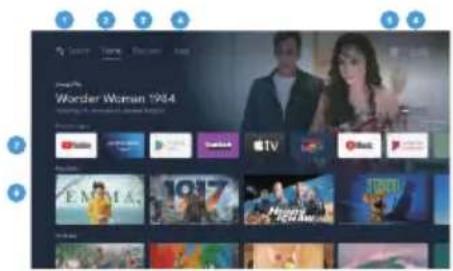
text_image
Wonder Woman 1984
Google Play
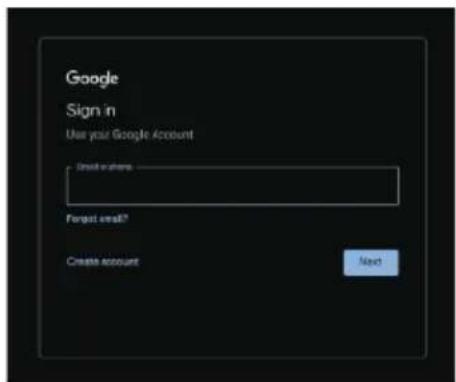
text_image
Google Sign in Use your Google Account Create accounts Forgot need? Create account NextUma vez conectado, será levado para a página abaixo, percorrer a lista de aplicações disponíveis para download OU ir para o botão de pesquisa, e pesquisar introduzindo texto ou premindo o botão Google Assistant no controlo remoto. controlo à distância.
Assistente do Google
Faça mais coisas na sua televisão usando a sua voz. Prima a tecla Botão Google Assistant no controlo remoto para pesquisar rapidamente mais de 400.000 filmes e programas, obter recomendações que recomendações para se adequar ao seu estado de espírito, controlar dispositivos domésticos inteligentes e muito mais.
Peça ao Google para procurar o mais recente blockbuster, stream shows ou jogos multiplayer abertos.
Faça com que as luzes diminuam ao ligar dispositivos domésticos inteligentes.
dispositivos.
Gerir tarefas e verificar o seu calendário.
Faça-lhe perguntas e veja as respostas na sua TV.
Descubra
Descubra novos filmes e espectáculos dos serviços a que já tem acesso. Sugestões baseadas no que viu e os seus interesses tornam mais fácil encontrar o seu próximo favorito.
Se ainda não tiver iniciado sessão no Google Play com a sua Conta Google, ao seleccionar o separador Descobrir no topo da página inicial, ser-lhe-á pedido que inicie sessão.
Uma vez iniciada a sessão no Google, poderá seleccionar as aplicações para as quais pretende recomendações dentro do Google Play.
aplicações para as quais pretende recomendações no âmbito do Descobrir secção
-
seleccionar (Verificar) as aplicações para as quais pretende recomendações.
-
Aguarde até 10 segundos para que a TV Android recolha as recomendações.
-
A secção Descobrir irá agora exibir os filmes ou programas de televisão recomendados.
Menu de entrada
Para aceder ao menu Input, prima o botão INPUT no comando à distância. Os inputs/portos que não estão a ser utilizados não podem ser acedidos.
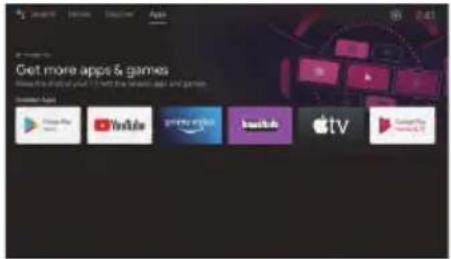
text_image
Get more apps & games You're doing your own help to get more apps and games. Available online YouTube Netflix Apple TV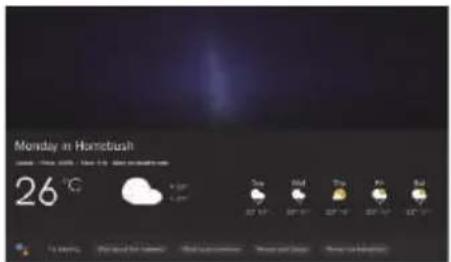
text_image
Monday in Hametibah 26 °C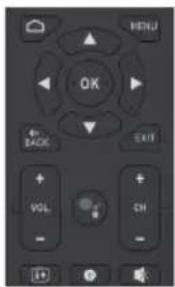
text_image
MENU OK BACK EXIT VOL CH
text_image
In the Heights THE AIR BACK THE AIR BACK THE AIR BACK THE AIR BACK THE AIR BACK THE AIR BACK THE AIR BACK THE AIR BACK THE AIR BACK THE AIR BACK THE AIR BACK THE AIR BACK THE AIR BACK THE AIR BACK THE AIR BACK THE AIR BACK THE AIR BACK THE AIR BACK THE AIR BACK THE AIR BACK THE AIR BACK THE AIR BACK THE AIR BACK THE AIR BACK THE AIR BACK THE AIRBack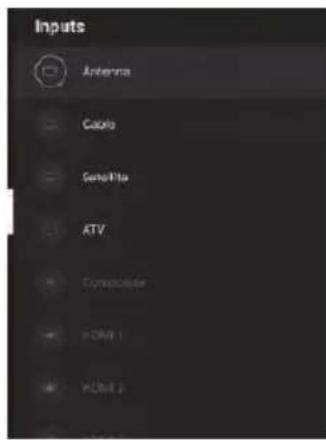
text_image
Inputs Antenna Cable Satellite ATV Computer FOM 1 VOut 2Definições
Para aceder ao menu Definições, seleccionar Definições (n° 5 na página 11) através do ecrã inicial ou premir o botão Definições no comando à distância.
Rede e Internet
Para aceder ao menu Rede, seleccione o menu Definições (#5 na página 11), desloque-se para baixo e seleccione Rede e Internet.
Menu de Canais
Para aceder ao menu Canal, seleccionar Definições (#5 na página 11) através do ecrã HOME.
Em seguida, desça e seleccione "Channel" (Canal).
Canal de Actualização Automática
Se esta opção for activada, a TV irá automaticamente actualizará automaticamente a televisão se forem feitas quaisquer alterações aos canais DVB-T digitalizados.
Para Sintonizar os Canais
Antena
- Na LiveTV, prima os botões INPUT do seu telecomando, seleccionar Antena.
- Prima o botão MENU e seleccione a opção Configurações para aceder ao menu de configuração, depois entrar no menu de canais.
- Seleccionar Canais para entrar no submenu, e depois seleccionar Scan de Canal.
- Entrar na pesquisa automática de canais ATV e DTV disponíveis.
- Update Scan: Pesquisa automática de pontos de frequência fora da estação.
- Procura individual RF: Procura manual DTV na qual se selecciona um canal RF e procura
selecciona um canal RF e procurará por canais DTV próximos dessa frequência.
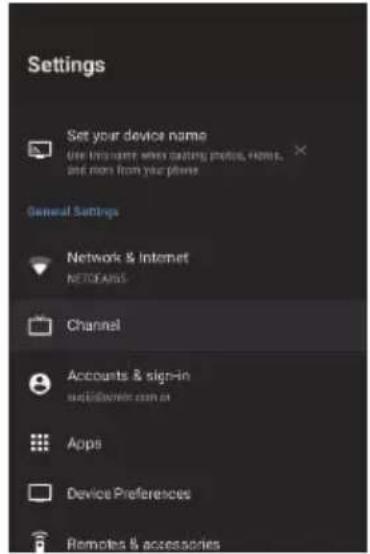
text_image
Settings Set your device name Use this name when calling profile, home, and more from your phone General Settings Network & Internet NETGEANS Channel Accounts & sign-in www.elsevier.com.cn Apps Device Preferences Remotes & accessories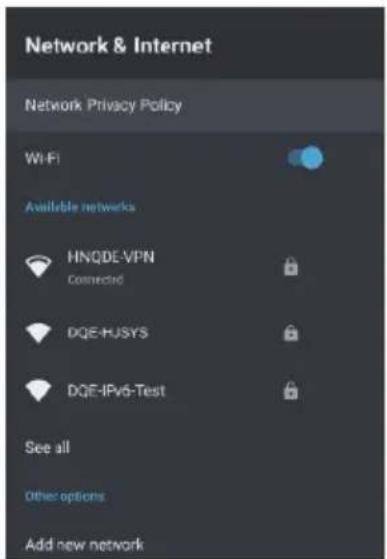
text_image
Network & Internet Network Privacy Policy Wi-Fi Available networks HNQDE-VPN Connected DQE-HUSYS DQE-IPv6-Test See all Other options Add new network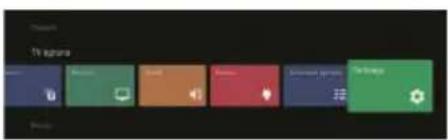
text_image
17 seconds Scankey Scankey Scankey Scankey Scankey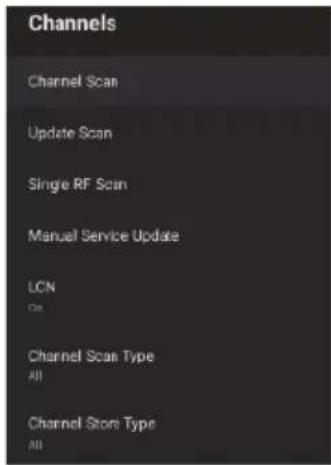
text_image
Channels Channel Scan Update Scan Single RF Scan Manual Service Update LCN C# Channel Scan Type All Channel Store Type AllCabo
- Na LiveTV, prima os botões INPUT do seu telecomando, seleccionar Cabo.
- Premir o botão MENU e seleccionar a opção Setup para aceder ao menu setup, depois entrar no menu channel.
aceder ao menu de configuração, depois entrar no menu de canais.
- Seleccione os canais para entrar no submenu, e depois seleccione o canal Scan.
- Definir o modo de digitalização, frequência, ID da rede e, em seguida, seleccionar Scan (Digitalizar).
depois seleccionar Scan.
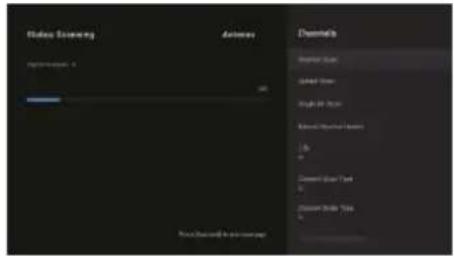
text_image
Status Screening Actions Description Report Score Adjusted Score Weighted Score Adjusted Performance 10 20 Consent Score Trend -1 Consent Score Trend -1 Power/Background Performance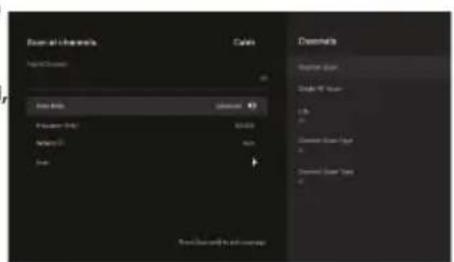
text_image
Scan channels Cales Scan Mode: Scan Mode: 100% Scan Mode: 50% Scan Mode: 20% Scan Mode: 10% Delete Delete Mode: 10% Delete Mode: 5% Delete Mode: 2% Delete Mode: 1%Satélite
- Na LiveTV, premir os botões INPUT no comando à distância e seleccionar Satélite.
- Prima o botão MENU e seleccione a opção Settings para aceder ao menu de configuração, depois entre no menu aceder ao menu de configuração, e depois entrar no menu de canais.
Prima Satellite Re-scan para procurar por satélites.
Seleccione Mais para alterar a ligação da antena de satélite ou Próximo para utilizar a configuração de posição de satélite único.
Seleccione o nome do satélite para introduzir as definições dos parâmetros de satélite, que incluem Satellite Select (outro satélite), Scan Mode, Scan Type, Store Type, Store Type,
Configurações de LNB, Transponder e outros parâmetros. Uma vez concluídas as definições, voltar ao menu anterior e clicar em Next para digitalizar.
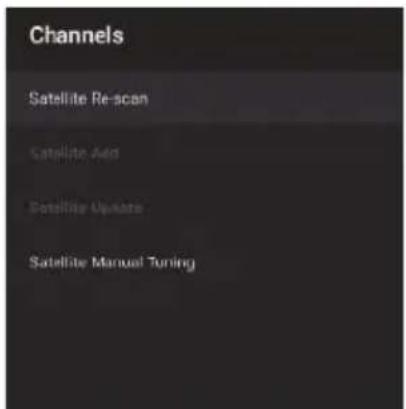
text_image
Channels Satellite Re-scan Satellite Add Satellite Update Satellite Manual Tuning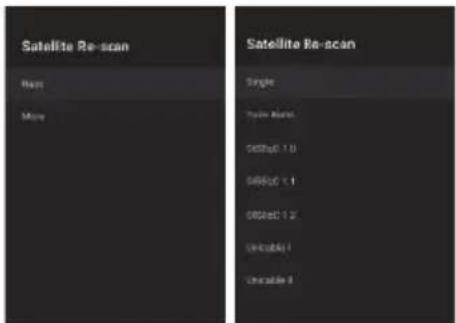
text_image
Satellite Re-scan Base More Satellite Re-scan Single Pure Mode 0.015x 1.0 0.025x 1.1 0.035x 1.2 Unstable UncstableAdicionar Satellite :
Acrescentar outro satélite (Um único satélite é seleccionado. A opção Todos os satélites não está disponível).
Pesquisa Manual de Satélite:
Procura manual de um TP específico.

text_image
Video Screening Add/Remove: 0 Change from 10.25 Update: 19 Add Add: 10.25 OK Video Screening is achievedCanais preferidos
Após a digitalização do canal estar completa, prima OK/Enter a qualquer momento enquanto se vê televisão para aceder à informação do canal e adicionar canais ao informação sobre os canais e adicionar canais à lista de Favoritos. Nota: Esta definição só pode ser feita quando se vê televisão em directo.
Adicionar Favorito
Quando a lista de canais for exibida, prima o botão Azul no comando à distância para adicionar o canal seleccionado à lista de favoritos.
Ver Lista de Favoritos
Quando a Lista de Canais for exibida, prima o botão Amarelo no comando à distância para seleccionar o Tipo de Canal. Aqui, desça e seleccione Favourites para ver os canais adicionados à lista de favoritos.
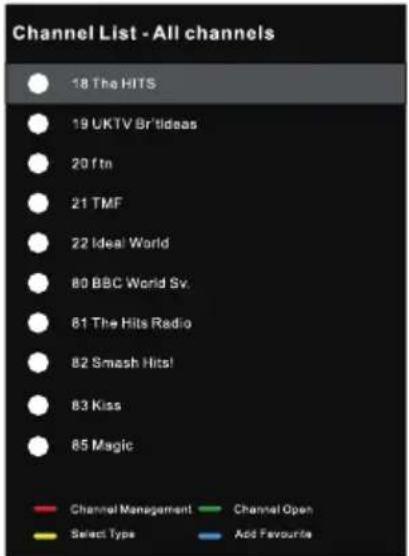
text_image
Channel List - All channels 18 The HITS 19 UKTV Br'tideas 20 f tn 21 TMF 22 Ideal World 80 BBC World Sv. 81 The Hits Radio 82 Smash Hits! 83 Kiss 85 Magic Red Channel Management Channel Open Yellow Select Type Add Favourite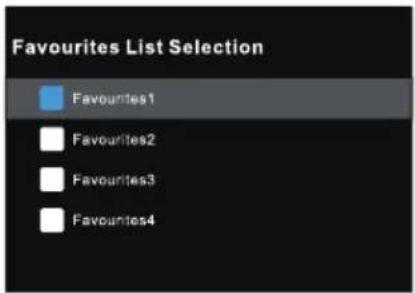
text_image
Favourites List Selection Favourites1 Favourites2 Favourites3 Favourites4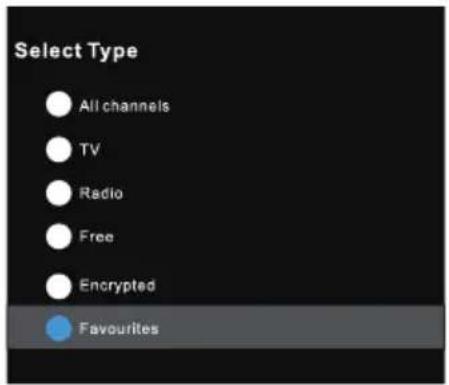
text_image
Select Type All channels TV Radio Free Encrypted Favourites
text_image
Channel List - Favourites1 1 The HITS 2 UKTV Br'tideasPreferências de dispositivos - Sobre
Para aceder ao menu Sobre:
-
seleccionar o ícone Configurações (#5 na página 12) através do ecrã inicial.
-
seleccionar "Preferências do dispositivo".
-
Em seguida, rolar para baixo e seleccionar "Sobre".
Reinicialização de Fábrica
Seleccione "Factory Reset", para restaurar o sistema para as configurações de fábrica. Note por favor que todos os dados do sistema actual serão apagados.
Hora
Para aceder ao menu Data e Hora, seleccionar o ícone Definições (#5 na página 12). através do ecrã inicial.
-
seleccionar "Preferências do Dispositivo".
-
Em seguida, desça e seleccione "Data e Hora".
Menu de definições de entrada
Para aceder ao menu de definições de entrada:
-
seleccionar o ícone Configurações (#5 na página 12) através do ecrã inicial.
-
seleccionar "Preferências do dispositivo".
-
Em seguida, rolar para baixo e seleccionar "Inputs".
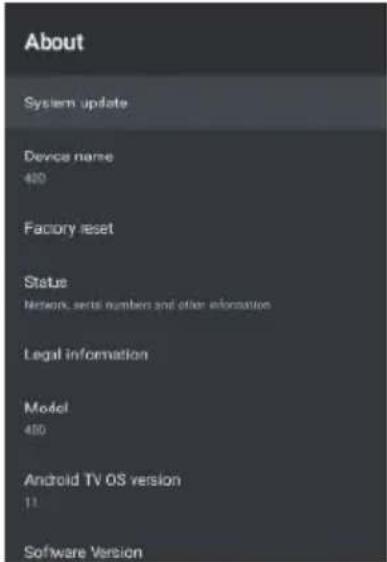
text_image
About System update Device name 400 Factory reset Status Network, serial numbers and other information Legal information Model 450 Android TV OS version 11 Software Version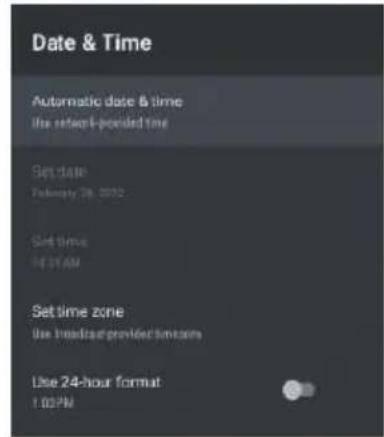
text_image
Date & Time Automatic date & time the retor-ponded time Set date February 26, 2012 Set time N:37 AM Set time zone Use medical provider system Use 24-hour format 1:00 PM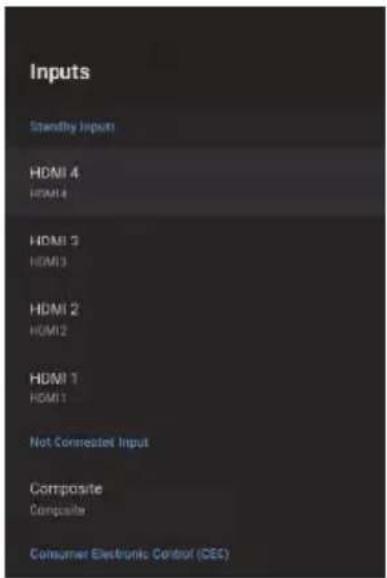
text_image
Inputs Standby Inputs HDMI 4 HDMI 4 HDMI 3 HDMI 3 HDMI 2 HDMI 2 HDMI 1 HDMI 1 Not Connected Input Composite Composite Consumer Electronic Control (CEC)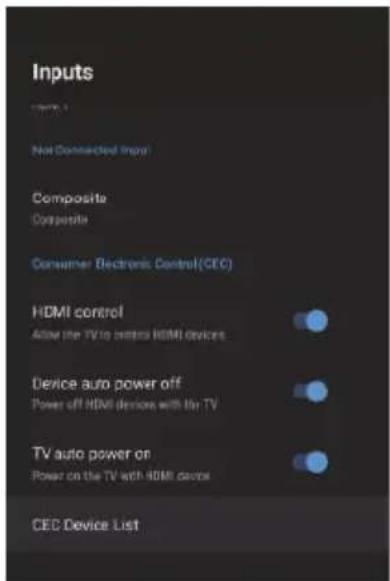
text_image
Inputs Not Connected Input Composite Composite Consumer Electronic Control(CEC) HDMI control Allow the TV to control HDMI devices Device auto power off Power off HDMI devices with the TV TV auto power on Power on the TV with HDMI devices CEC Device ListMenu de definição de potência
Para aceder ao menu de definição de potência,
-
seleccionar o ícone Configurações (5) através do ecrã INÍCIO. SCREEN.
-
seleccionar "Preferências do Dispositivo".
-
Em seguida, rolar para baixo e seleccionar "Power" (Alimentação). Sleep Timer - Opções de Desligar, 10 minutos, 20 minutos, 30 minutos, 40 minutos, 50 minutos, 60 minutos, 90 minutos e 120 minutos para desligar automaticamente a sua TV.
desligue automaticamente a sua televisão.
Picture Off - Desliga o ecrã (recomenda-se que não seleccione esta opção).
Desligar automático sem sinal - Desliga o televisor se não for detectado nenhum sinal.
Menu de Definições de Imagem
Para aceder ao menu Definições de Imagem:
-
- seleccionar o ícone de Definição (5) no ecrã INICIATIVO.
-
seleccionar "Preferências do Dispositivo".
-
Em seguida, desloque-se para baixo e seleccione "Picture" (Imagem).
Picture Mode - Opções à escolha - Standard, Vivid, Sport, Filme, Jogo, Poupança de energia, Utilizador.
Menu de definições de som
Para aceder ao Menu de Definições de Som,
-
seleccionar o ícone Configurações (5) através do ecrã inicial.
-
seleccionar "Preferências do Dispositivo".
-
Em seguida, rolar para baixo e seleccionar "Som".
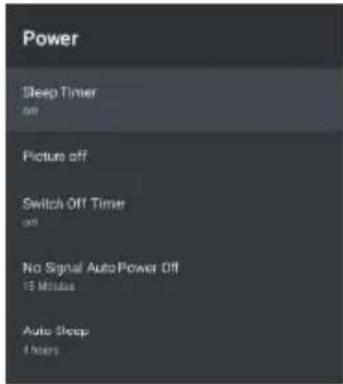
text_image
Power Sleep Timer off Picture off Switch Off Timer off No Signal AutoPower Off 15 Minutes Auto Sleep 4 hours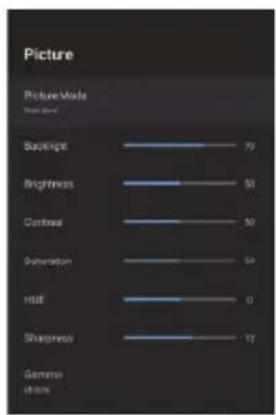
bar
Picture | Picture Mode | Value (%) | |---|---| | Backlight | 70 | | Brightness | 50 | | Contrast | 50 | | Saturation | 50 | | Hali | 0 | | Sharpness | 17 | Germano 48 stores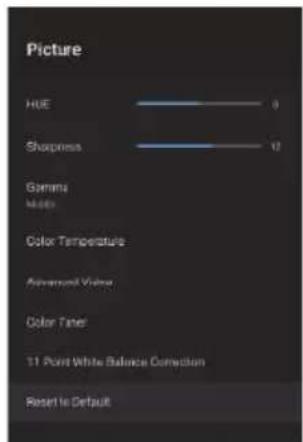
text_image
Picture HUE Sharpness Gamma Main Color Temperature Adversely Value Color Tafel 11 Point White Balance Correction Reset to Default
text_image
Sound System sounds sound style Version Balance Base Treble Sound Smoround Projection Group Speaker Delay eARCSound Style - Opções à escolha - Standard, Vívido, Desporto, Filme, Música, Notícias, Utilizador.
Saída Digital - Auto, Bypass, PCM, Dolby Digital Plus, Dolby Digital.
(Recomenda-se a selecção AUTO, pois detectará automaticamente a qualidade do som
detectar automaticamente a qualidade sonora produzida pelo conteúdo).
Ecrã inicial
Para aceder ao menu do ecrã inicial:
- seleccionar o ícone SETTINGS (#5 na página 12) através do.
Ecrã Princi-pal. - seleccionar "Preferências do Dispositivo".
- Em seguida, rolar para baixo e seleccionar "Home Screen".
Screensaver
Para aceder ao menu do Screen Saver:
- seleccionar o ícone Configurações (#5 na página 12 através do ecrã inicial.
- seleccionar "Preferências do Dispositivo".
- Em seguida, desça e seleccione "Protector de ecrã".
Para aceder ao Google Assistant a partir do menu Definições.
- seleccionar o ícone Configurações (n° 5 na página 12) através do ecrã de início.
- seleccionar "Preferências do Dispositivo".
- Em seguida, desça e seleccione "Google Assistant".
As contas só podem ser acedidas se uma conta do Gmail estiver ligada ao Google Play.
Uma conta Gmail é necessária para descarregar e instalar aplicações no Google Play.
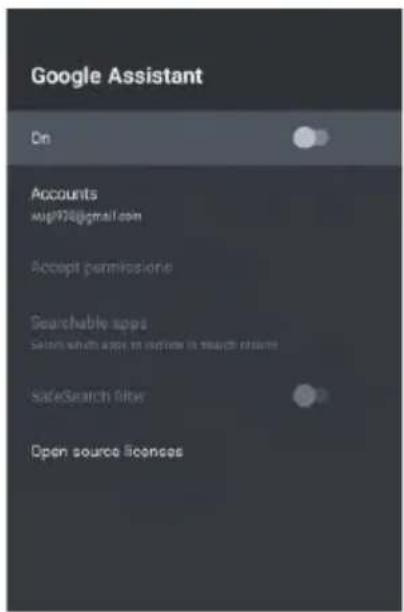
text_image
Google Assistant On Accounts wpl978@gmail.com Accept permission Searchable apps Select which apps to update in search filters SafeSearch filter Open source licenses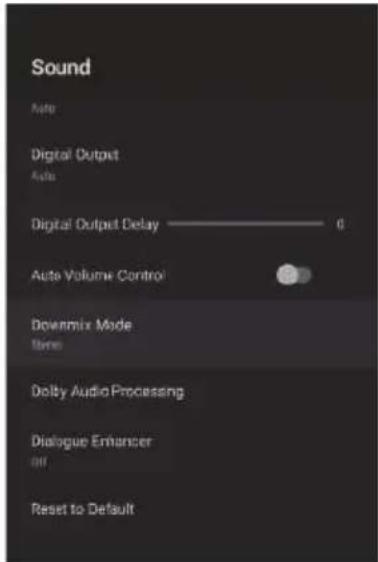
text_image
Sound Auto Digital Output Auto Digital Output Delay ———— 0 Auto Volume Control Downmix Mode Name Dolby Audio Processing Dialogue Enhancer Off Reset to Default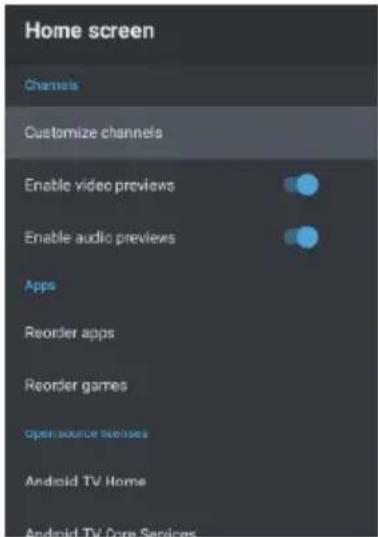
text_image
Home screen Channels Customize channels Enable video previews Enable audio previews Apps Reorder apps Reorder games Open source licenses Android TV Home Android TV Core Services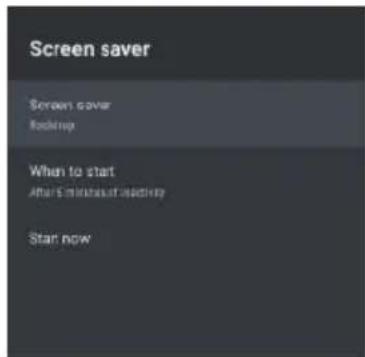
text_image
Screen saver Screen saver Bootstep When to start After 5 minutes of bootstep Start nowControlos parentais
Para aceder ao menu Controlo Parental:
-
seleccionar o ícone Configurações (#5 na página 12) através do ecrã inicial.
-
Em seguida, desloque-se para baixo e seleccione.
-
seleccionar "Controlo Parental".
A partir daqui, tem a opção de seleccionar e criar uma nova palavra-passe para bloquear determinados canais.
Nota: Não se esqueça de guardar/guardar a palavra-passe em algum lugar onde possa aceder mais tarde.
Se se esquecer da palavra-passe, terá de redefinir de fábrica a TV para voltar a utilizá-la.
Canais Bloqueados - Bloquear canais específicos para restringir a sua utilização.
Restrições de programas - Pode restringir programas específicos de um canal de televisão a serem bloqueados.
Entradas Bloqueadas - Bloquear a entrada de uma porta de TV para restringir a sua utilização.
Alterar PIN - Alterar o PIN existente seleccionado quando entrar neste menu pela primeira vez.
pela primeira vez neste menu.
Guia/EPG
- Ao ver televisão em directo, prima o botão Guia no comando à distância para abrir a interface EPG.
- A informação do programa será exibida e poderá operar o menu do EPG utilizando os botões coloridos.
- Prima o botão PVR para configurar um programa de gravação.
Emparelhar o comando à distância
Neste menu, pode emparelhar o seu controlo remoto Bluetooth ou outros dispositivos Bluetooth.
-
prima os botões "MENU" e "LEFT" no fundo do comando à distância durante 5 segundos.
-
Quando o LED começar a piscar, solte-o.
O telecomando enviará o sinal de emparelhamento para a televisão e exibirá a informação do telecomando no lado direito do ecrã.
- Prima o botão OK para exibir o emparelhamento.
Se o emparelhamento for exibido, a ligação é bem sucedida. bem sucedida.
- Se "Couldn't Pair" for afixado, a ligação falhou.
Esperar 30 segundos e premir os botões "MENU" e "LEFT" no fundo do telecomando durante 5 segundos para repetir os passos acima indicados.
- Premir o botão "BACK" para voltar ao menu anterior.

text_image
Channel Channels Auto Channel Update Channel Update Message Parental Controls Open Source Licenses
text_image
Monday, Fri:14 2027 10:58:28 AM Video Synthesis Line Current: 10.000 Current: 10.000 Current: 10.000 Current: 10.000 Current: 10.000 Current: 10.000 Current: 10.000 Current: 10.000 Current: 10.000 Current: 10.000 Current: 10.00 Current: 10.00 Current: 10.00 Current: 10.00 Current: 10.00 Current: 10.00 Current: 10.00 Current: 10.00 Current: 10.00 Current: 10.00 Current: 10.00 Current: 10.14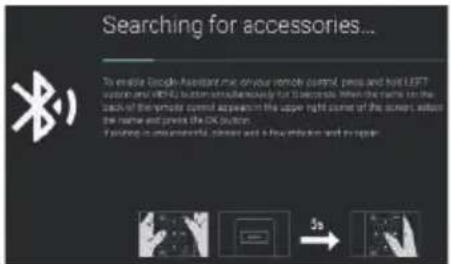
text_image
Searching for accessories... To enable Local Assistance me drive remote control, press and hot left button and WiFi button simultaneously for 10 electrons. When the name is the back of the remote control appears in the upper right some of the screen, outside the name and private the WiFi button. If setting its operational status and a low level end can be open.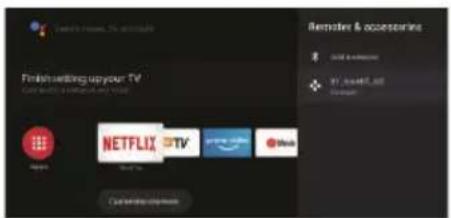
text_image
Finish setting up your TV NETFLIX TV Microsoft & accessories GOLD & ACCESS 81. 2047.02 Download| PROBLEMA DE IMAGEM | PROBLEMA DO SOM | INSPECTAR |
| Neve | Ruído | Posição, direcção ou ligação de antenas |
| Imagem fantasma | Áudio normal | Posição, direcção ou ligação da antrena |
| Interferência | Ruído | Equipamento electrónico, luz de ciclo auto-móvel/motor, luz fluorescente |
| Imagem normal | Mudo | Volume (verificar se o modo mudo está ligado ou se as ligações ao sistema áudio não estão correctas) |
| Nenhuma imagem | Mudo | O cabo de alimentação não está ligado, o interruptor não está ligado, OU os botões de brilho e contraste e volume não estão liga-dos, premir a tecla de standby no controlo remoto para verificar o dispositivo. |
| Sem cor | Áudio normal | Controlo das cores |
| Imagem quebrada | Áudio normal ou fraco | Sintonizar novamente o canal |
| Sem cor | Ruído | Sistema de TV |
| Barreira negra na par-te inferior e superior da imagem | Áudio normal | alterar a relação de aspecto para zoom |
Ficheiro não reproduzido a partir de dispositivo USB:
- Verificar se o ficheiro está num formato compatível.
Problema com o acesso à Internet:
- Verificar se o cabo de rede / wifi está ligado correctamente.
INFINITON
Soporte y contacto

text_image
QR code image with a central logo, likely linking to a digital resource or website.¿Necesitas ayuda?
En nuestra sección de Preguntas frecuentes (FAQs) damos soluciones a todos esos problemas que pueden surgir con un producto.
Nuestra garantía, compromiso y sello de calidad son parte de la esencia de Infiniton. Amabilidad, cercanía, pasión, compromiso, calidad y eficiencia a la hora de resolver toda incidencia.

text_image
QR code image with a central logo, likely linking to a digital resource or website.Asistencia técnica o reparación
Para solicitar asistencia técnica o reparación de su producto Infiniton, dispone de nuestra página web, funcionando 24 horas al día y 7 días a la semana, escaneando el código QR de la izquierda y completando el formulario. Recuerde tener a su disposición la factura de compra y el número de serie del producto.

text_image
QR code image containing encoded data, with a central logo or watermarkSolicitud de piezas o repuestos
En el siguiente enlace de nuestra web encontrará los mejores accesorios y repuestos originales de la marca Infiniton, para que de ésta manera pueda seguir sacándole el máximo partido a su producto Infiniton. Para ello, escanee el código QR de la izquierda y complete el formulario.

natural_image
Silhouette of a person wearing a headset with a wrench icon (no text or symbols)Si lo desea, puede solicitar la asistencia técnica a través del siguiente número de teléfono:
958 087169
Preste especial atención a la extensión que debe marcar, la cual, se la indicarán al principio de la grabación.
Horario:
De lunes a jueves de 8:00 a 14:00 y de 15:45 a 18:00, viernes de 8:00 a 15:00*.
*Durante los meses de verano, el horario de atención telefónica al cliente puede variar.

Alternativamente puede solicitar asistencia técnica vía correo electrónico info@infiniton.es rma@infiniton.es
Para agilizar todos los trámites, siempre se deben cumplimentar los siguientes datos:
Nombre y apellidos / Teléfonos de contacto / Dirección completa / Código postal Población / Marca / Modelo del producto / N° serie / Avería del producto.
INFINITON
Certificación CE
Se ha certificado que este producto cumple con
Directiva de Baja Tensión (2014/35EU)
Directiva de Compatibilidad Electromagnética (2014/30/EU)
Directiva RoHS (2011/65/EU)

text_image
CE

Para más información relacionada con las declaraciones y certificados de conformidad, póngase en contacto con nosotros a través del correo:
info@infiniton.es
Además, puede ponerse en contacto con nosotros escaneando el siguiente código QR:

text_image
QR code image with a central logo, likely linking to a digital resource or website.Resumen de Declaración de conformidad
Infiniton declara, bajo su responsabilidad, que este aparato cumple con lo dispuesto en la Directiva 99/05/CE del Parlamento Europeo y del Consejo del 9 de marzo de 1999, traspuesta a la legislación española mediante Real Decreto 1890/2000 del 20 de noviembre.
Infiniton World Electronic S.L
C/Baza, 349. Nave 4
18220 Albolote (Granada) ESPAÑA
infiniton.es
Escanea estos códigos y siguenos en nuestras redes sociales para acceder a contenido exclusivo

text_image
QR code with central logo, likely linking to a digital service or application
text_image
QR code with central Facebook logo, likely linking to a social media or digital content platformINFINITON
Copyright©2022 Todos los derechos reservados
INFINITON
TARJETA DE GARANTÍA
Todos los campos a rellenar son obligatorios
Modelo
N° Serie ____
Fecha de compra ____
Cliente
Dirección
Localidad
Teléfonos de contacto ____
Firma y sello del comercio
SERVICIO TÉCNICO OFICIAL
C/Baza, 349, nave 4
18220 Albolote (Granada)
infiniton.es
Condiciones de la garantía, al dorso
INFINITON
INFINITON
TARJETA DE GARANTÍA
Todos los campos a rellenar son obligatorios
Modelo
N° Serie ____
Fecha de compra ____
Cliente ____
Dirección
Localidad ____
Teléfonos de contacto ____
Firma y sello del comercio
SERVICIO TÉCNICO OFICIAL
C/Baza, 349, nave 4
18220 Albolote (Granada)
infiniton.es
Condiciones de la garantía, al dorso
INFINITON

text_image
QR code image containing encoded data, with a central logo or watermarkTÉRMINOS Y REGISTRO DE GARANTÍA
El aparato objeto de este certificado está garantizado contra cualquier defecto de fabricación que se aprecie durante los plazos marcados por la ley de garantías del territorio donde se comercializa este producto.
Para tener derecho a la garantía es indispensable que este certificado sea cumplimentado y enviado la parte inferior del mismo en el momento de la compra o registrado telemáticamente en infiniton.es
escaneando el código QR de la izquierda.
La parte superior debería permanecer junto con la factura de compra en poder del usuario para ser presentados al requerir cualquier servicio.
La garantía se limita a la reparación o sustitución de las piezas que aparezcan como defectuosas en el citado plazo. No ofrecemos garantía a aparatos que hayan sufrido un uso incorrecto por parte del usuario (errores de manejo, transporte, suciedad, conexión inadecuada, etc.) y en general para aquellas averías que no provengan directamente de un defecto de fabricación. Tampoco ofrecemos garantía a aquellos aparatos que hayan sido manipulados por personas ajenas a nuestro Servicio Técnico.
Esta Garantía Legal no cubre el mantenimiento o sustitución de los elementos fungibles del producto (pilas, etc.), cuyos daños tengan origen en el desgaste ordinario y en el uso de los mismos. Asimismo, la garantía no cubre los daños causados por la falta de mantenimiento de los productos. Ninguna de las garantías aquí recogidas cubre la sustitución de piezas debido al desgaste o rotura de mecanismos, gomas, carcasas y/o plásticos, así como los deterioros estéticos, debidos al uso normal del producto. Del mismo modo, las garantías no cubren ningún tipo de daño producido durante el transporte del producto (incluyendo, a título enunciativo y no limitativo, daños estéticos, golpes, rayas, arañazos, manchas, abolladuras, etc.)

text_image
QR code image containing encoded data, with a central logo or watermark symbolTambién puede registrar su garantía completando el formulario de esta tarjeta, para después enviarla telemáticamente. Para ello, siga atentamente estos pasos:
- Rellene todos los campos obligatorios en esta tarjeta de garantía.
- Realice una foto del formulario con todos los campos completos.
- Escanee el código QR de la izquierda.
- Siga todos los pasos que se le indicarán en el enlace.
INFINITON .es
INFINITON
world electronic