
LED36 - Belysning GODOX - Gratis brugsanvisning og manual
Find enhedens vejledning gratis LED36 GODOX i PDF-format.


Brugerspørgsmål om LED36 GODOX
0 spørgsmål om dette apparat. Besvar dem du kender, eller stil dit eget.
Stil et nyt spørgsmål om dette apparat
Download vejledningen til din Belysning i PDF-format gratis! Find din vejledning LED36 - GODOX og tag din elektroniske enhed tilbage i hånden. På denne side er alle dokumenter nødvendige for brugen af din enhed offentliggjort. LED36 af mærket GODOX.
BRUGSANVISNING LED36 GODOX
Godox神牛
LED Video Light
LED摄影灯

[Non-Text]
一、前言
感谢您购买神牛产品!
LED36摄影灯非常适用于微距拍摄、静物拍摄、以及视频拍摄等。由36颗高亮度LED灯珠组合,发光强度大、色温准确、小巧机身、便携无忧。手动调节亮度旋钮可以控制发光的亮度,在实际拍摄中可根据实际需要,灵活拼接,多灯组合实现不同的光线亮度。
警告
请保持干燥:请勿用湿手接触产品,亦不可将产品浸入水中或暴露于雨中。请勿私自拆卸产品,如产品出现故障须由本公司或授权的维修人员进行检查维修。
请勿让儿童接触本产品。
▲ 本产品不能防水,在雨天及潮湿环境下请注意防水。
请勿放置在超过50度的高温环境中。
请勿在化学品、可燃性气体或其他特殊物质附近使用闪光灯,这些物质在特殊情况下可能对闪光灯发出的瞬间强光敏感,有可能导致火灾或电磁干扰。在这些场合下,请注意相关警告标识。
▲ 使用电池的注意事项
- 切勿将电池投入火中或加热升温。
- 当电量用尽时,电池容易漏液。所以为了避免产品受损,请在长期不
- 如果受损电池中的液体接触到皮肤或衣服,请立即用大量清水冲洗。
三、部件
01.36粒灯珠
- 电源开关
-
亮度旋钮
-
电池仓
-
热鞍接口
-
固定按钮
-
固定旋钮B
-
热靴连接座
- 1/4"吉阳安满孔

四、安装使用
- 安装摄影灯
- 转动摄影灯的固定旋钮A(06)至最高点,固定摄影灯。转动摄影灯的固定旋钮B(07)至最高点,将热靴连接座水平插入相机或摄像机热靴。
- 向下扭紧固定旋钮B(07)。
注:如您的摄像机没有相应的热歌连,可以购买市面上的摄像机连接来加,通过剪制杠上的1/4”来加安润孔来用房。

2. 使用摄影灯

- 打开电池仓(04)。
标识安装电池(2*A)并关闭好电池仓。
[Non-Text]


- 按电池仓里的正负极
标识安装电池(2*AA),
并关闭好电池包。

- 打开电源开关(02),
摄影灯开始发光。
[Non-Text]
- 通过调节亮度旋钮(03),可控制发光的亮度。
当使用完之后请关闭电源开关(02)。
3. 摄影灯组合使用
通过热数接口(05)与热数连接座
(08)之间的连接,可以组合多个摄
影灯在一起,加强发光亮度,更好
的控制摄影的光线效果。

五、产品参数
| 电池供电 | 2*AA电池 |
| 功率 | <1.3W |
| 使用时长 | >1.5小时(以碱性电池为参考) |
| 色温 | 5500~6500K |
| 亮度 | >260Lux (0.5米) |
| 调光方式 | 无级调光 |
| 灯珠数量 | 36个 |
| 工作环境温度 | -10~40度 |
| 产品尺寸 | 70*89*38mm |
| 净重 | 80g |
* 设计和规格如有变更,恕不另行通知。
705-LED360-00
Godox
LED LED LIGHT

[Non-Text]
Foreword:
Thank you for purchasing this Godox Product!
LED36 video light is excellent for macrophotography, product shooting, and
video recording, etc. This lightweight and portable light provides high brightness and accurate sales temperature. You can flexibly control the light
brightness and accurate color temperature. You can flexibly control the light brightness by using the dimmer and by interlocking multiple lights.
Warning:
▲ Always keep this product dry. Do not use in rain or in damp conditions.
Do not disassemble. Should repairs become necessary, this product mus
be sent to an authorized maintenance center.
▲ Keep out of reach of children.
As this product do not have waterproof function, please take measures of waterproof in rain or damp environment.
waterproof in rainy of damp environment. Do not use or store the product if the am
DO NOT USE OF STORE THE PRODUCT IN THE AMBIENT TEMPERATURE HEADS OVER 30°C.
Do not use the flash unit in the presence of flammable gases, chemicals and other similar materials. In certain circumstance, these materials may be
other similar materials. In certain circumstances, these materials the sensitive to the strong light emitting from this flash unit and fire or
sensitive to the strong light omitting from electromagnetic interference may result.
▲ Observe precautions when handling batteries
- Do not put batteries into a fire or apply direct heat to them.
- Batteries are prone to leakage when fully discharged. To avoid
- Balances are prone to damage which may discharges to break damage to the product, be sure to remove batteries when the
product is not used for a long time or when batteries run out of
charge. - Should liquid from the batteries come into contact with skin or
clothing, rinse immediately with fresh water
Parts:
- 36 LED Beads
- Power Switch
- Brightness Controller
- Battery Compartment
-
Battery Compartment
-
Locking Ring A
- Locking Ring B
- Camera Hotshoe Connection


Installation and Operation
- Installing the Video Light
Screw the Locking Ring A (06) and B (07) to the
highest point so that the light is fixed and insert the
Camera Hotshoe Connection horizontally into the
hotshoe of a camera or a camcon
Tighten the Locking Ring B (07).

Note: If your camcorder has no hotshoe connection, you are advised to purchase a
connecting bracket for camcorder. The video light has a 1/4" Bracket Mounting Hole as your camcorder does. Therefore, you can see? support both the light and the
your camcorder does. The camcorder to the bracket
2. Using the Video Light

Open the Battery
Compartment (04)
[Non-Text]
[Figure]
(
[Non-Text]
LESH

• Install batteries (2*AA)
according to indications
in the compartment and
* Turn the Brightness Controller (03) to adjust the
brightness.
[Non-Text]
Turn the power off if it will not be used.
3.Interlocking Multiple Video Lights
Through the Light Hotshoe Connection
(05) and Camera Hotshoe Connection
(08), multiple video lights can be interfaced to others, strengthen the
Interlocked together to strengthen the
Folding brightness and got a better
lighting brightness and get a better control of the lighting effects.

Technical Data:
| Battery | Two AA batteries |
| Power | <1.3W |
| Duration | Approx. 1.5 hours with alkaline batteries |
| Color Temperature | 5500~6500K |
| Brightness | >260Lux (0.5m) |
| Brightness Control | Stepless |
| LED Beads Quantity | 36 |
| Operation Temperature | -10~40°C |
| Dimension | 70*89*38mm |
| Net weight | 80g |
* Product design and specifications are subject to change without notice.
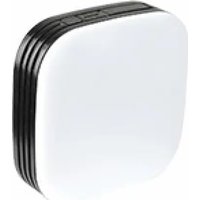


Mærke : GODOX
Model : LED36
Kategori : Belysning